Passkeys on Android
To enroll passkeys in SafeNet MobilePASS+, you must configure MobilePASS+ as a passkey manager on your Android device. This allows MobilePASS+ to create and manage the passkeys that you use to access apps and websites.
Configure MobilePASS+ as a passkey manager
Configure MobilePASS+ as a passkey manager in the settings. There are several ways to access these settings.
Welcome tutorial
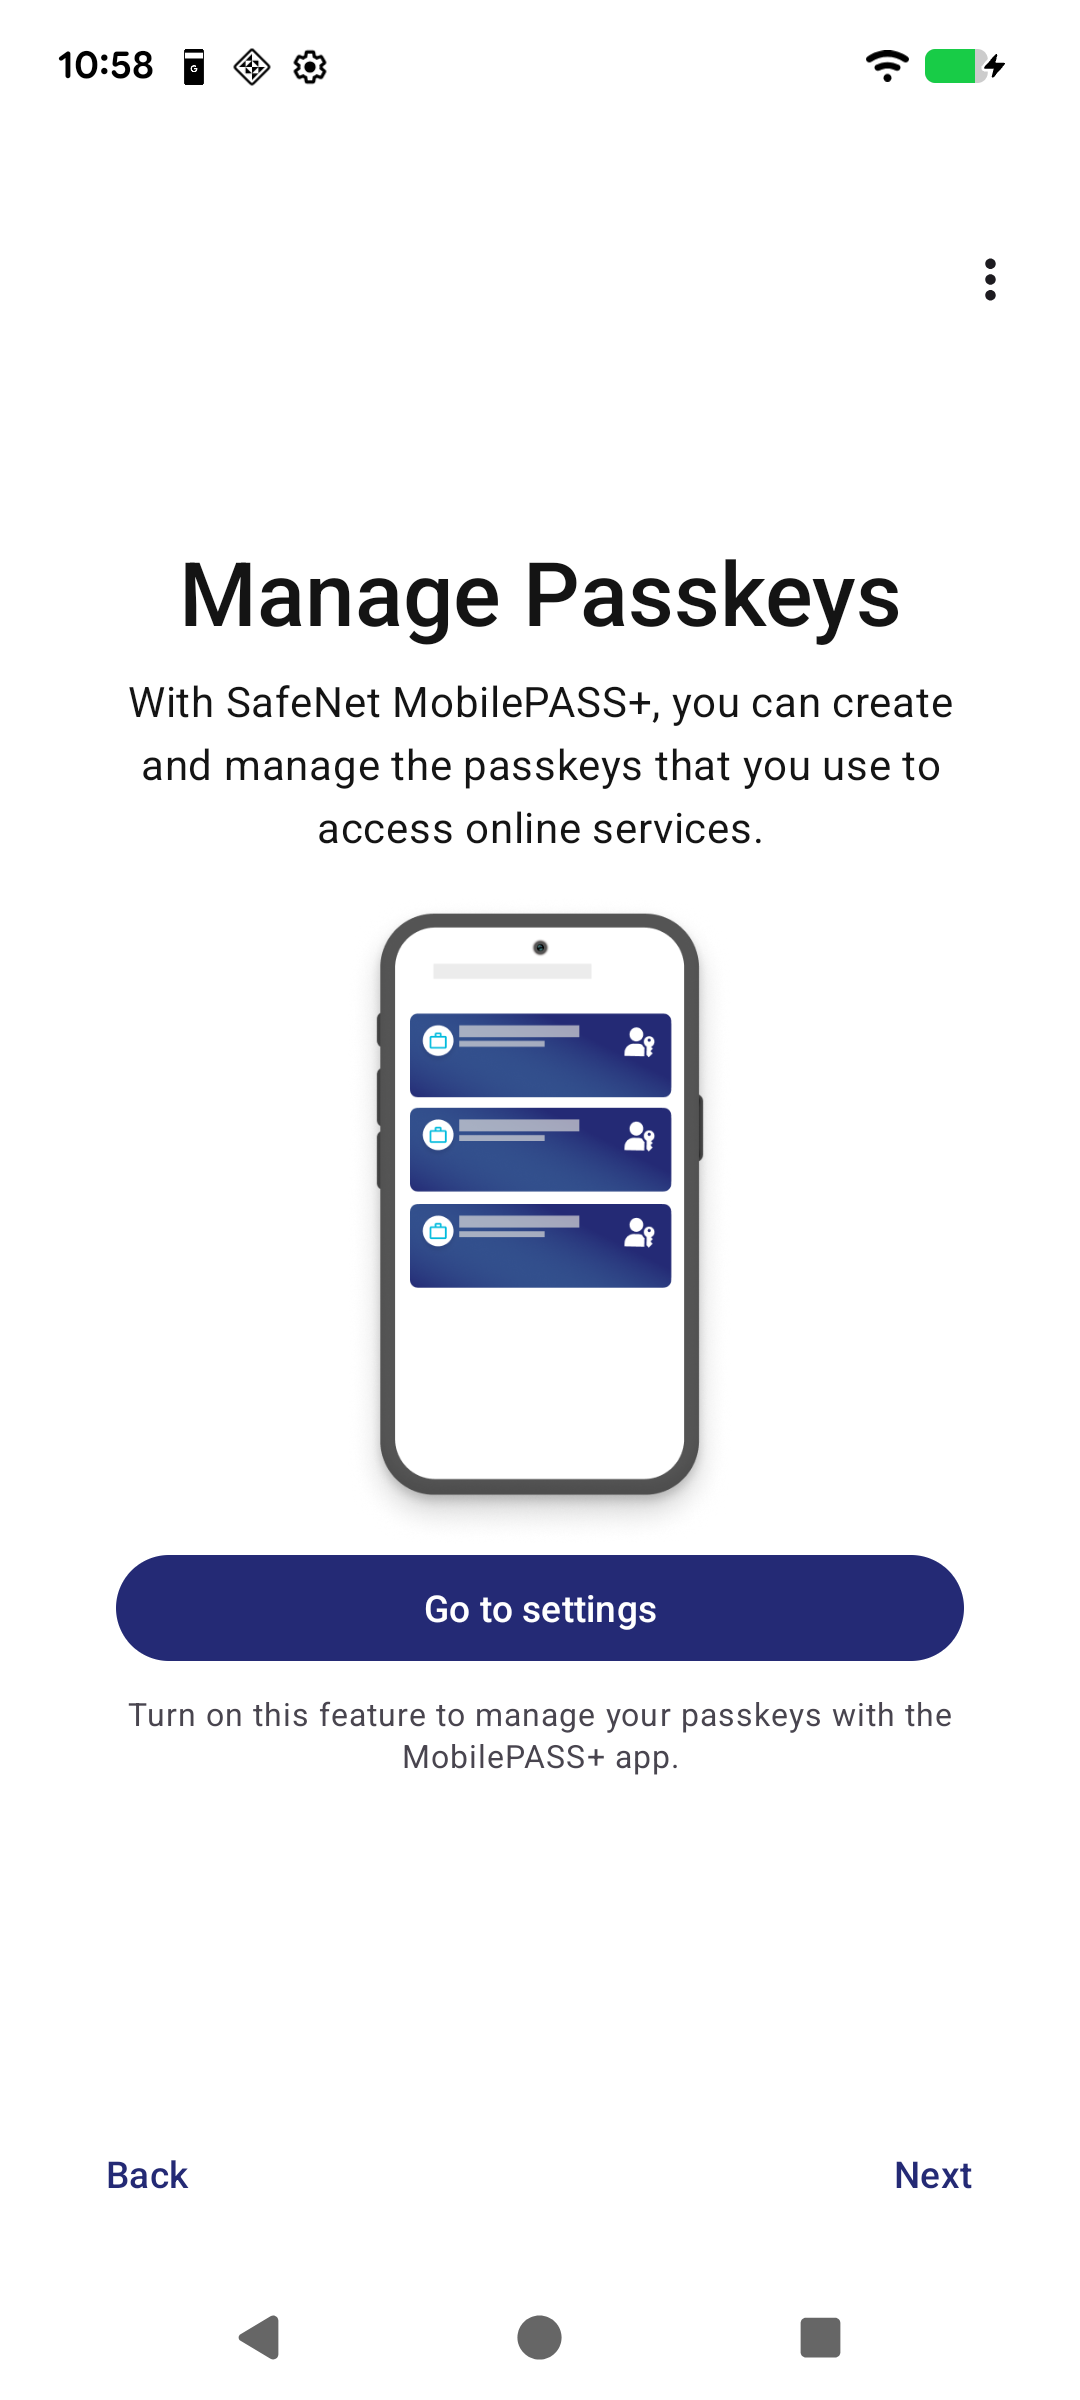
The MobilePASS+ welcome tutorial includes a Manage Passkeys screen, which includes basic instructions and a button that opens the Android system Settings, where you can set MobilePASS+ as a passkey manager.
-
On Android 15, it is recommended to set MobilePASS+ as the primary password manager.
-
On Android 14, no additional password manager can be configured.
When you set MobilePASS+ as a password manager, the tutorial shows that it is active.

Post-upgrade tutorial
If you upgraded MobilePASS+ from the Play Store, the app settings show a notification. When you open the settings, a passkeys tutorial starts. The second screen of this tutorial has a button that opens the iAndroid system settings.


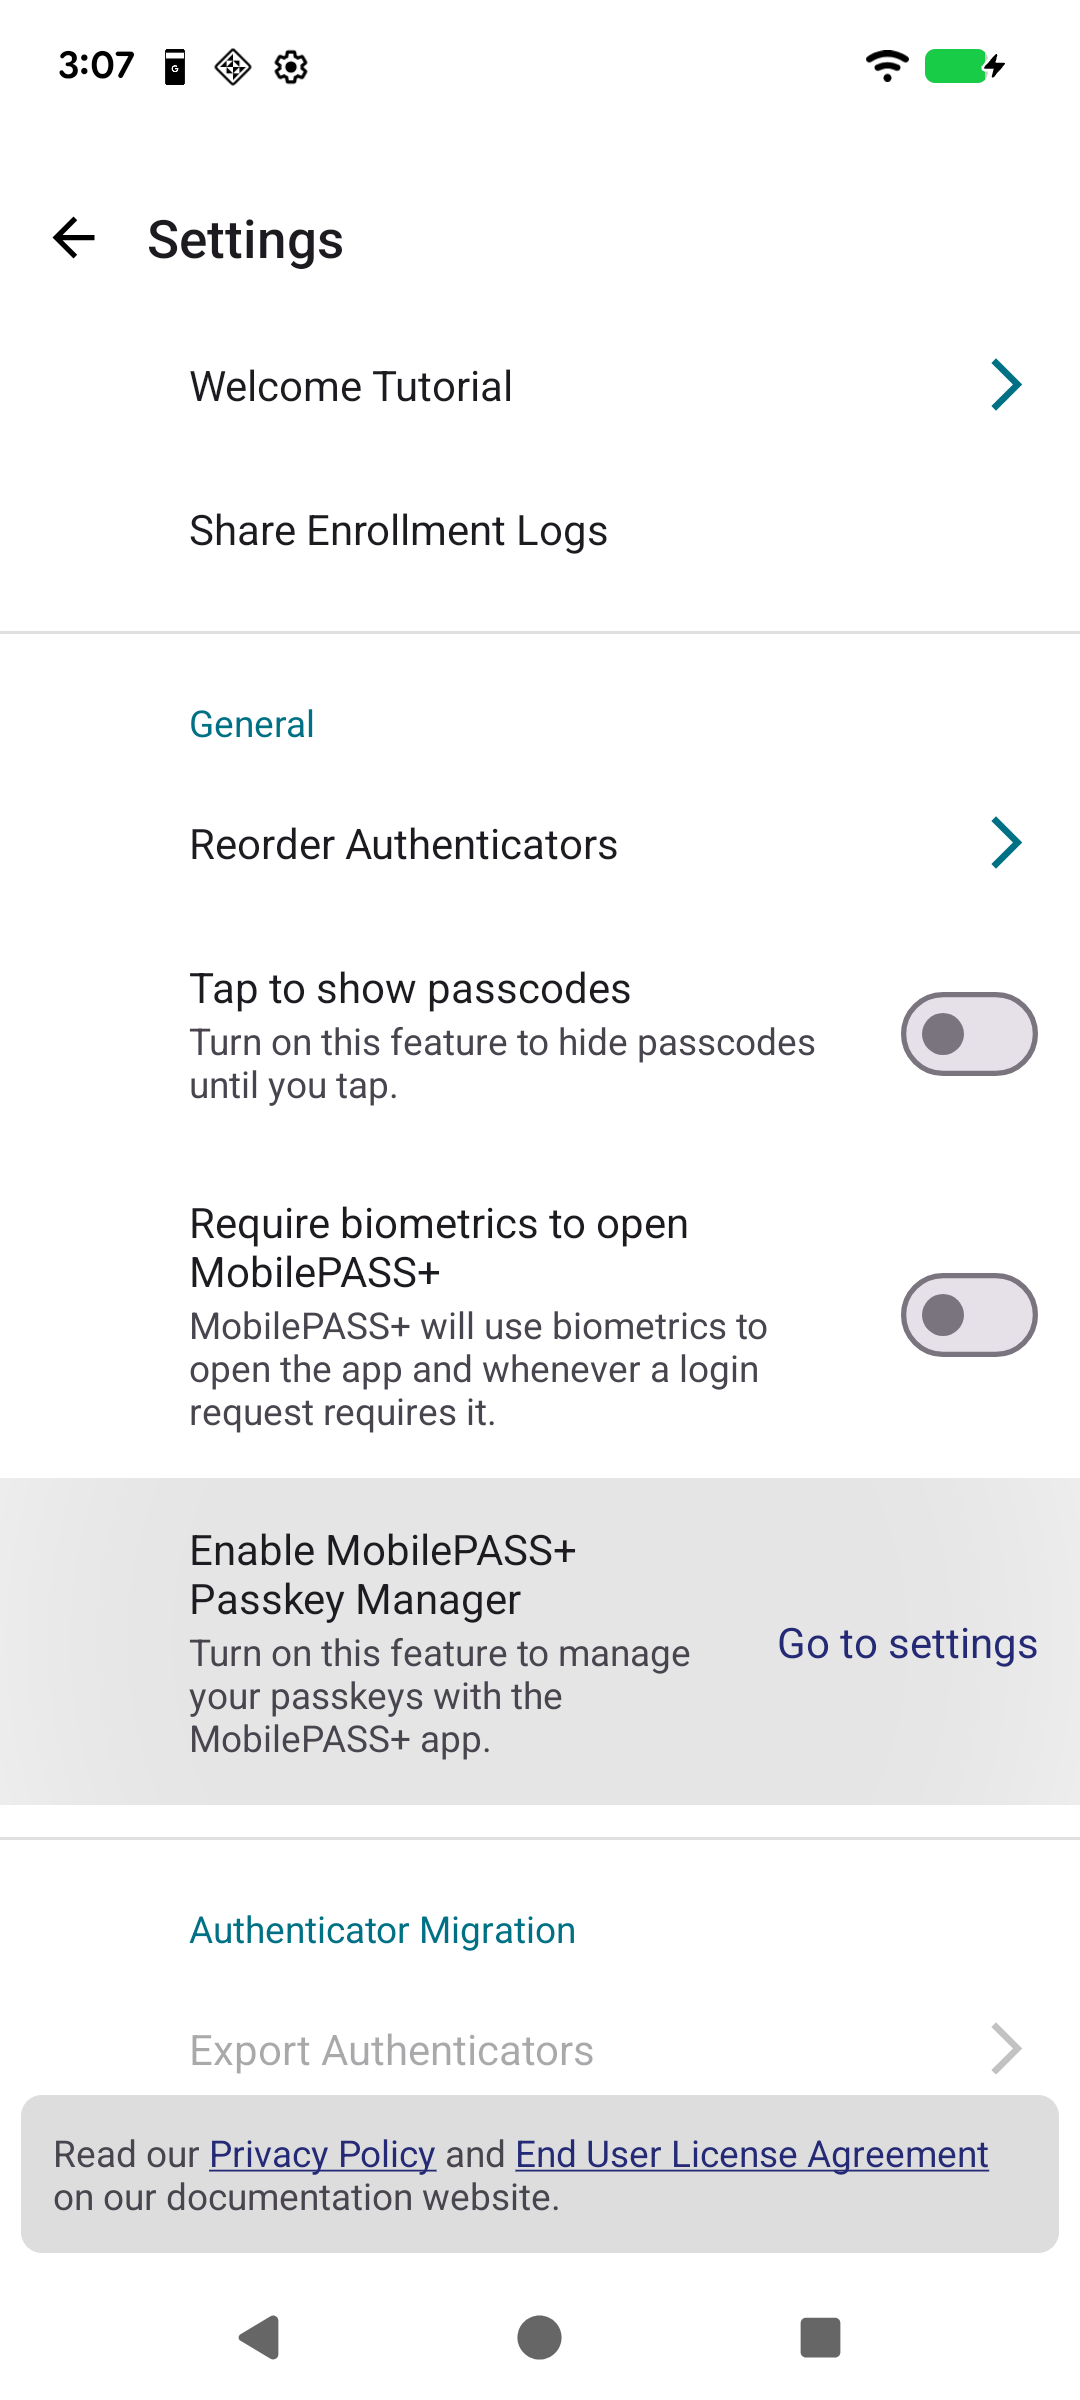
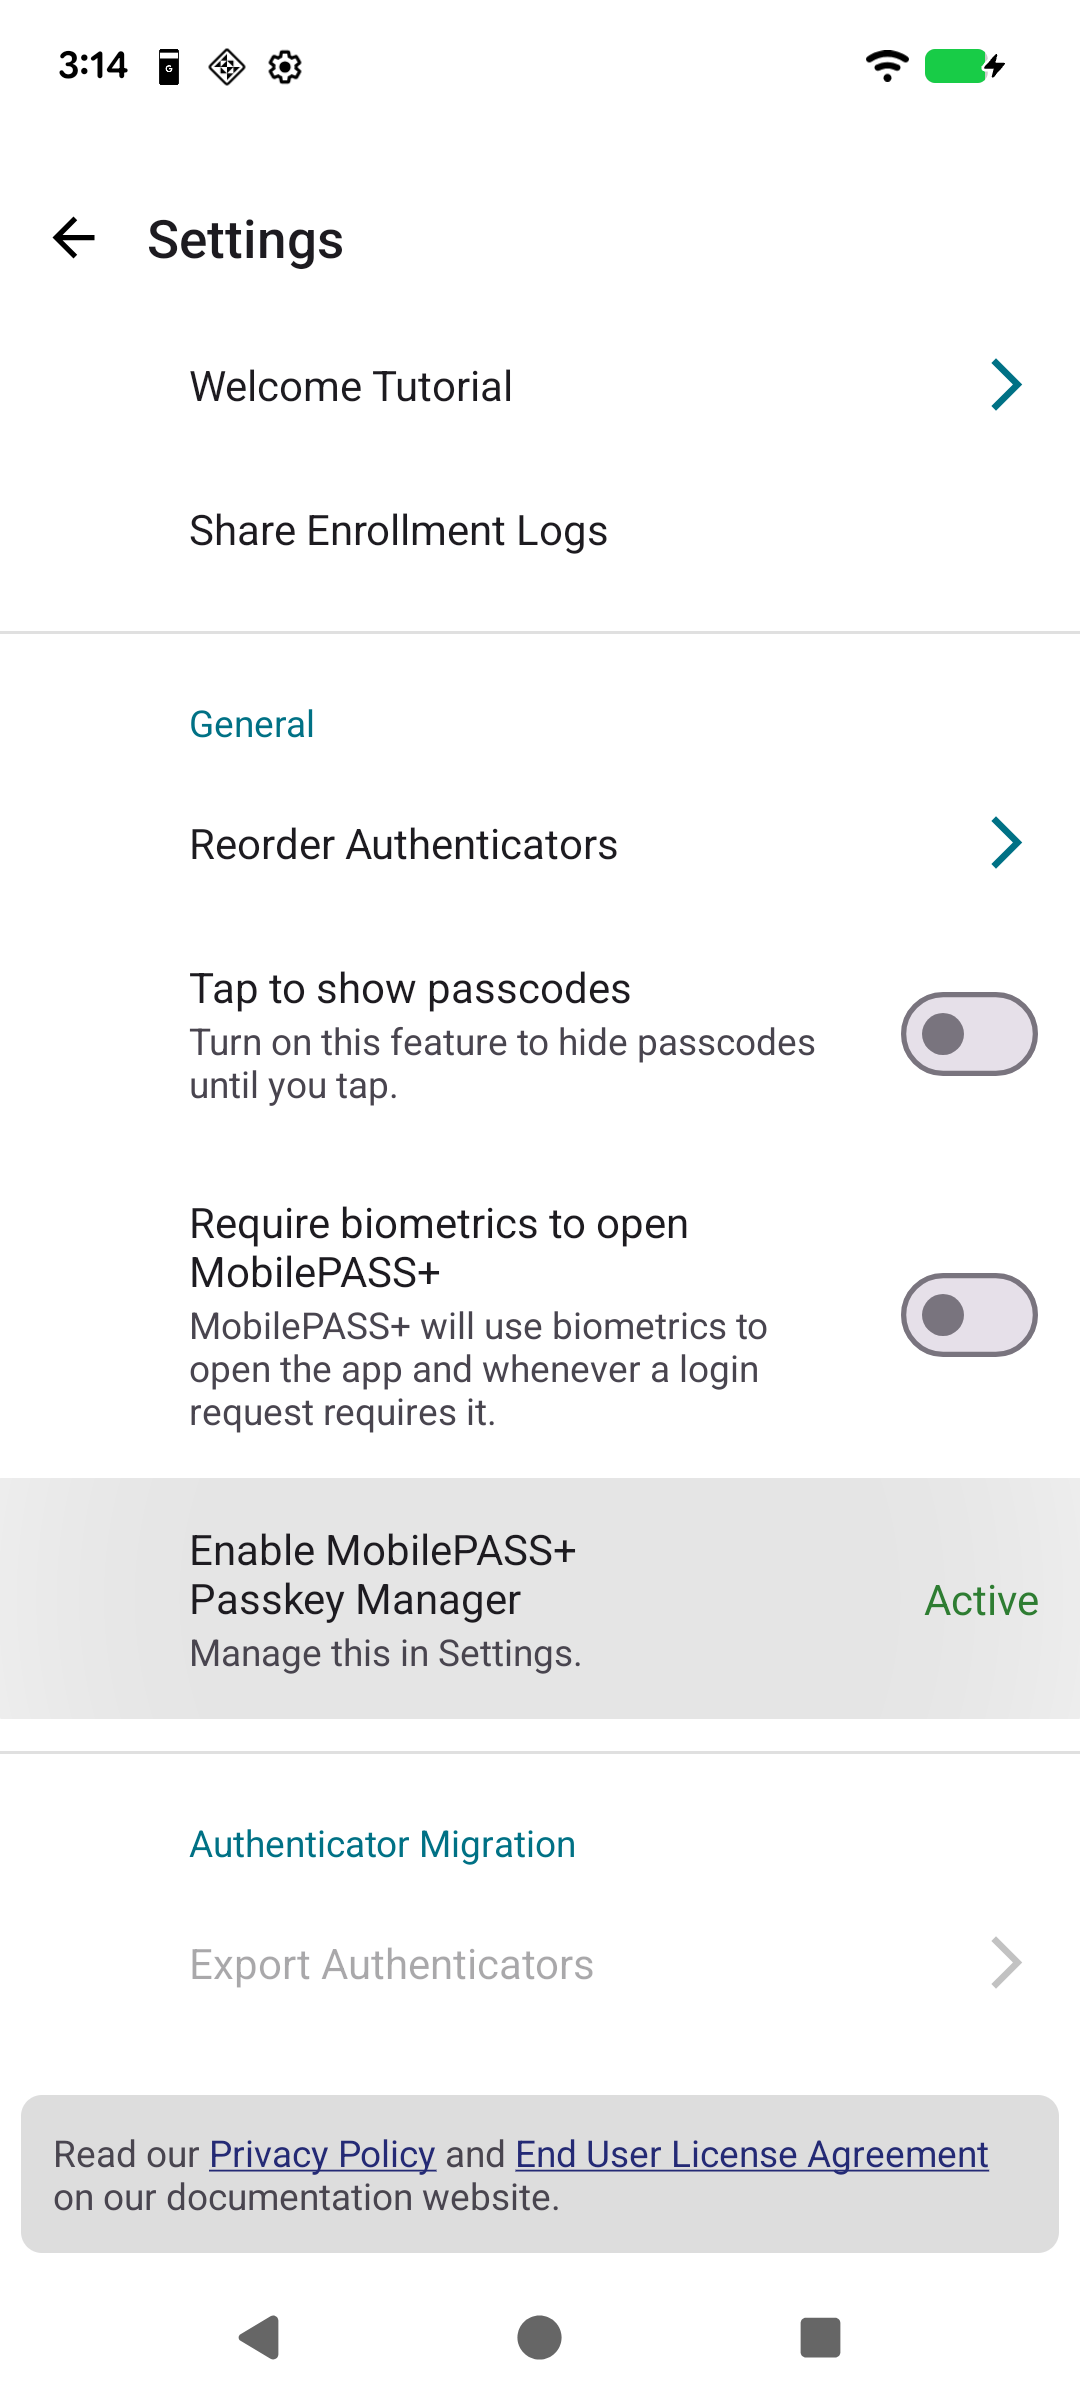
MobilePASS+ application settings
You can set MobilePASS+ as a passkey manager in the application settings.
- In the application settings, tap the Passkey Manager setting. The System Settings open, where you can activate MobilePASS+ as a passkey manager.
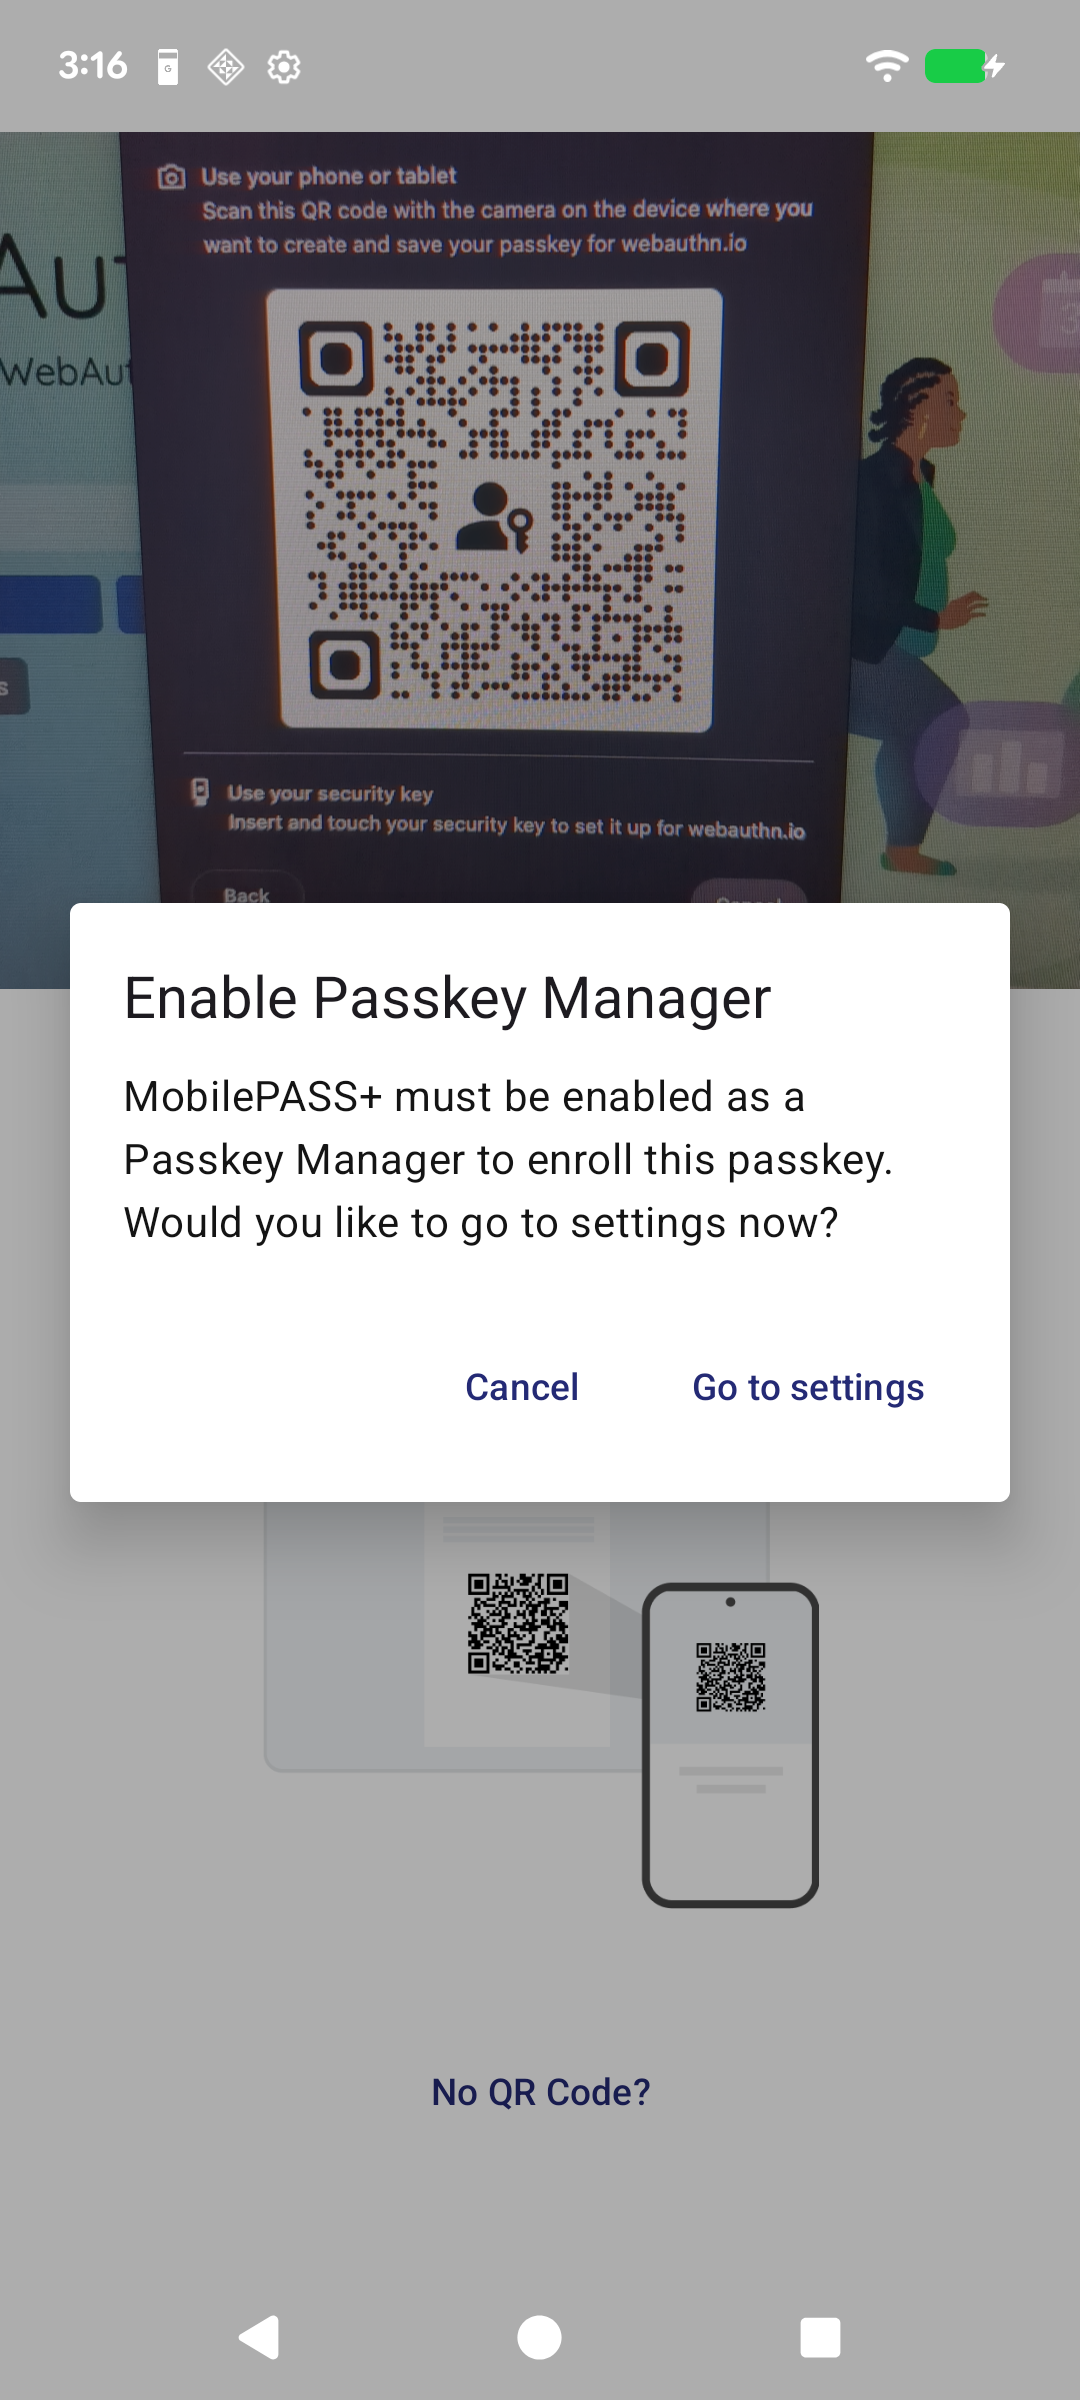
Passkey QR code
When MobilePASS+ is not set up as a passkey manager and you scan the QR code for a passkey, a message box opens and prompts you to activate MobilePASS+ as a passkey manager.
QR code readers for passkeys
Using QR Code readers is the primary mechanism for creating and authenticating passkeys. This can be done using a camera, whether it's the system camera, a third-party camera, or the QR code reader in the MobilePASS+ application.
-
System QR code reader: Access the system QR code reader from the device menu.
-
Third-party QR code reader: The Play Store has a number of QR code reader applications that you can use at your own risk.
-
MobilePASS+ QR code reader: MobilePASS+ has a QR code reader for enrolling authenticators, including both OATH and passkey authenticators.
Enroll passkeys in MobilePASS+ on Android
Enrolling Passkeys is identical for all providers, regardless of where the Passkey is created. Passkey authenticator enrollment is always self-provisioned. With MobilePASS+, this can be done using two methods:
-
QR code enrollment: Use a QR code reader on your Android device.
-
Device browser enrollment: Use a browser on your Android device, such as Chrome, Firefox, or others.
Enroll using a QR code reader on SafeNet Trusted Access
-
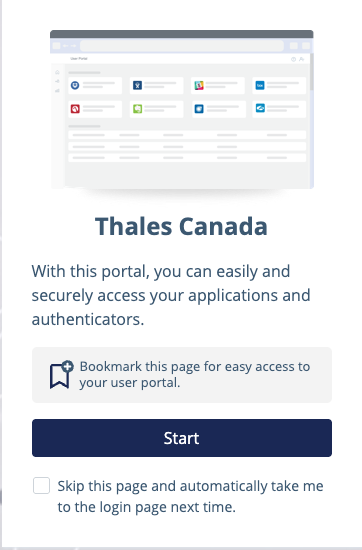
On your device, open the user portal using the link provided by your system administrator.
-
On the user portal start window, select Start.
-
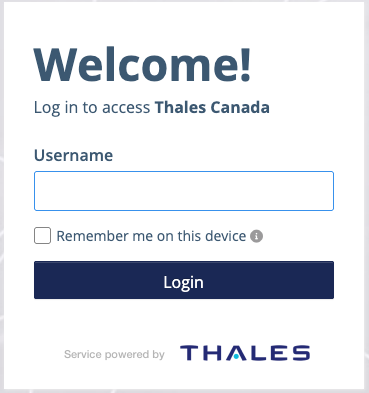
Enter your Username and then select Login.
-
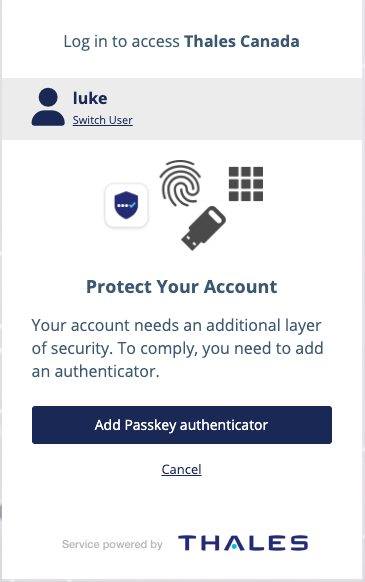
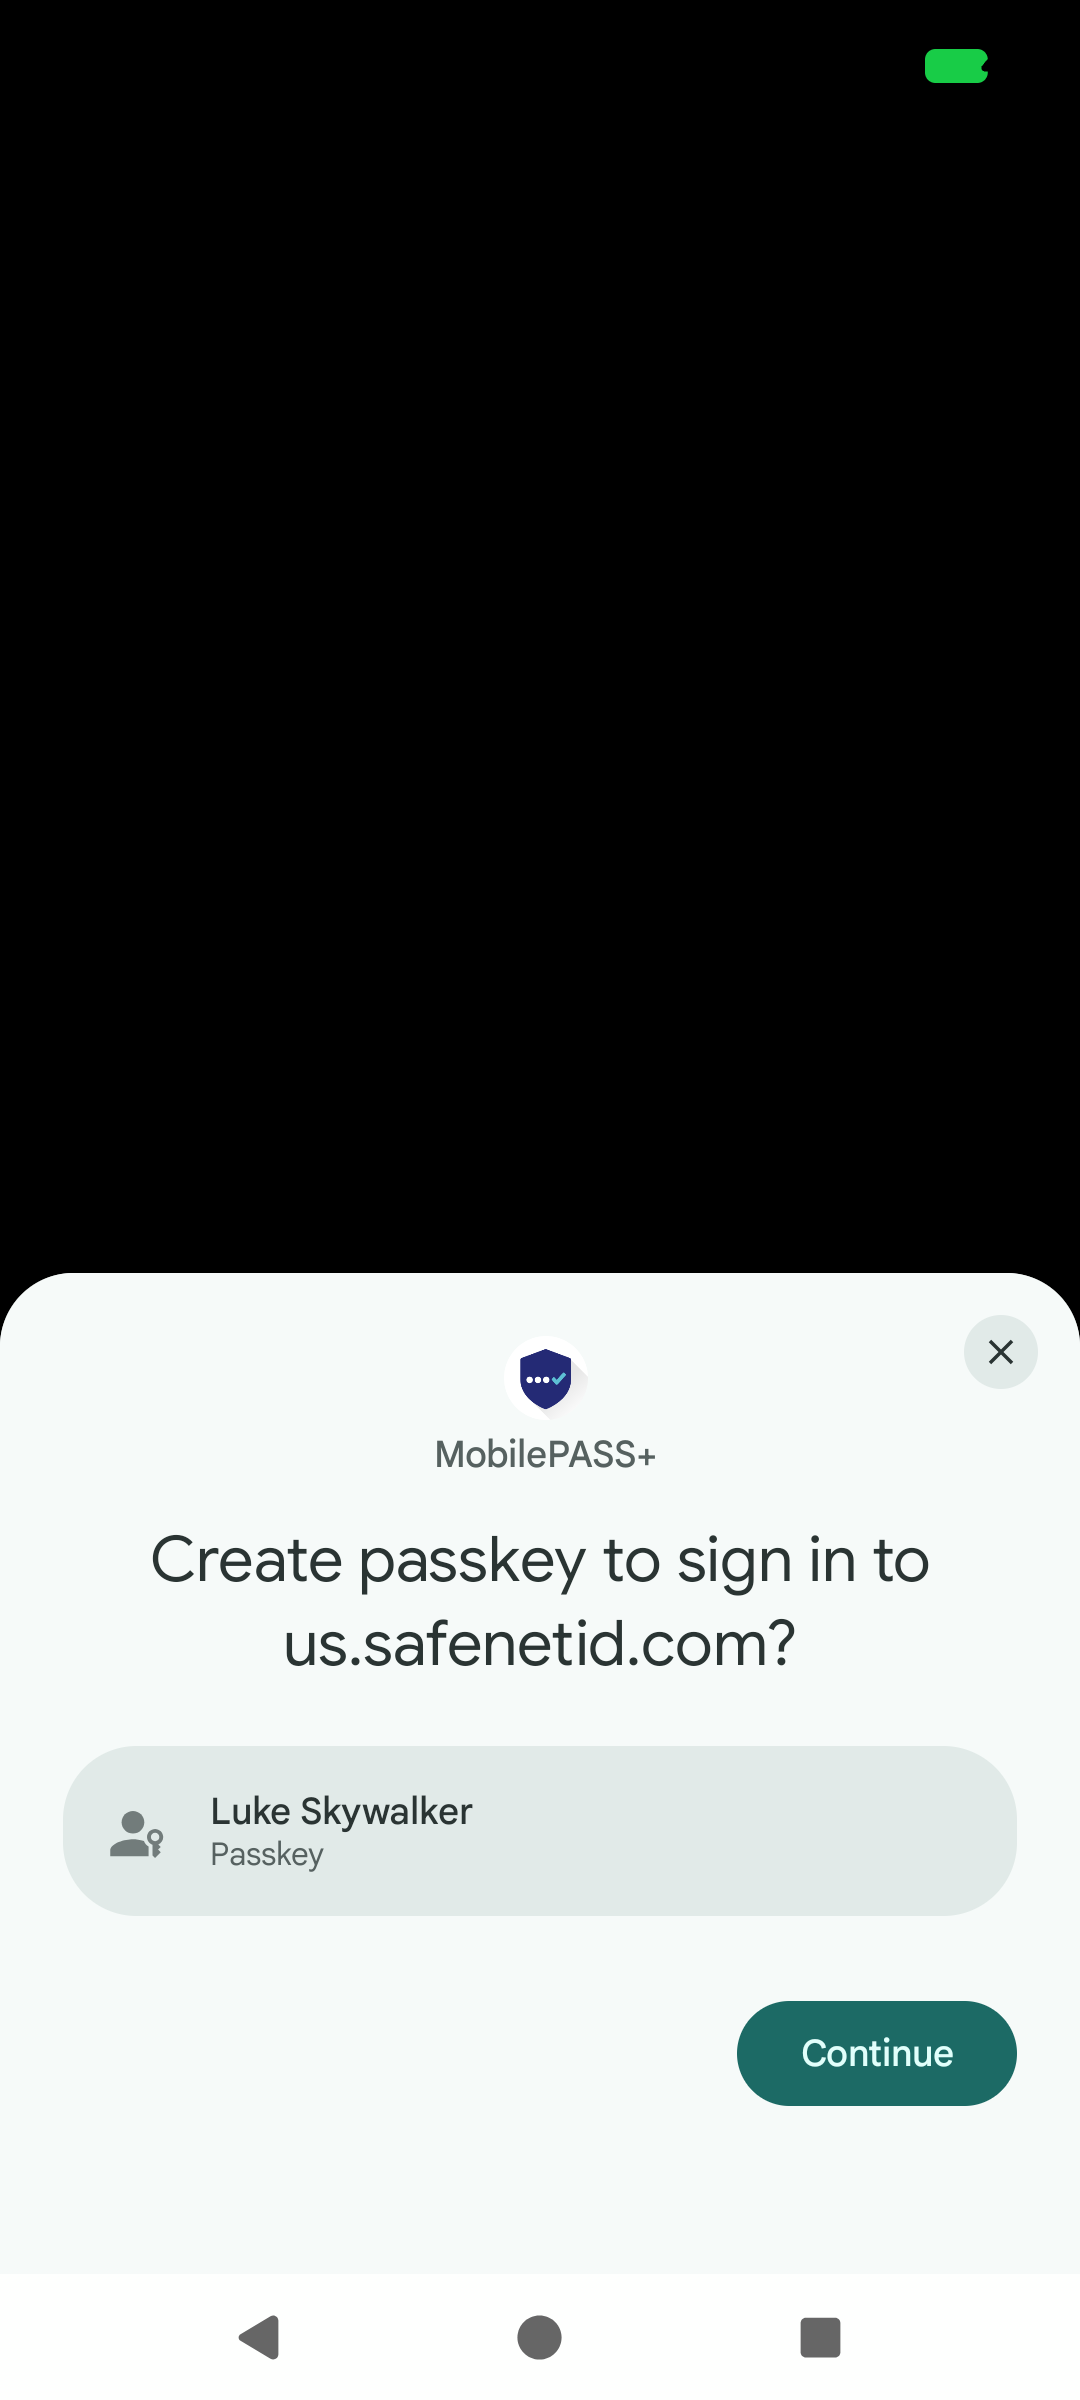
On the Protect Your Account screen, select Add Passkey Authenticator.
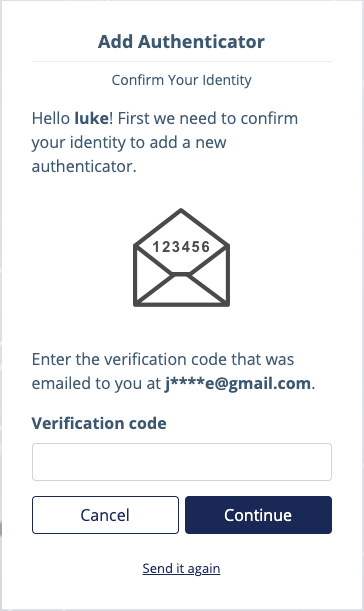
The system sends you an email that contains a verification code.
-
On the Confirm Your Identity screen, enter the Verification code from the email and select Continue.
-
To confirm your identity, enter your password and then select Submit.
-
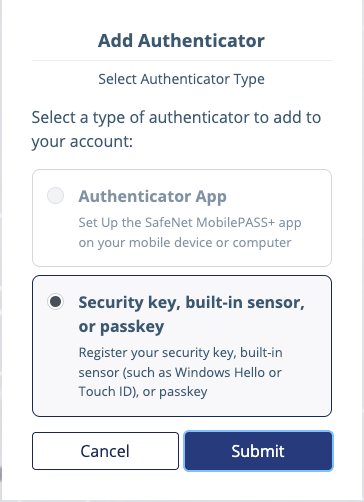
On the Select Authenticator Type screen, select Security key, built-in sensor, or passkey and then select Submit.
Note
The next steps are specific to Google Chrome. The steps might be slightly different in other browsers.
-
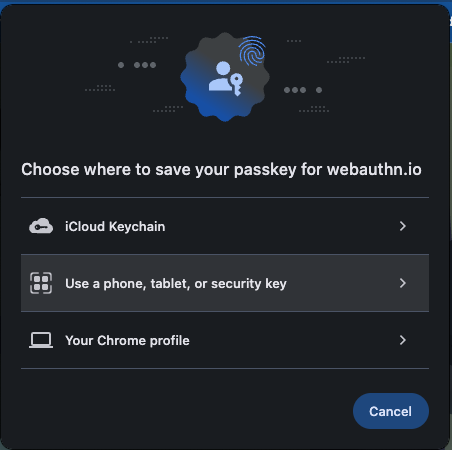
Select Save another way.
-
Select Use a phone, tablet, or security key.
-
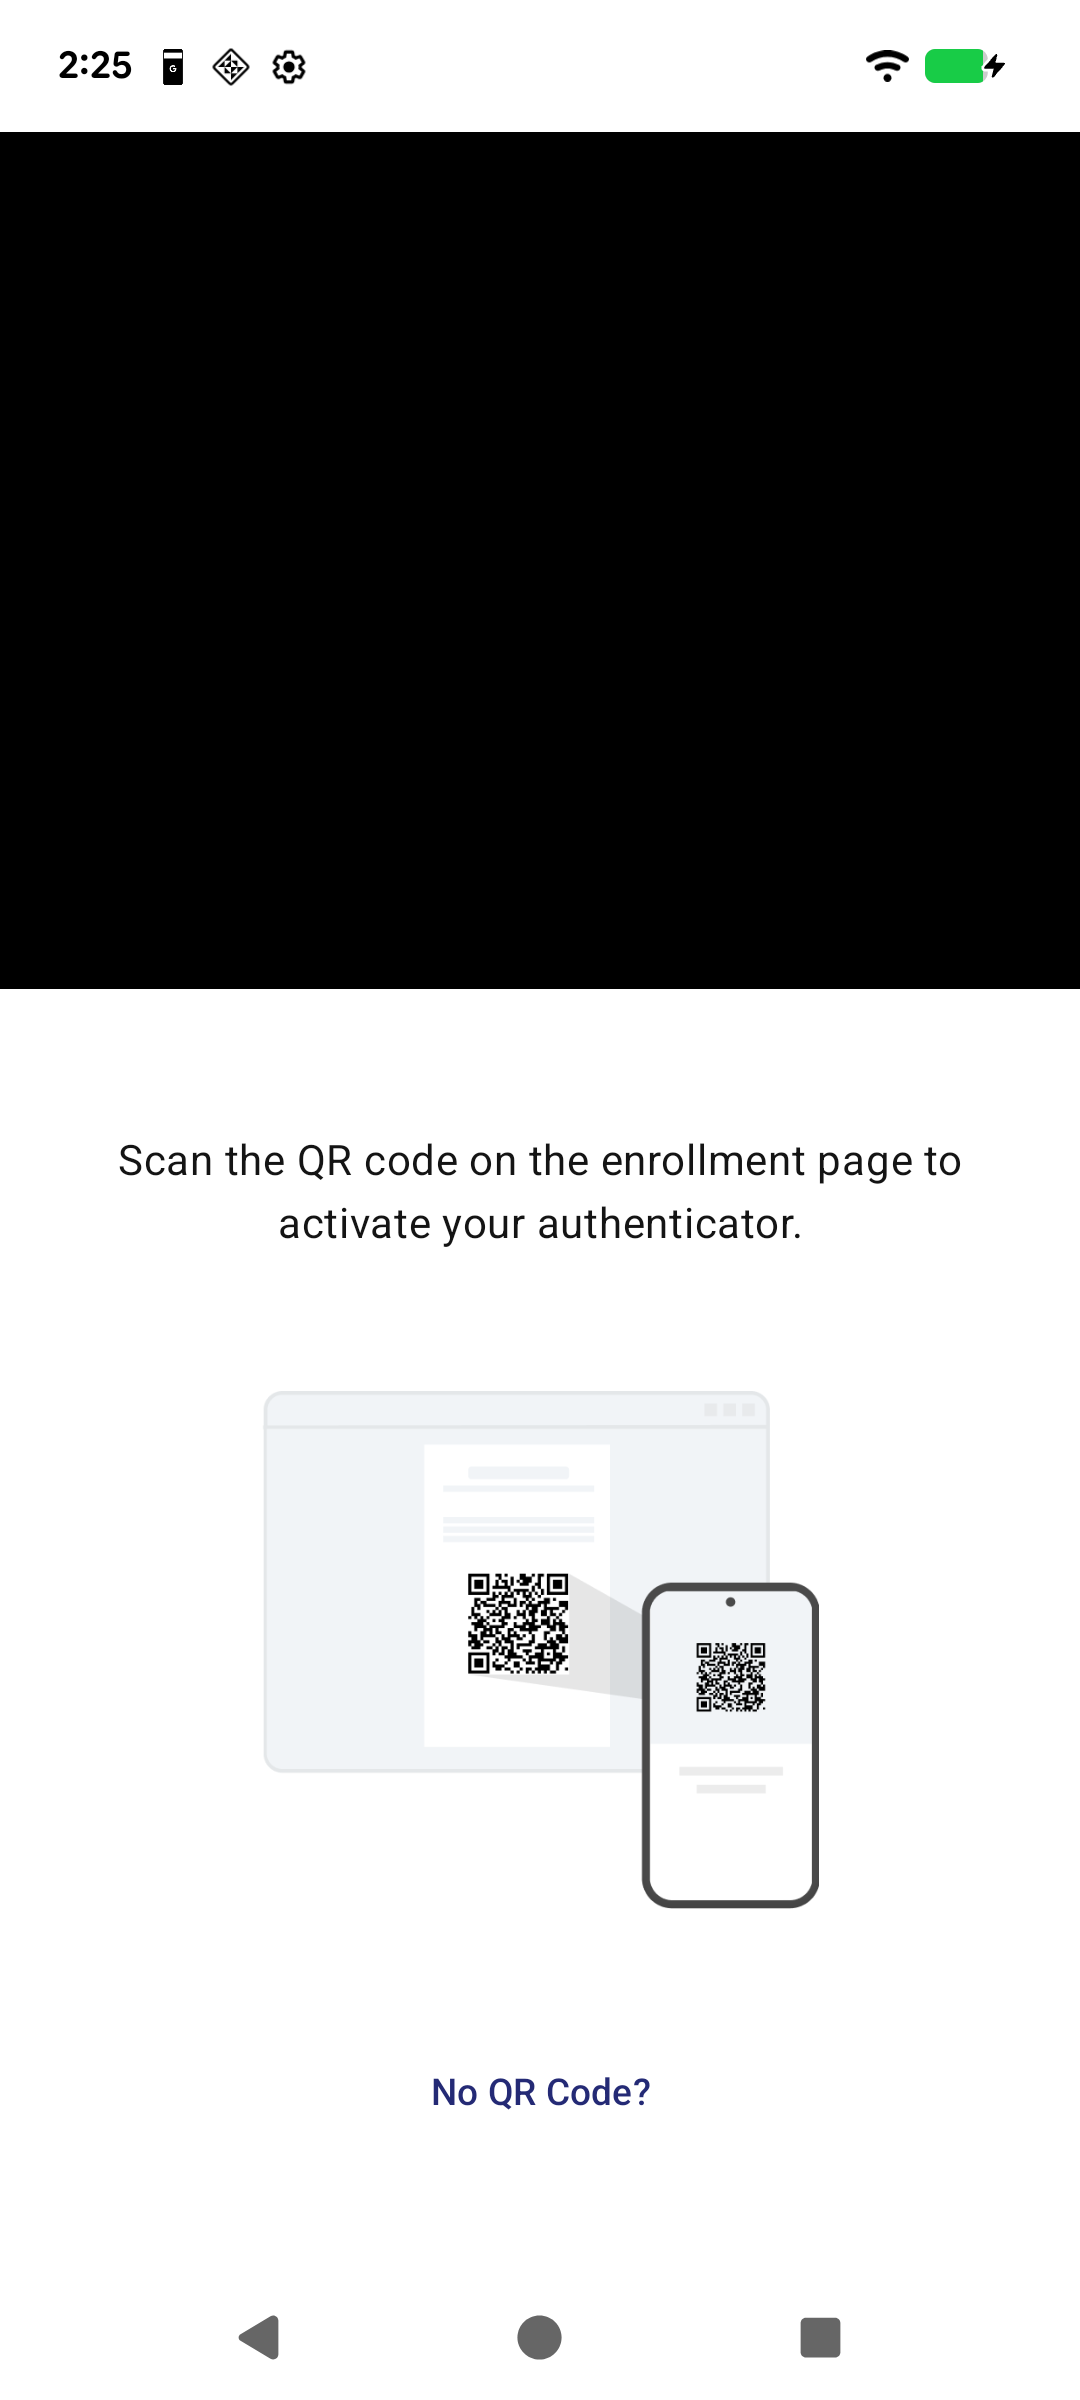
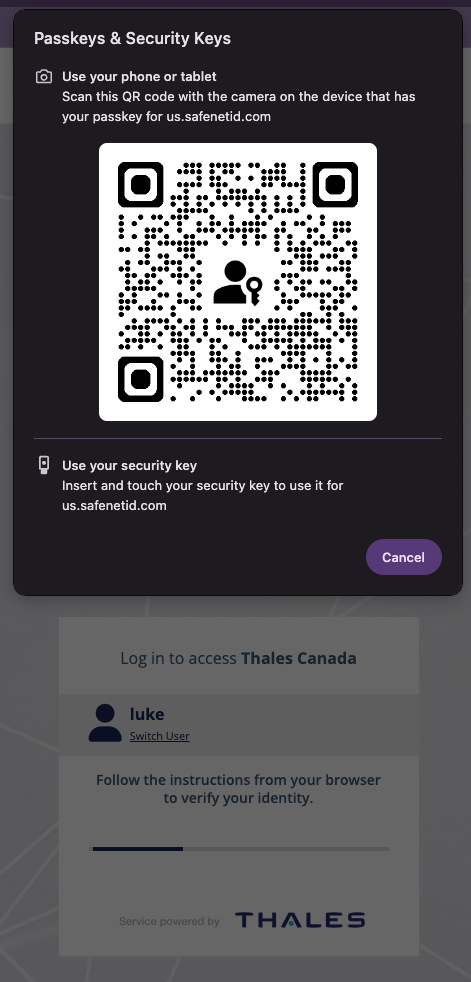
On the device where you want to enroll the passkey, scan the QR Code using a QR code reader on the device you want to enroll.
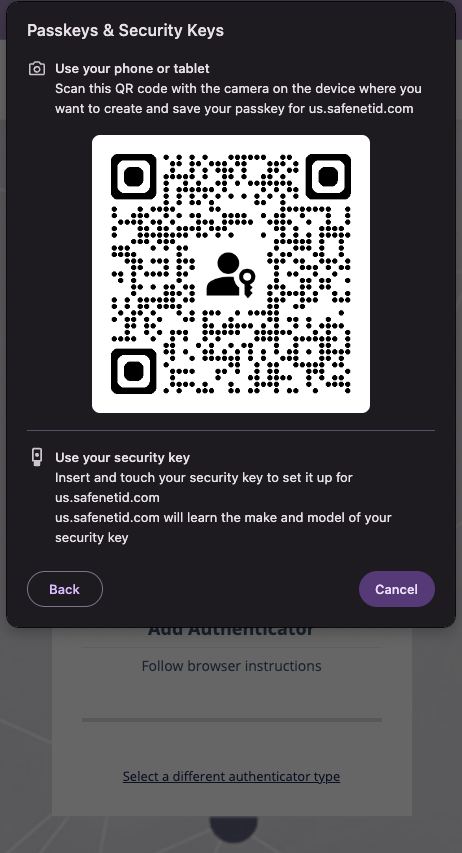
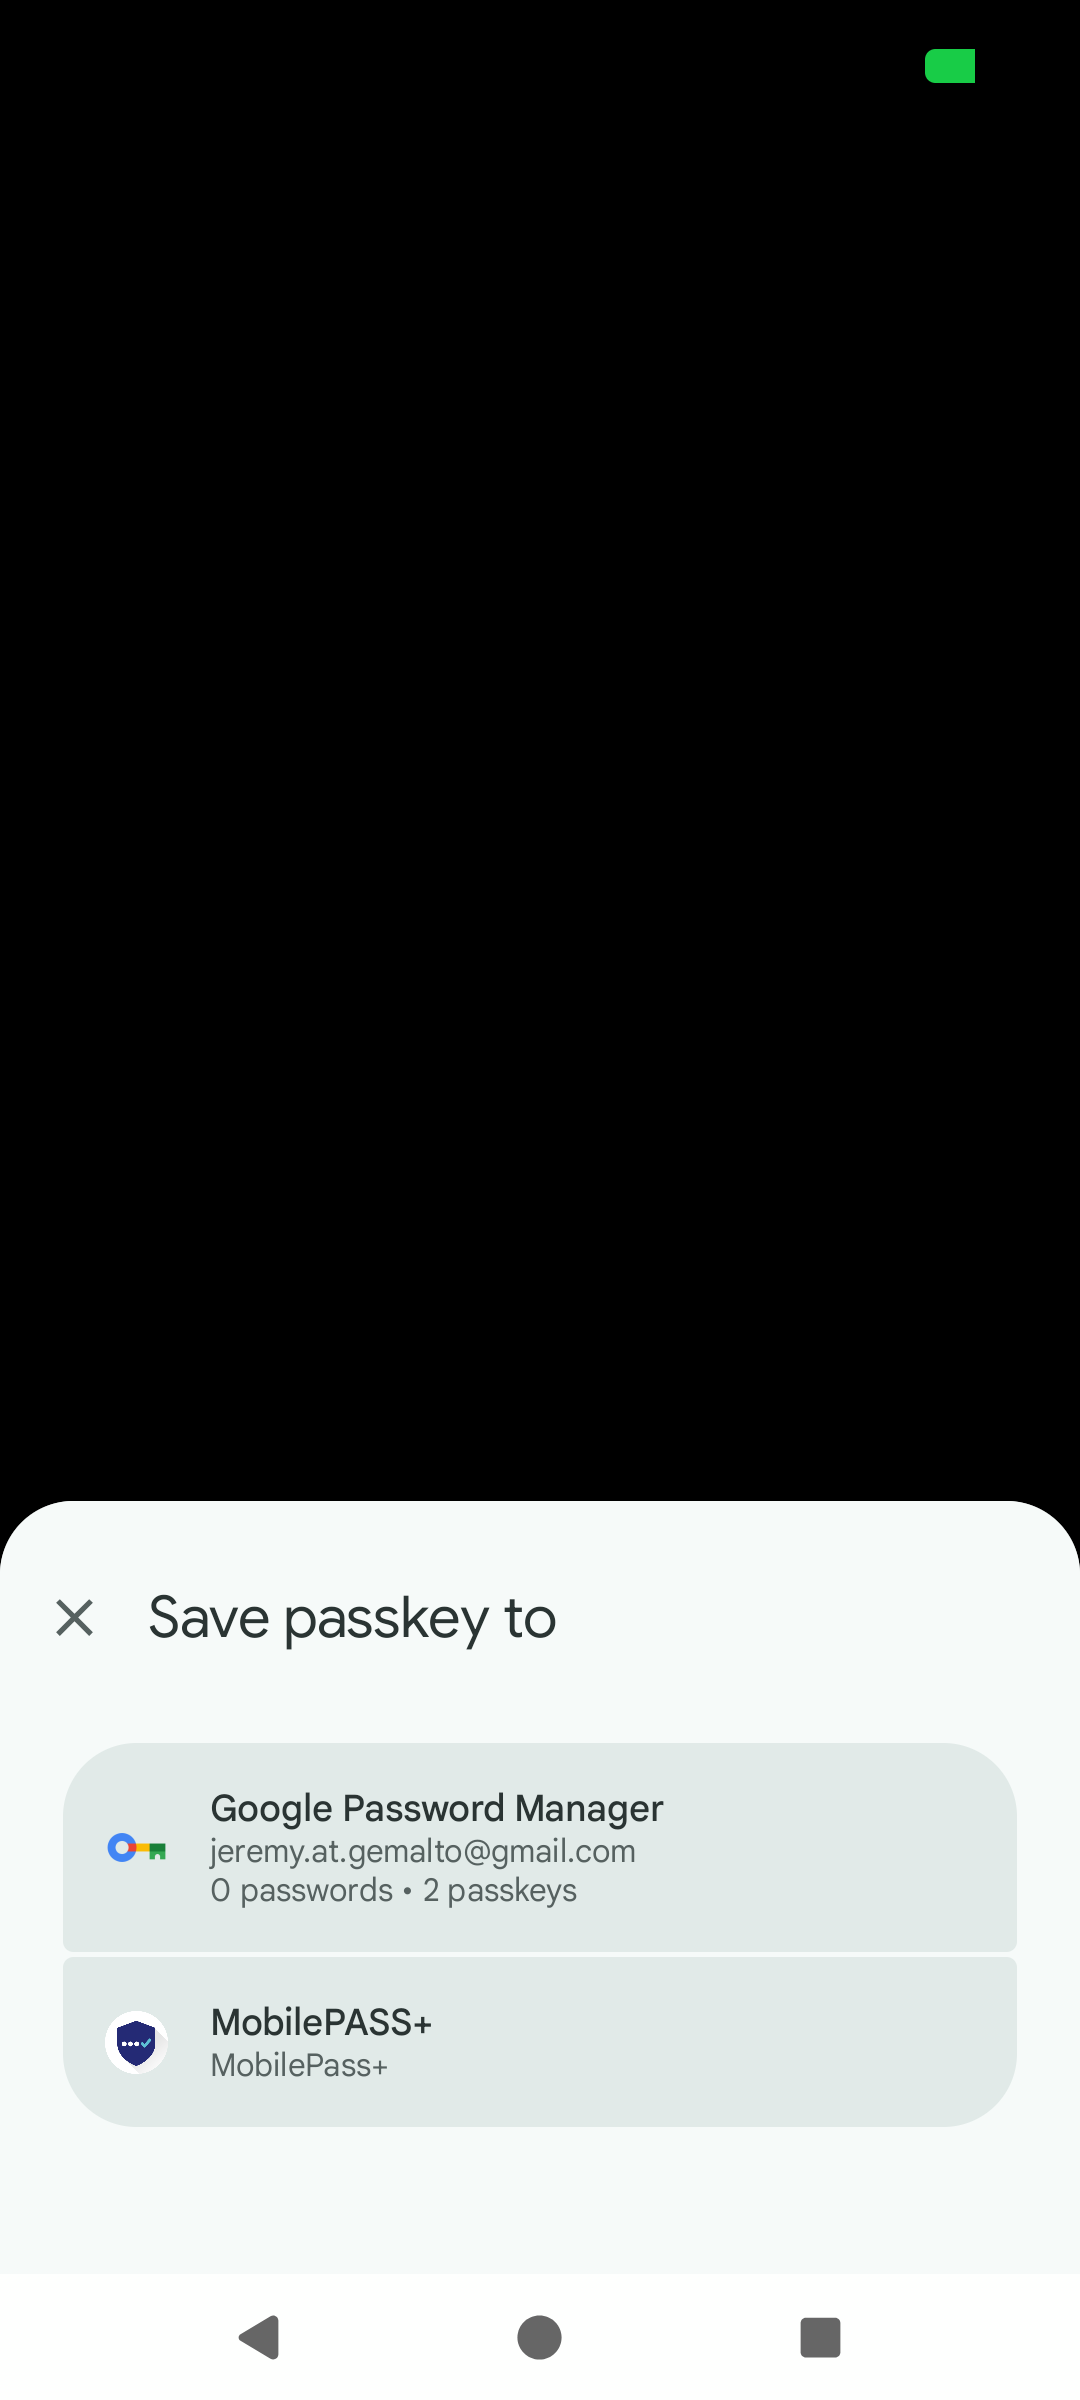
If MobilePASS+ is not set as your preferred passkey manager, tap Save another way, and then tap MobilePASS+.
A connection is established between your device and the browser. The next steps need to be done quickly before timing out (the time-out period is typically 15-30 seconds).
On your device, a message opens. The message includes your username and the service for which you are enrolling a passkey.
-
Verify that this information is correct, and click Continue.
-
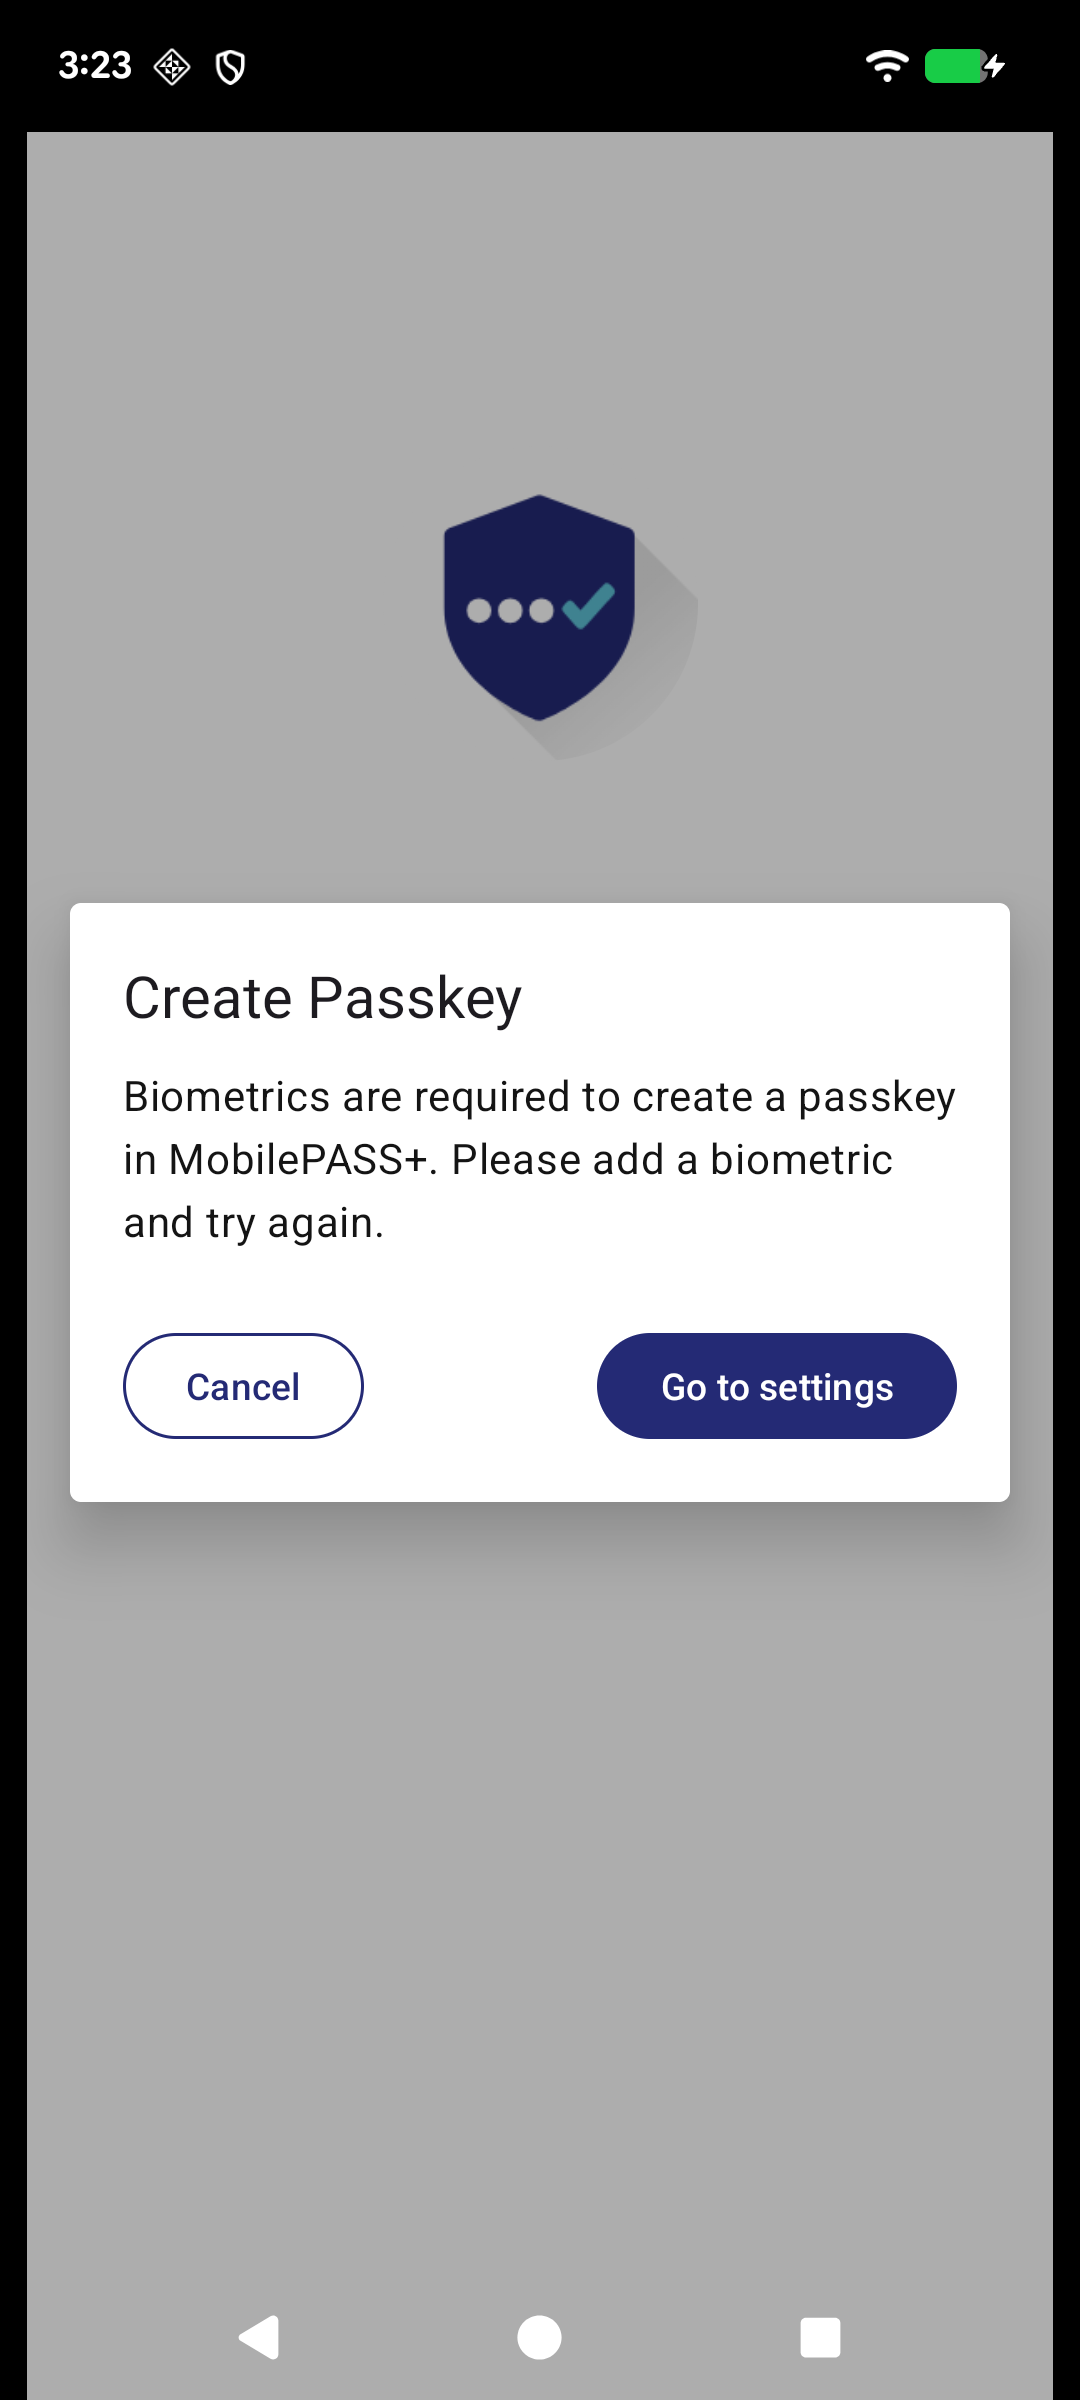
When prompted, authenticate using your biometrics.
Set up biometrics
If you don't have biometrics set up on your device, a message prompts you to set it. Tap Go to settings, which opens the device settings where you configure a fingerprint.
If the passkey creation times out, you need to re-enroll.
After the biometrics are verified, the passkey is ready to use.
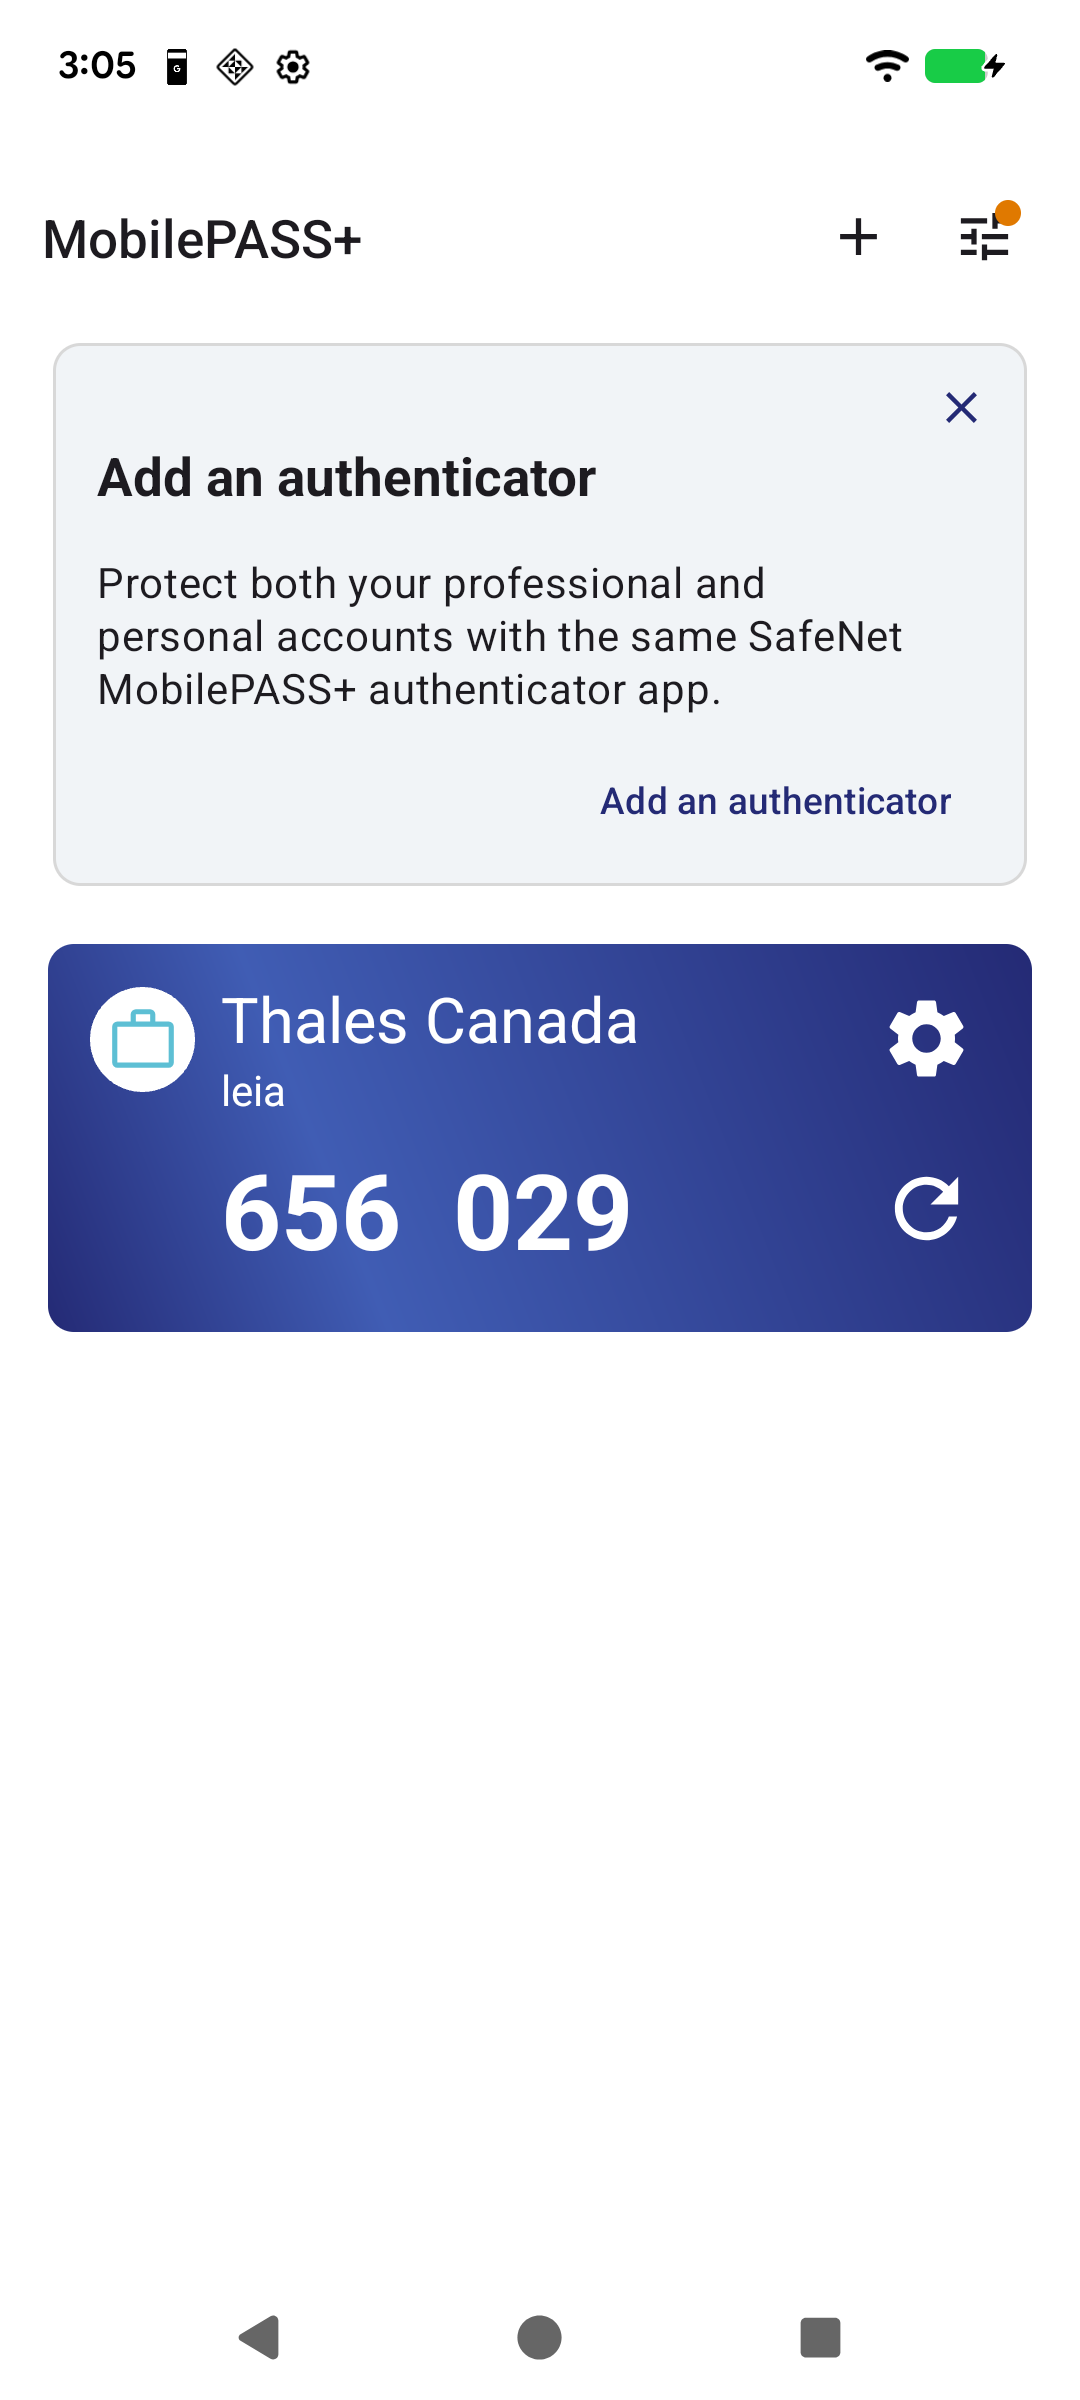
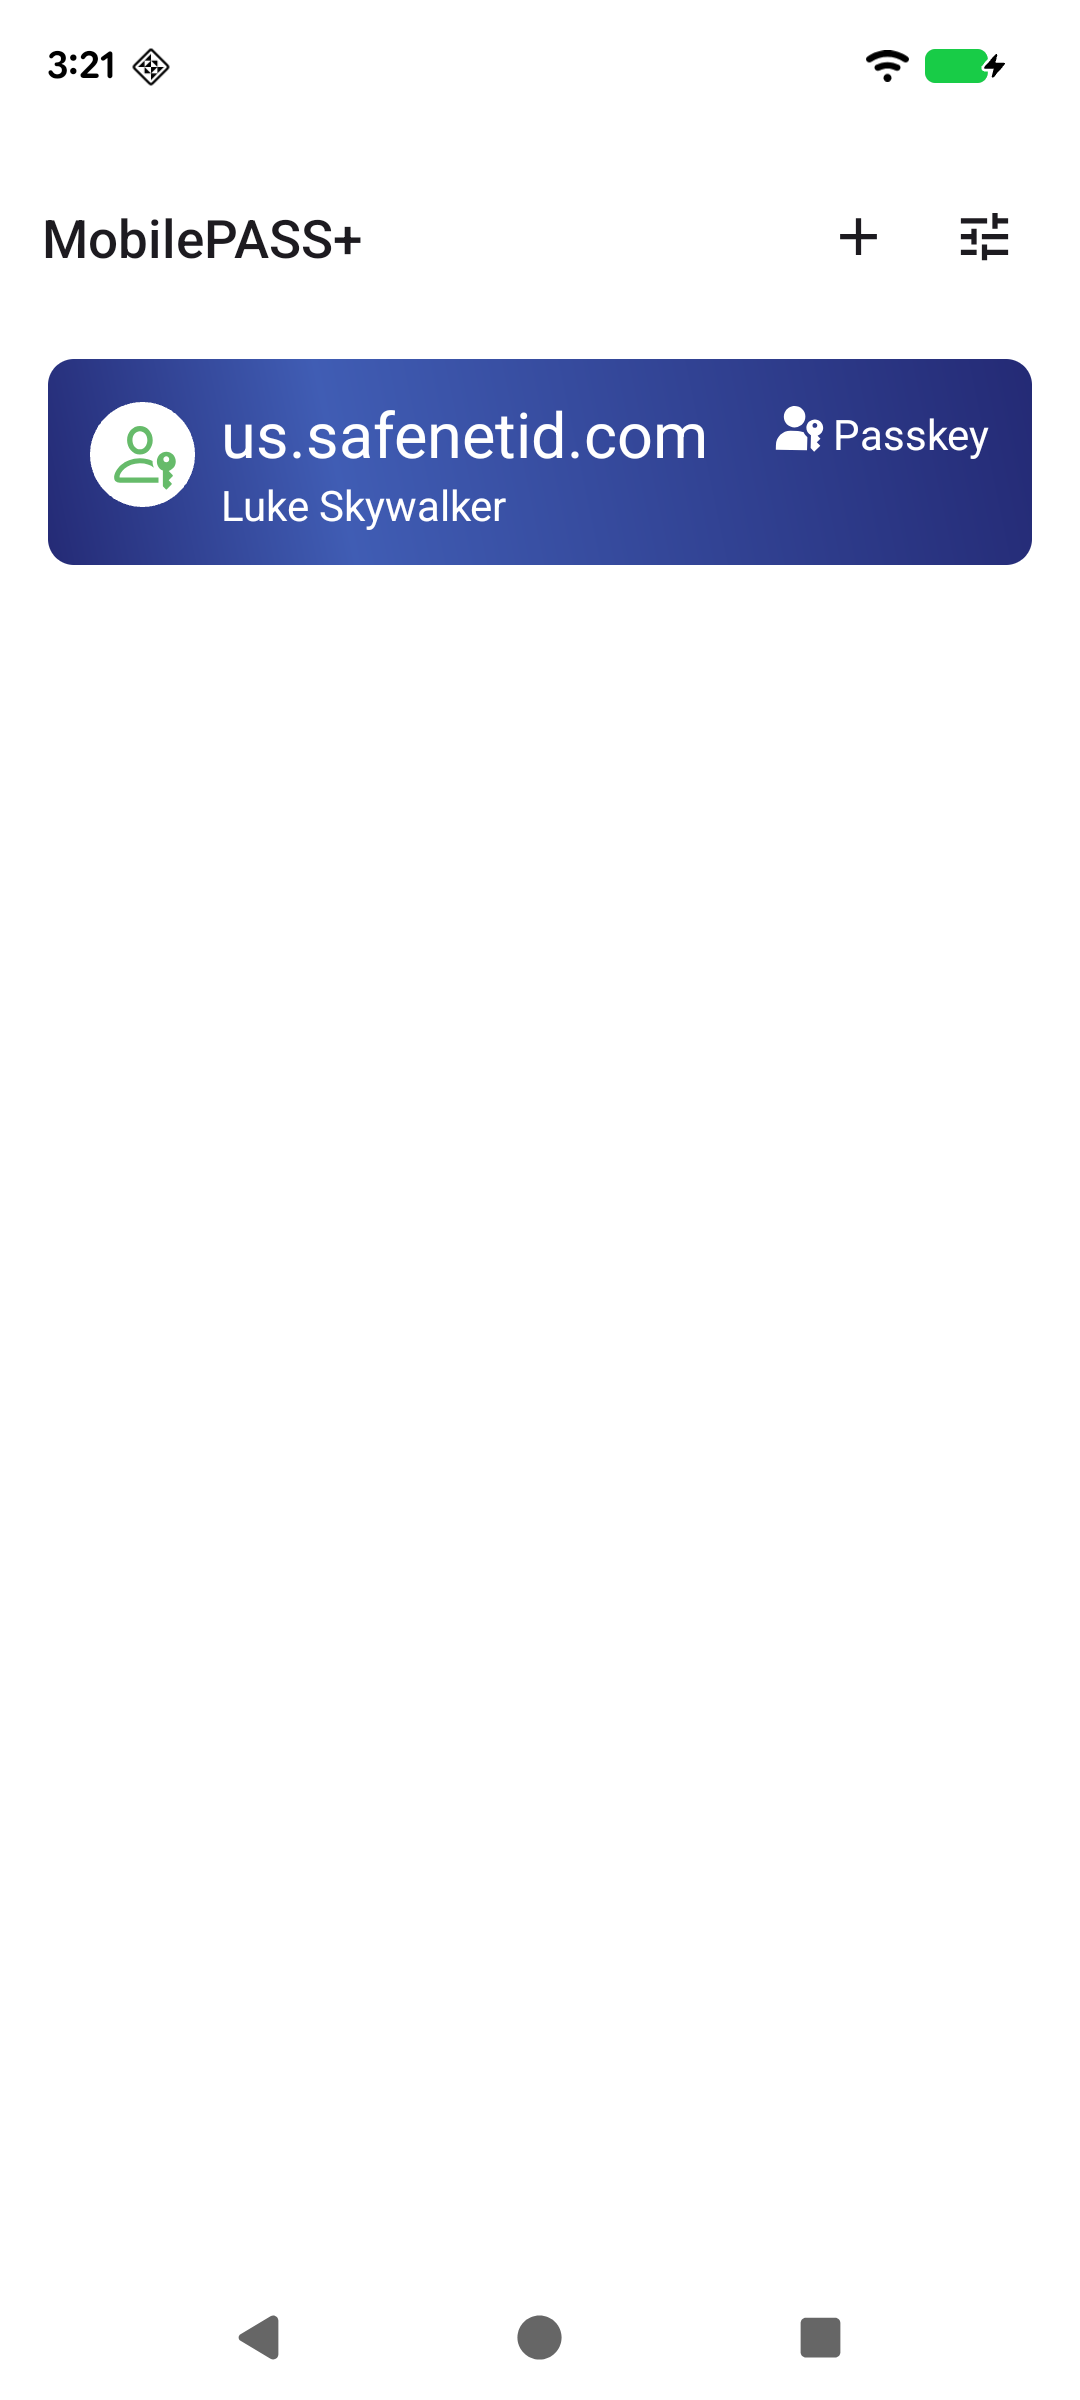
In MobilePASS+, you can see the passkey in the list of authenticators.
-
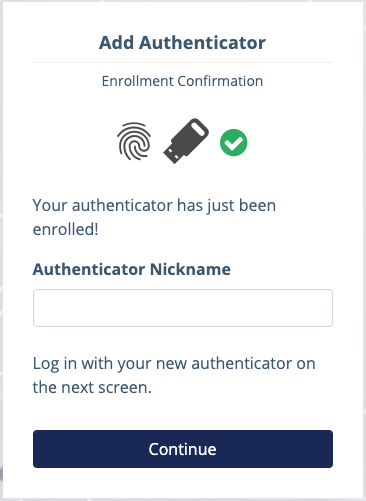
Back in the browser, set a nickname for the passkey.
The nickname is only for personal use, such as to help you identify the passkey on the STA portal.
Next, you are presented with a QR code to authenticate you into the login portal.
-
Scan the QR code using a QR code reader, and you are logged in to the SafeNet Trusted Access portal.
Enroll using Chrome on your Android device
The steps to enroll a passkey using Chrome on your Android device are slightly different.
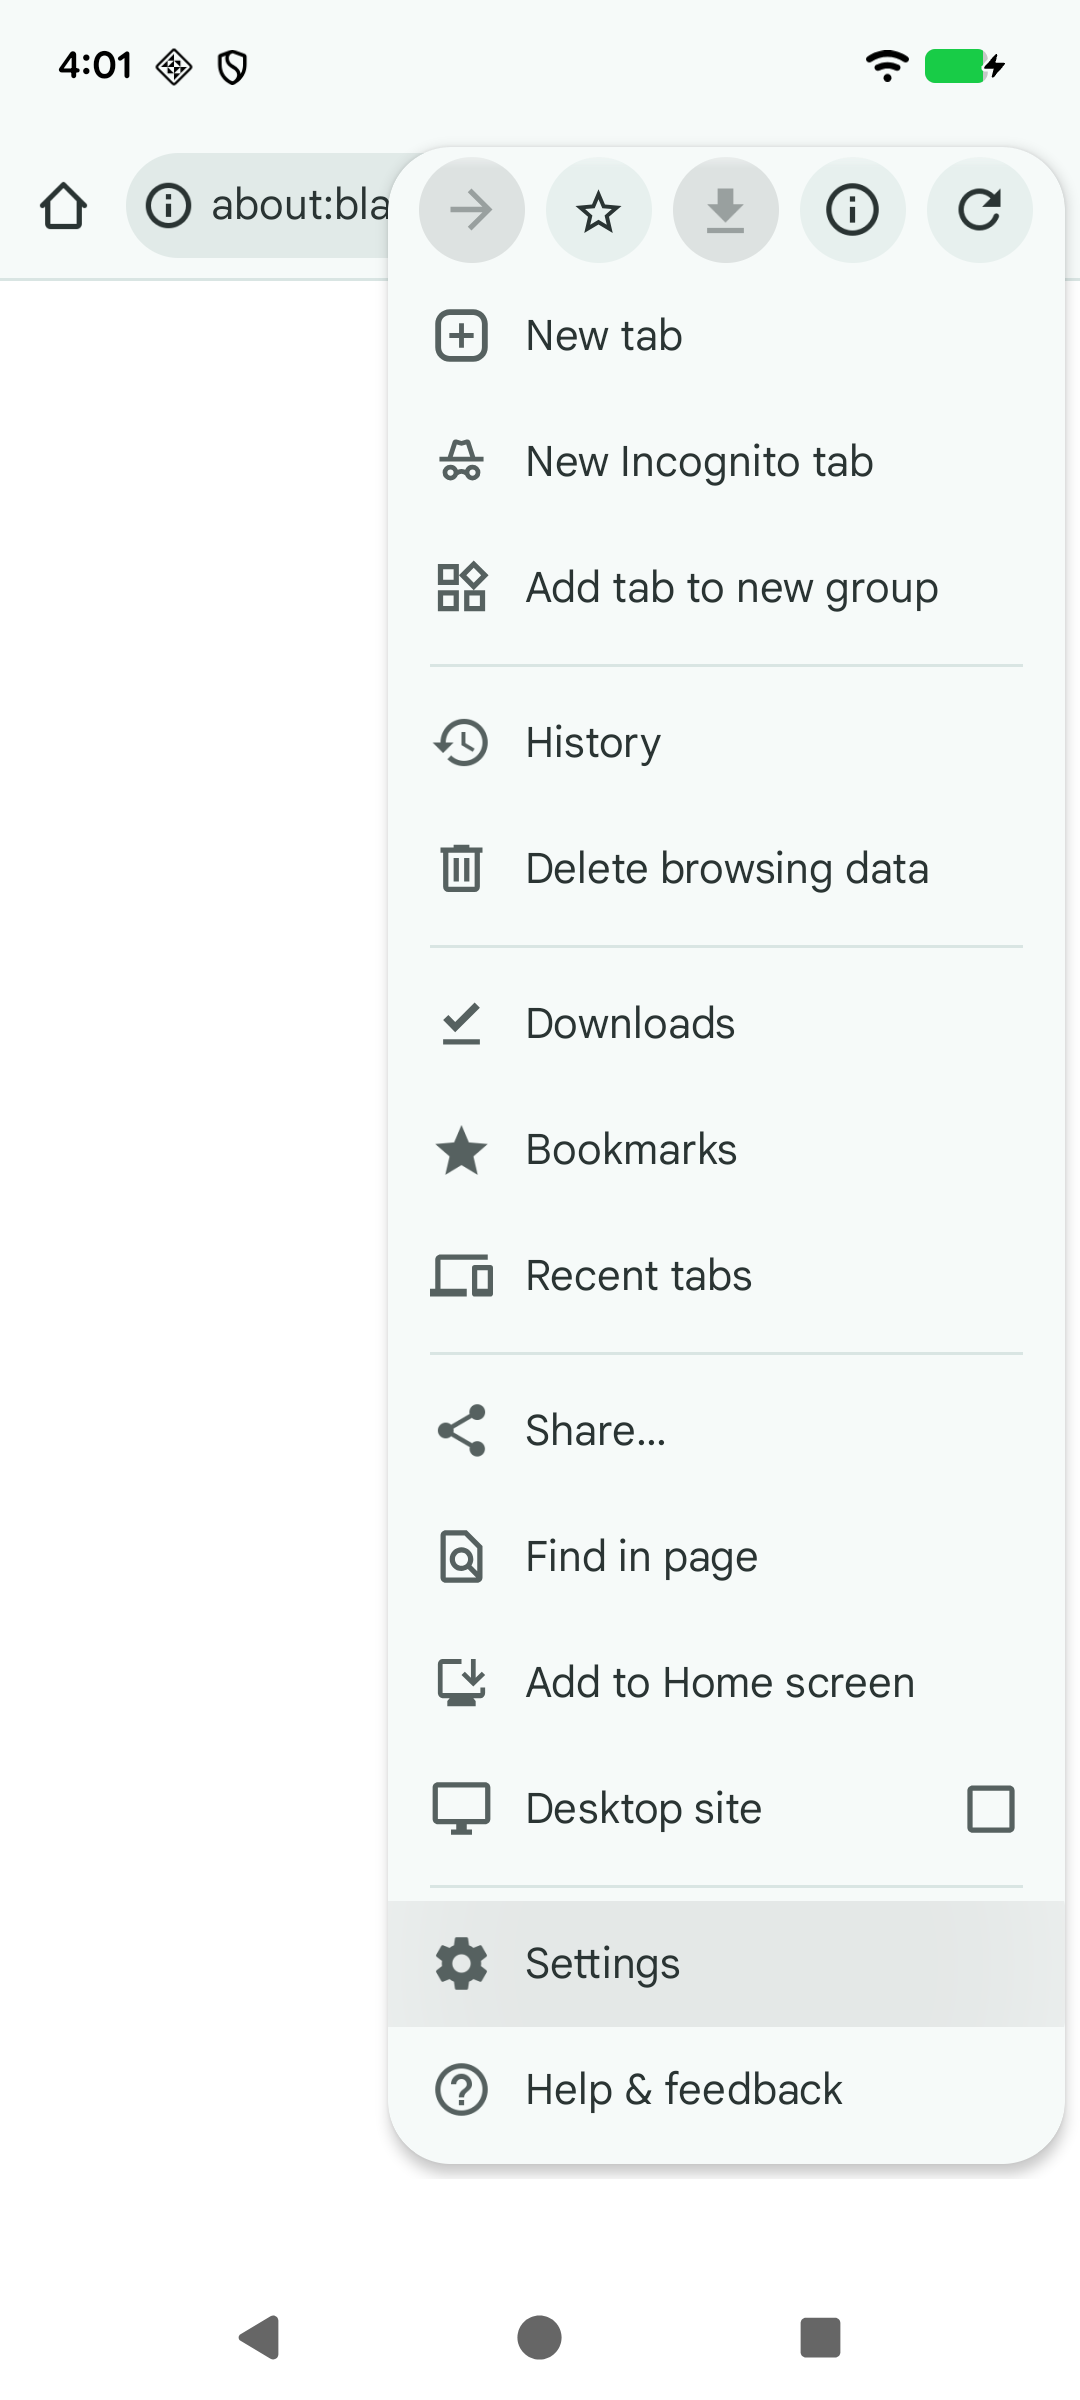
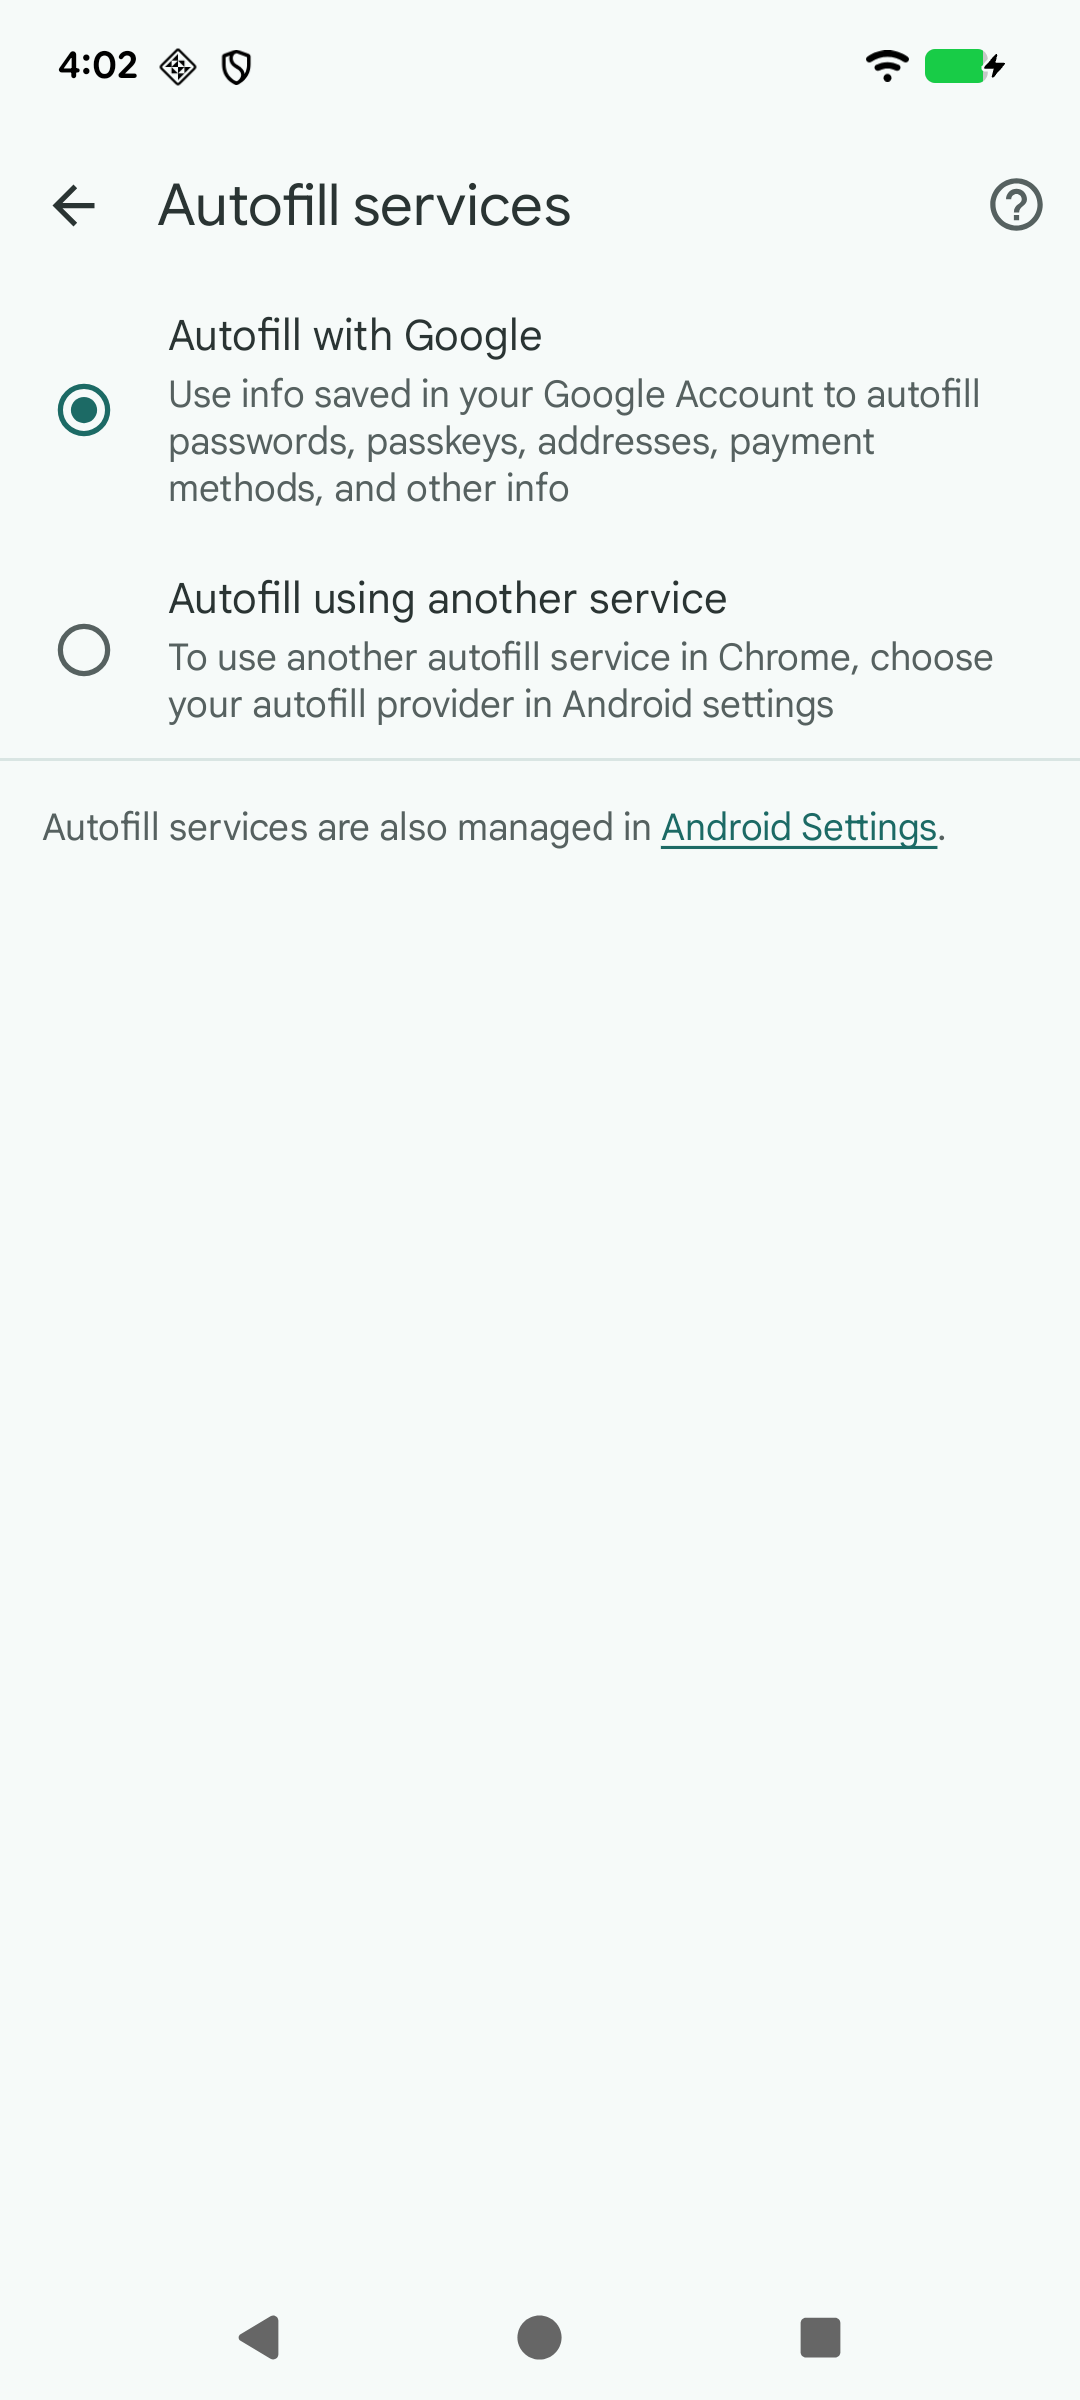
On Chrome, you must make a minor change in the browser settings.
-
Update both your device and browser to the latest versions. Otherwise the passkeys might not be saved in MobilePASS+ and instead stored in the device's keystore.
-
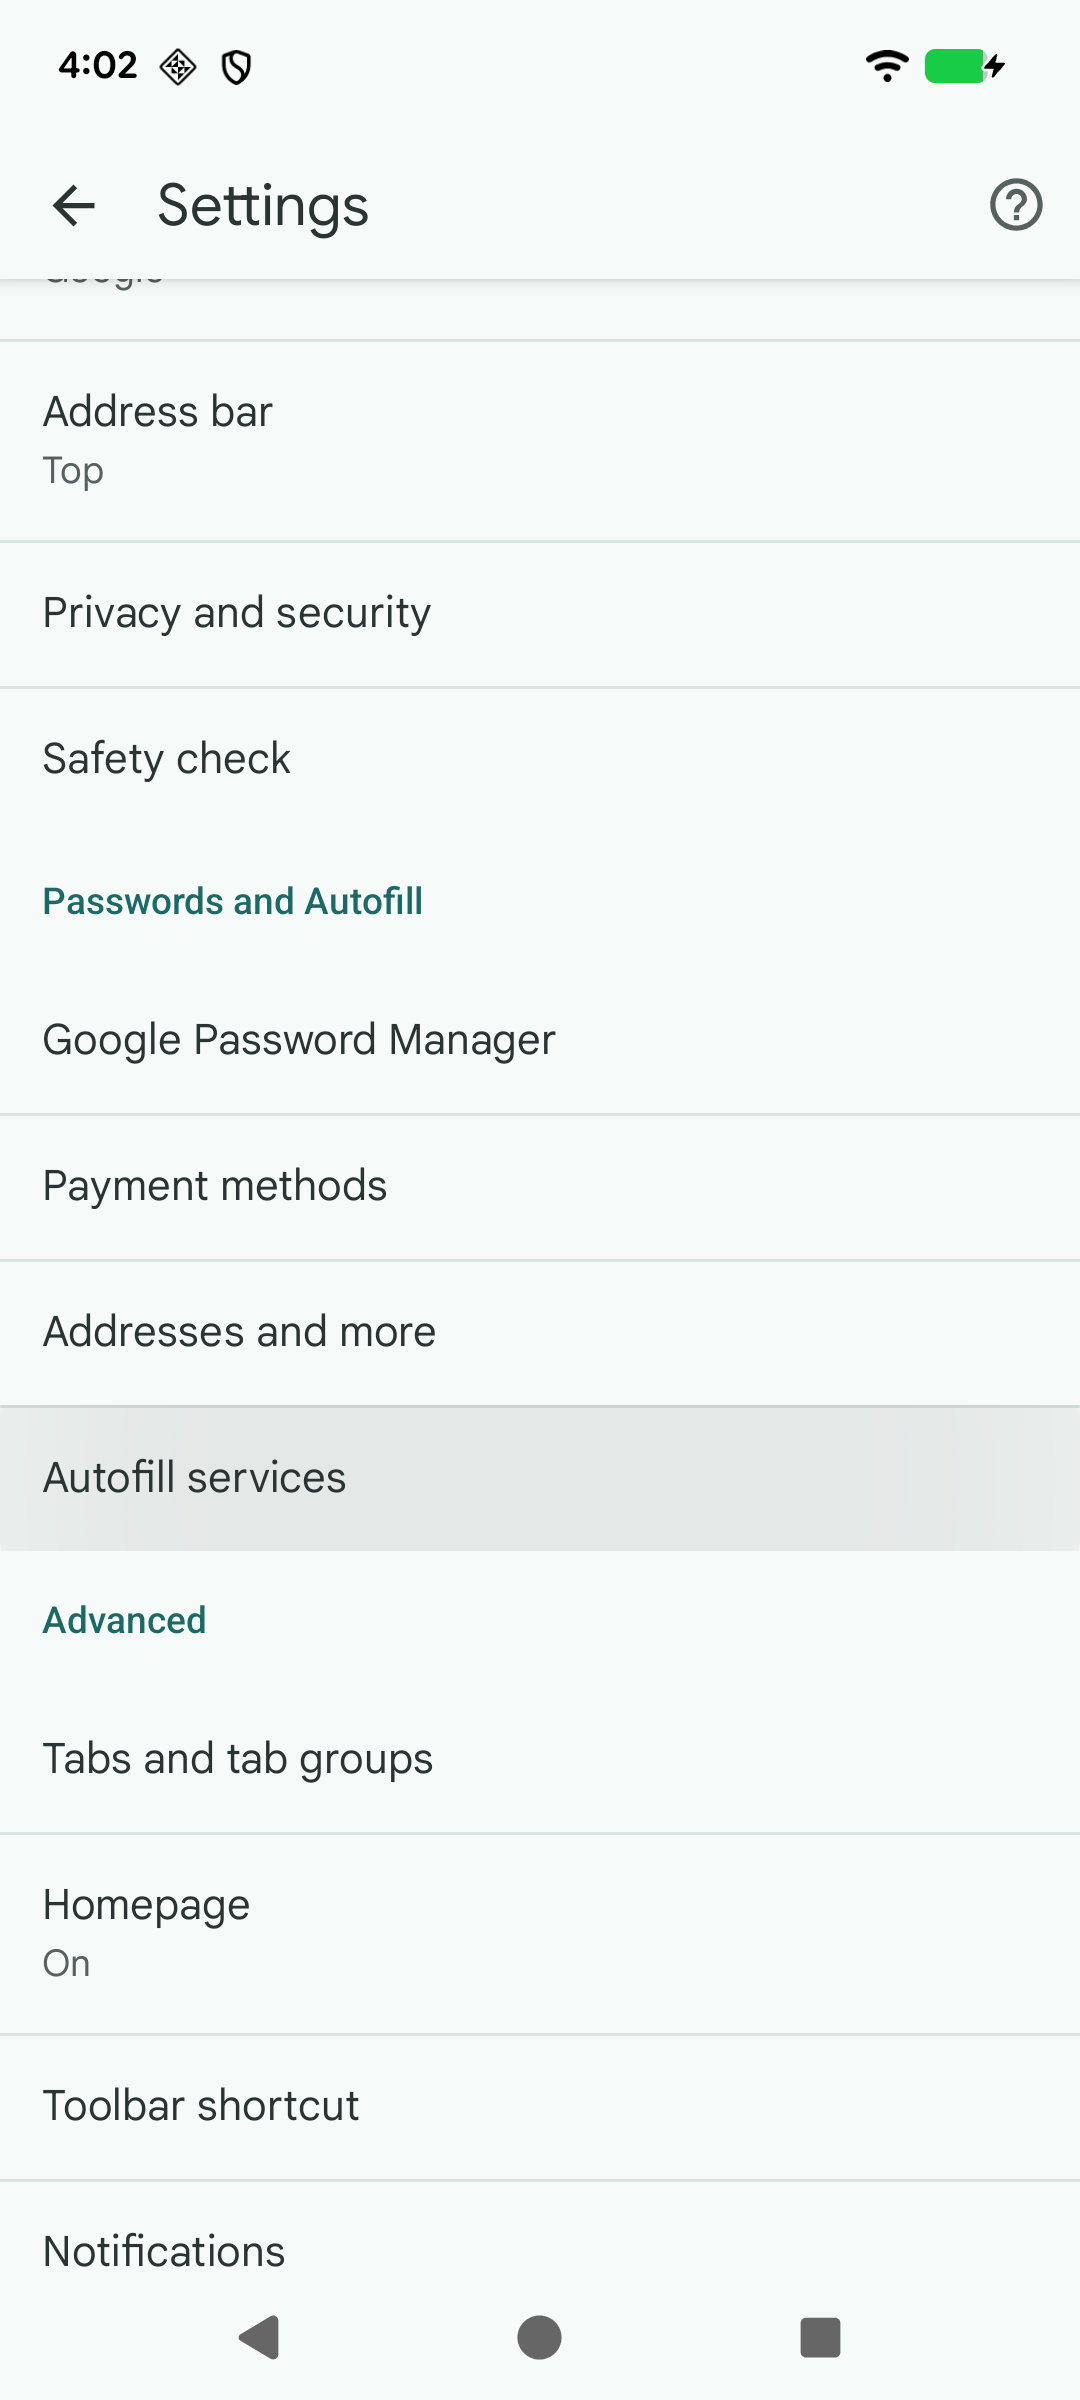
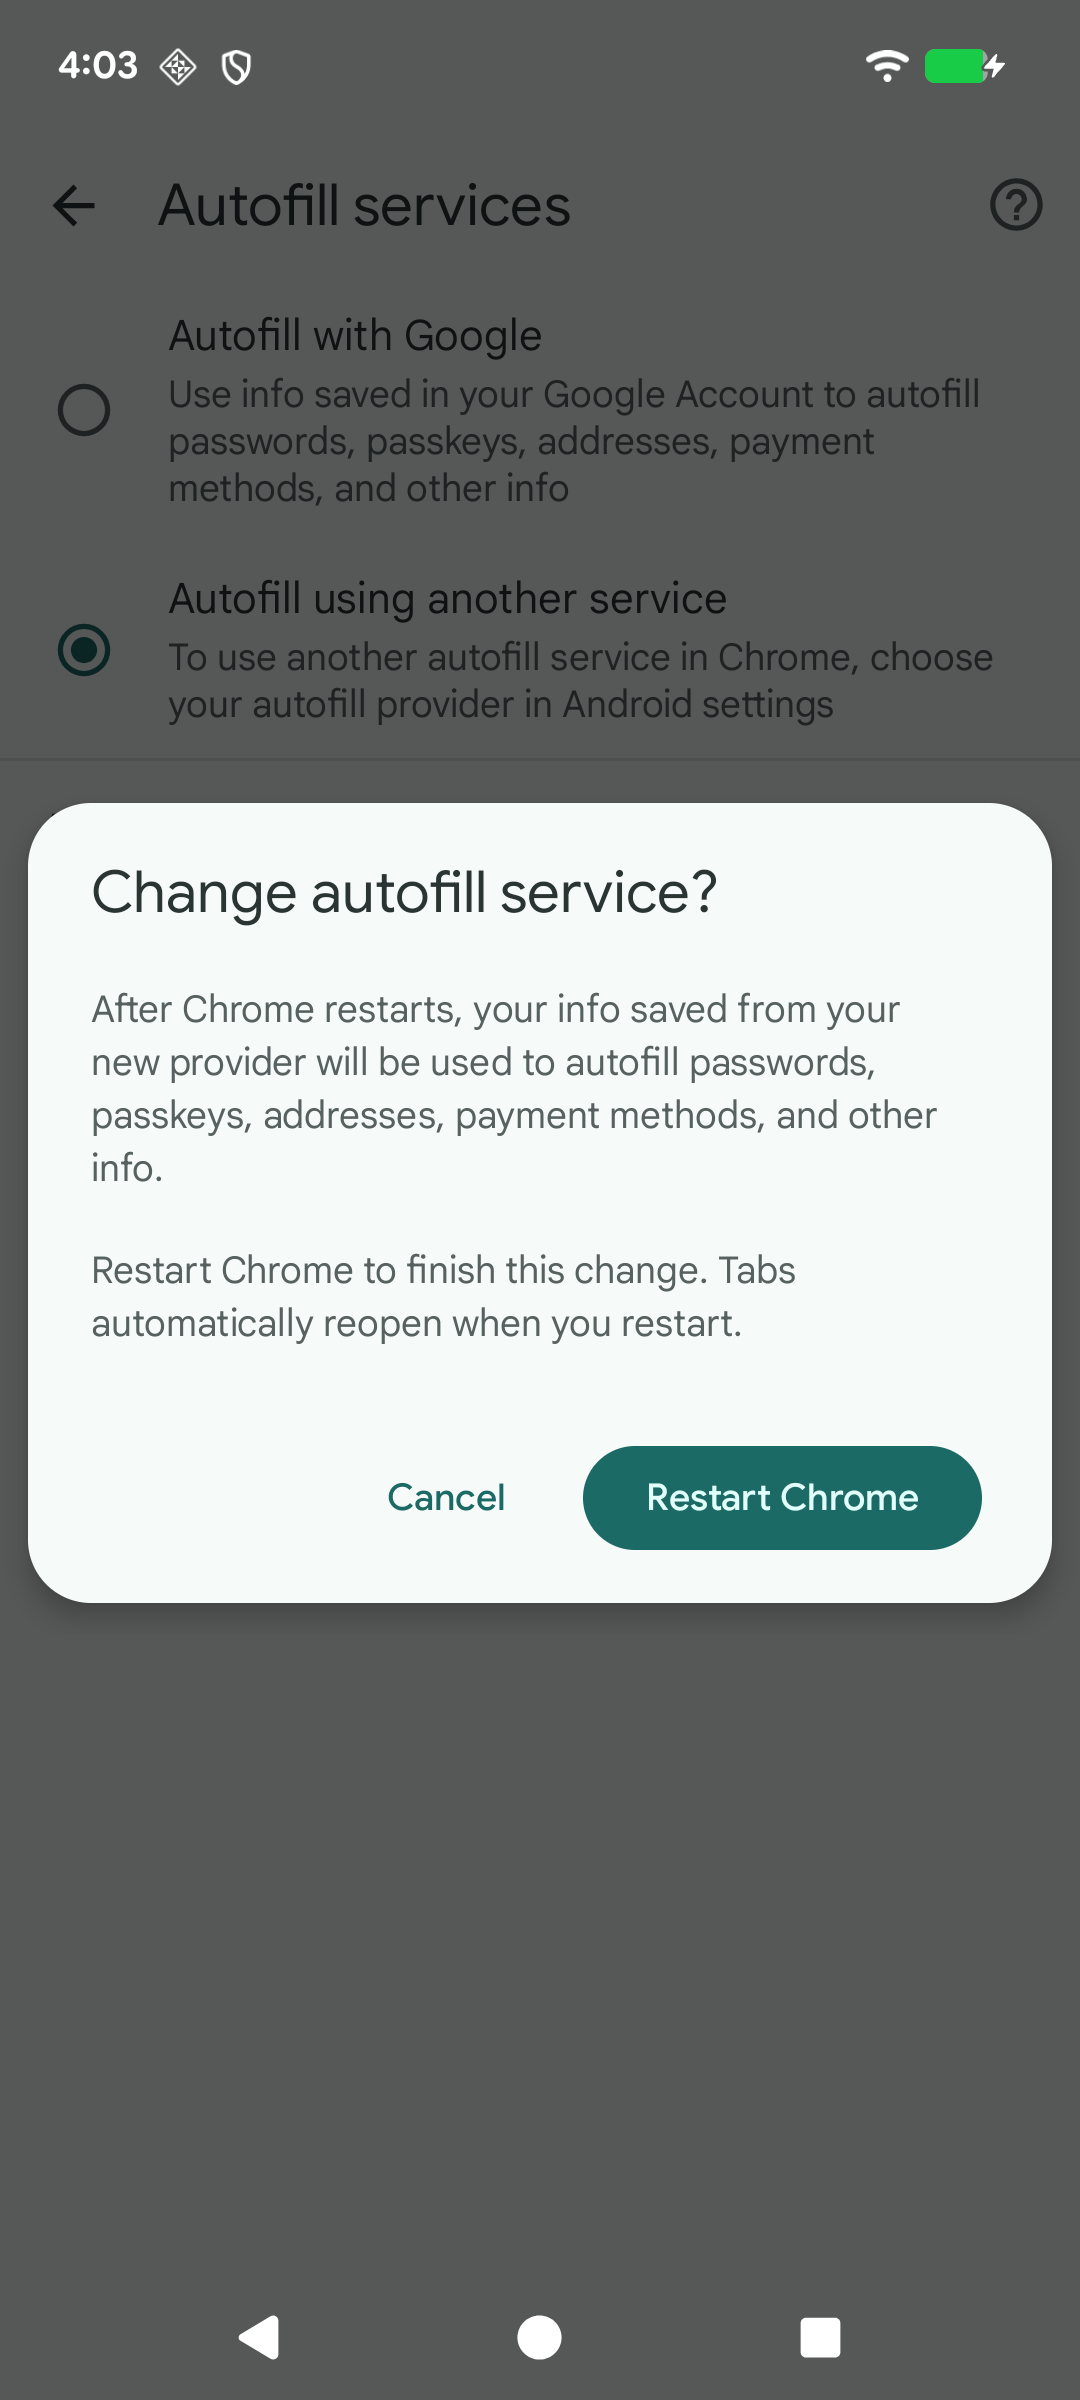
Go to Settings > Autofill Services and select Autofill using another service.
-
When prompted, restart Chrome.
When this configuration is done, the steps to enroll a passkey are the same as when using a QR Code.
View passkey details
To view passkey details, tap the passkey in the MobilePASS+ Authenticator list, which opens a new screen.
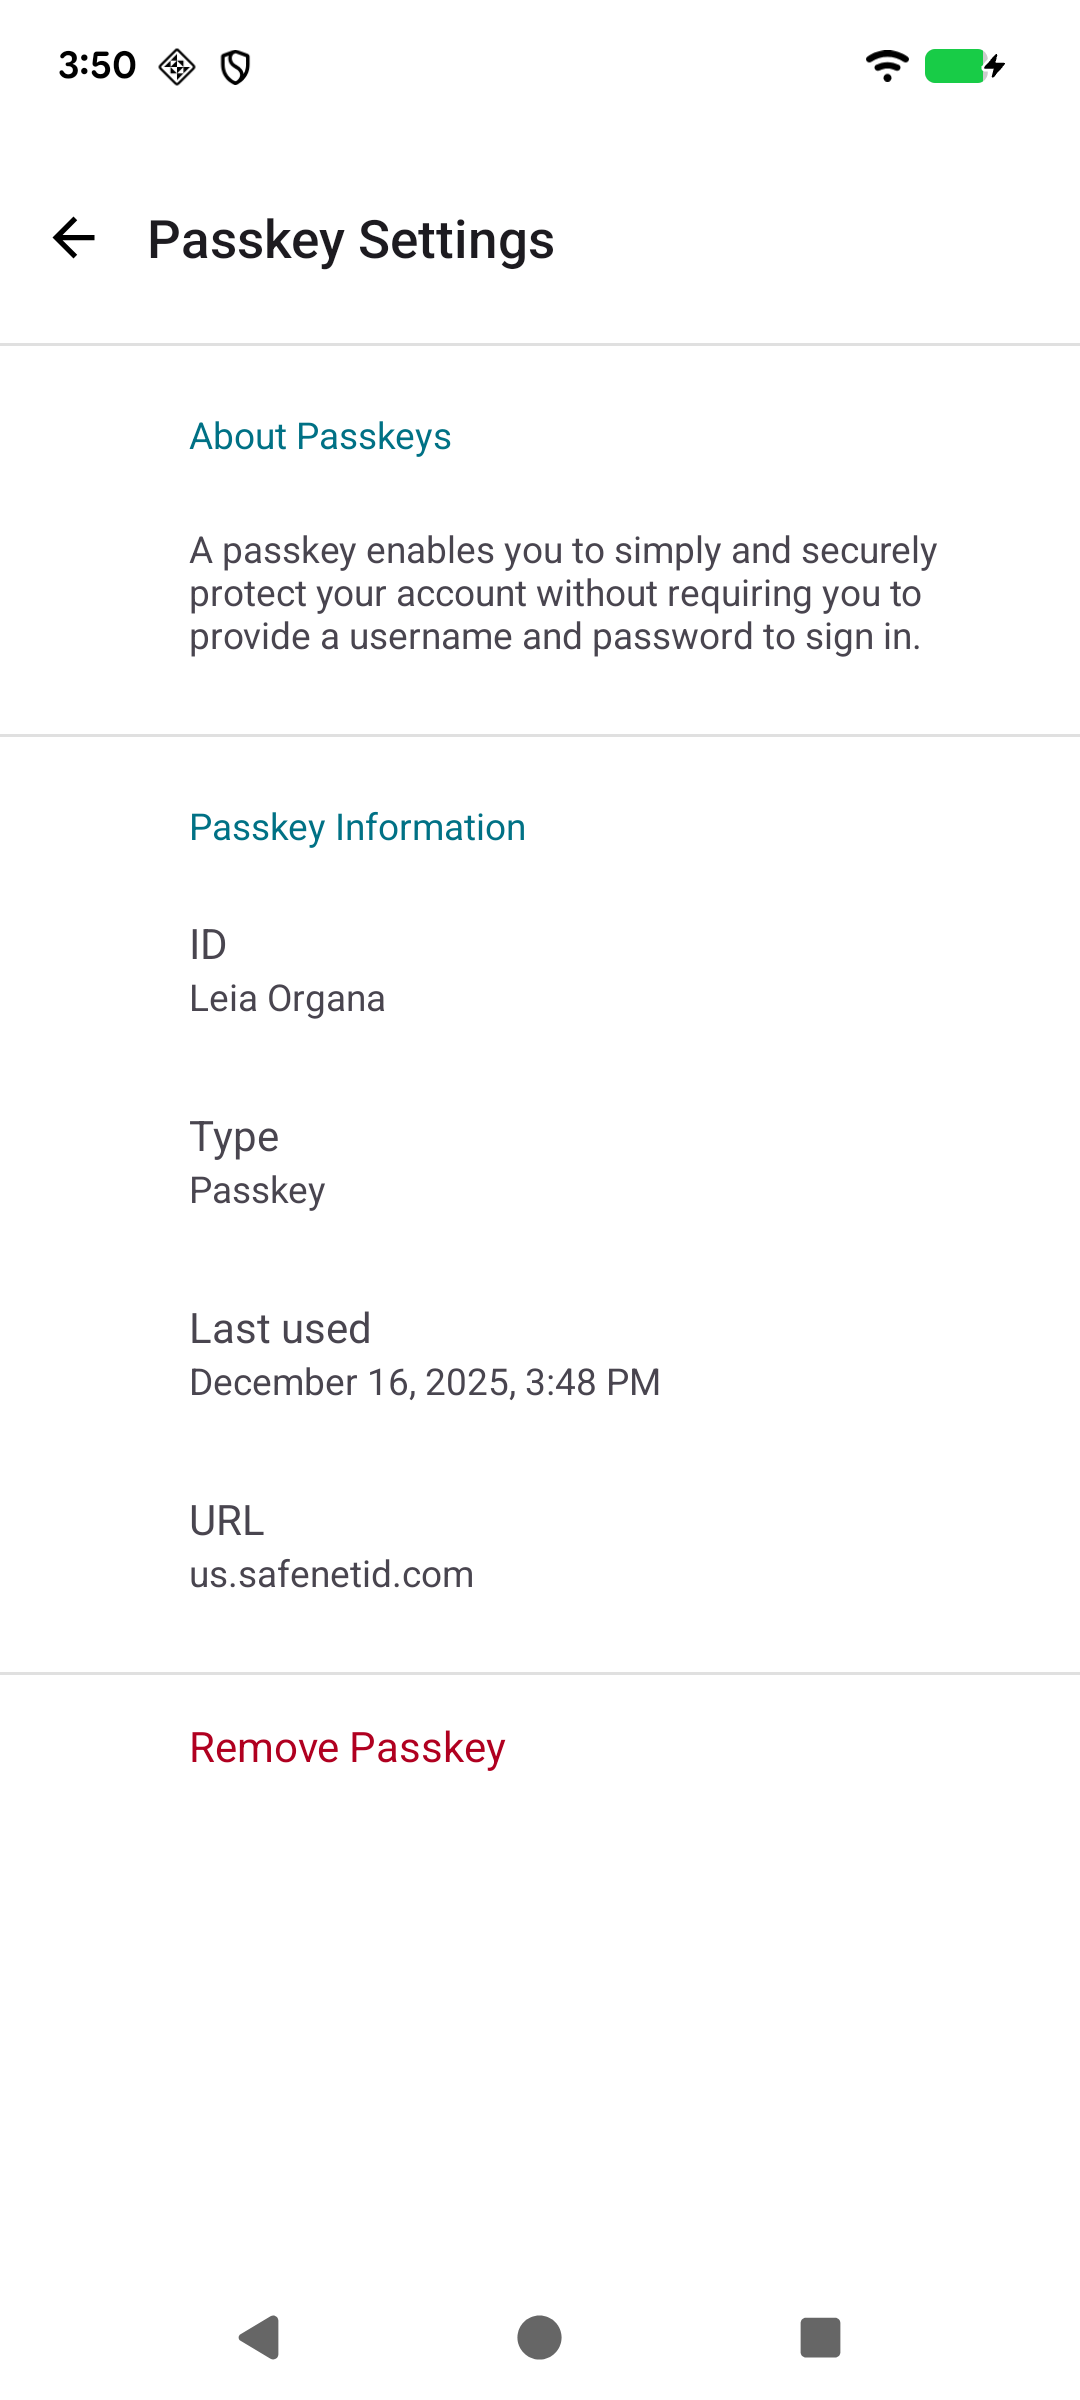
On this screen, you can view a description of what passkeys are, along with the user ID, the authenticator type, the URL, and the last time it was used.
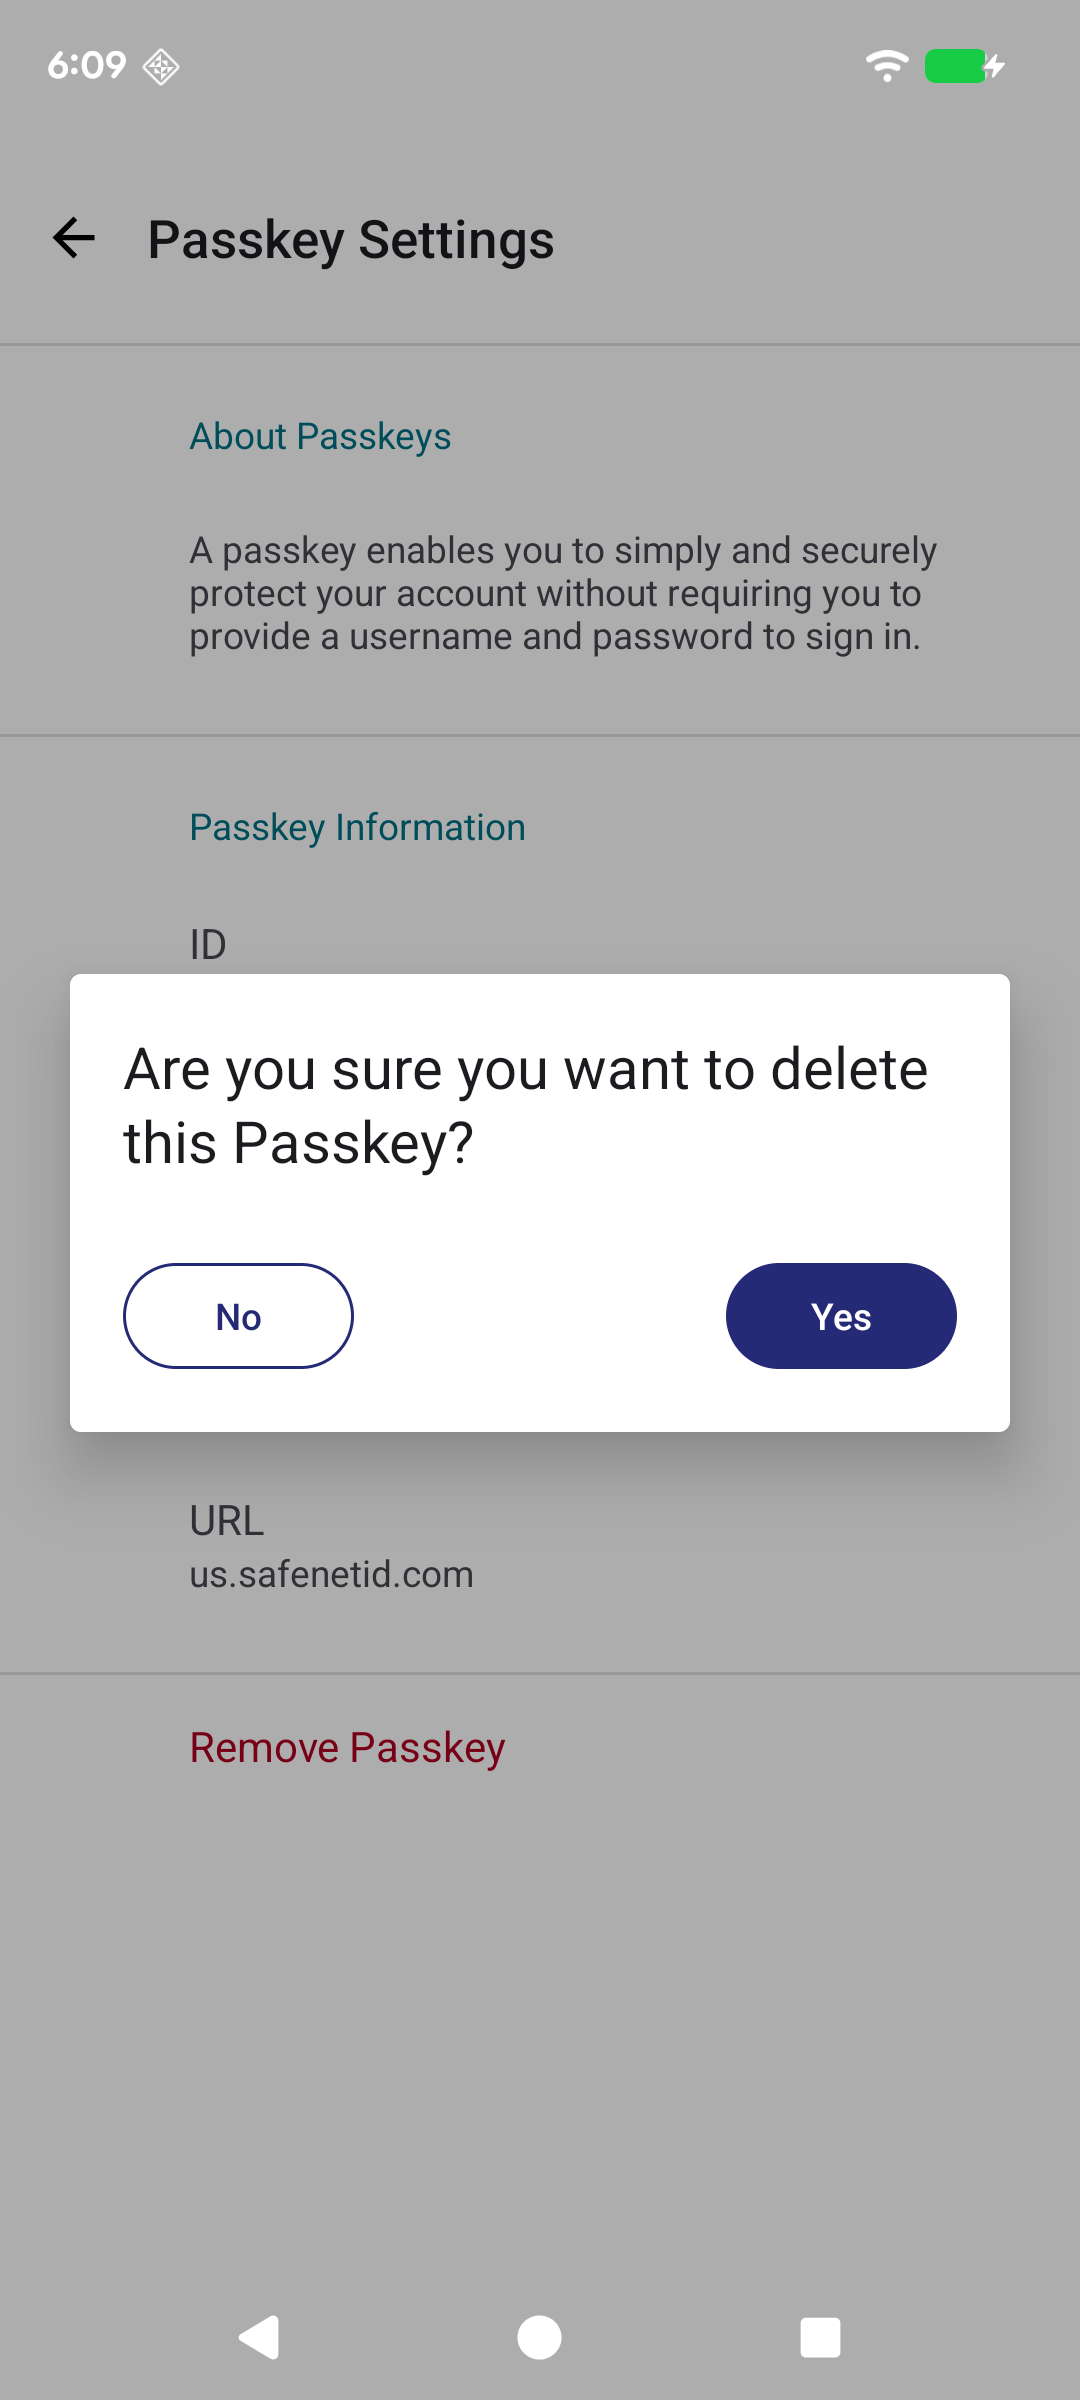
Delete a passkey
To delete a passkey, on the passkey details screen, click Remove Passkey.