
Configure authenticator support
You can configure the SafeNet Agent for Active Directory Federation Services (ADFS) to support multiple types of authenticators:
-
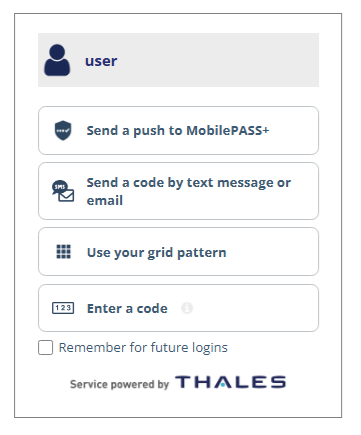
User choice of authenticator (UCA): UCA allows users to select from their available authentication methods during AD FS sign-in. When a user signs in, they are presented with a list of the authentication methods that they have enrolled in SafeNet Authentication Service Private Cloud Edition (SAS PCE).
-
FIDO authenticators: In addition, you can configure the agent to support FIDO authenticators as one of the authentication methods that users can select.
Configure UCA support
After you install SafeNet Agent for ADFS, you can configure the agent to support UCA. Users can then choose their preferred authentication method when they sign in.
To configure UCA support, you must update the following files:
-
ADFSConfig.agentis the agent configuration file. -
SAFENET-MFA.iniis the agent initialization file.
Update the agent configuration file
In the agent configuration file (ADFSConfig.agent), replace the required values with the corresponding information from SAS PCE.
-
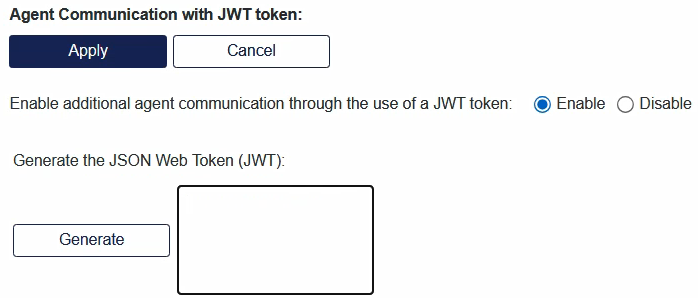
In SAS PCE, go to System > Setup > Agent Communication with JWT Token.
-
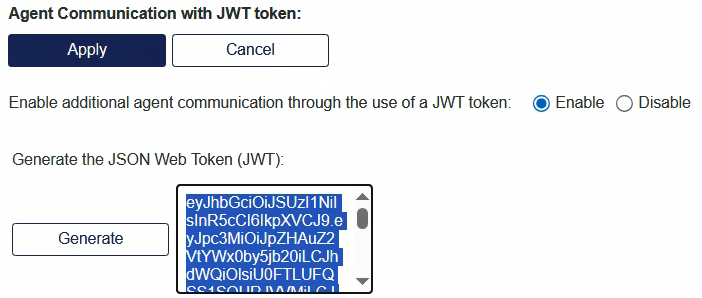
Under Generate the JSON Web Token (JWT), select Generate.
-
Copy the entire generated JWT and paste it in a text editor.
-
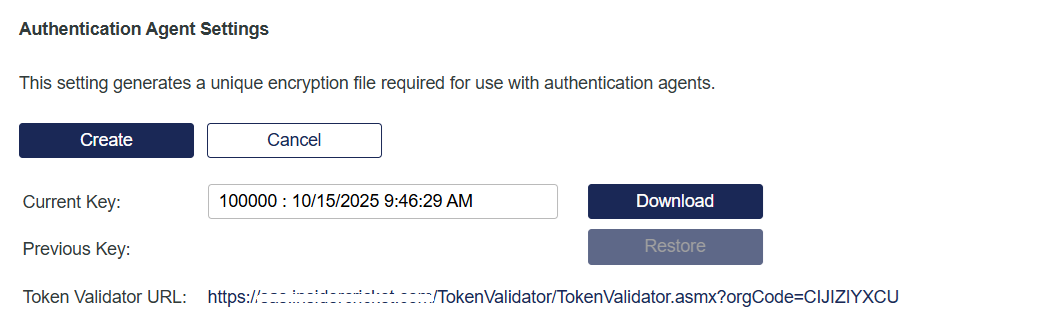
In SAS PCE, go to Virtual Servers > Comms > Authentication Processing > Authentication Agent Settings.
-
At the end of the Token Validator URL, copy the orgCode value and paste it in the text editor.
-
On the local drive where you installed the agent, go to Program Files > SafeNet > SAS > SafeNetMFA > bin, and open the ADFSConfig.agent file in a text editor.

-
Locate the string:
"PrimarySasApiUrl":"<Your SAS Url>" -
Select the
<Your SAS Url>value, and replace it with IP address or hostname of the primary SafeNet server URL. -
To configure the IP address or hostname of the failover SafeNet server, locate the string:
"SecondarySasApiUrl":"<Your secondary SAS Url>" -
Select the
<Your secondary SAS Url>value, and replace it with IP address or hostname of the failover SafeNet server URL. -
Locate the string:
"AgentCommunicationJWT": "<AGENT_COMMUNICATION_JWT>" -
Select the
<AGENT_COMMUNICATION_JWT>value, and paste the JWT value that you generated in SAS PCE.All the content in the ADFSConfig.agent file must be in one line.

-
Locate the string:
"orgCode": "<ORG_CODE>" -
Select the
<ORG_CODE>value, and paste the token validator orgCode that you copied in SAS PCE.
The AD FS sign-in page can now list multiple authenticator options.
Update the INI file
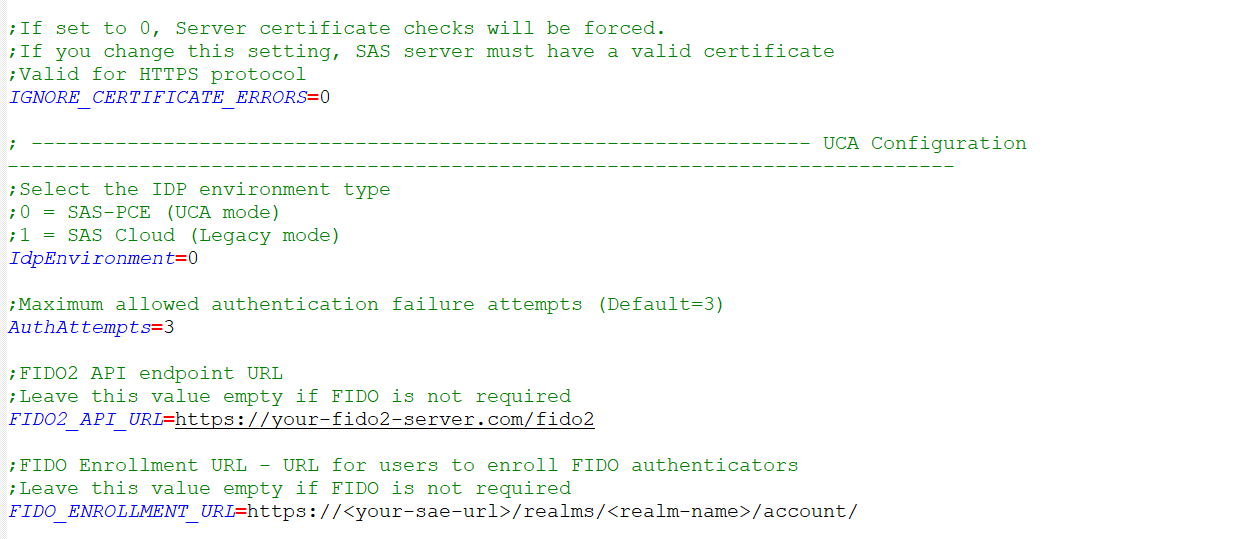
Update the configuration parameters in the SAFENET-MFA.ini file.
-
On the local drive where you installed the agent, go to Program Files > SafeNet > SAS > SafeNetMFA > ini, and open the SAFENET-MFA.ini file in a text editor.
-
Set the
IdpEnvironmentvalue to0or1:- `0` (Default) Indicates that UCA is enabled. - `1` Indicates that legacy variant of the agent is enabled. -
For the
AuthAttemptsvalue, specify the maximum number of allowed authentication failure attempts. This value must exactly match the Account lock threshold that is defined in the account lockout policy in SAS PCE. The default value is3. -
To ensure that all changes made in the
ADFSConfig.agentandSAFENET-MFA.inifiles are applied successfully, on the ADFS Management Console (SafeNet Agent for ADFS), disable and then re-enable the agent.
Configure FIDO support
FIDO authenticators enable strong, phishing-resistant authentication with passkeys and platform authenticators.
After you configure UCA support, you can configure SafeNet Agent for ADFS to support FIDO authenticators. FIDO authentication does not work without UCA.
To configure FIDO support, you need to provide values in the agent configuration (ADFSConfig.agent) and initialization (SAFENET-MFA.ini) files. You can get the values from SAS PCE.
After you configure FIDO support, users can sign in with their FIDO authenticator.
-
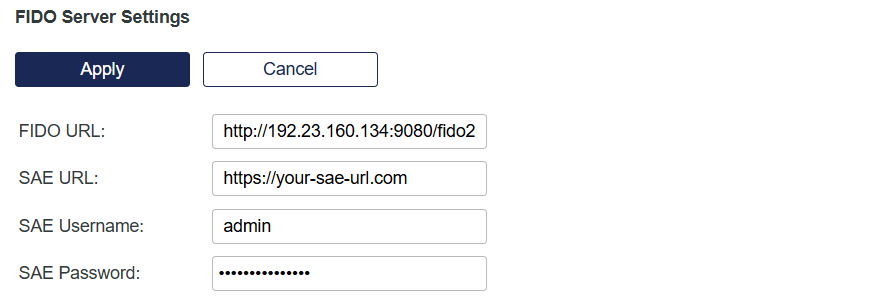
In SAS PCE, go to System > Communications > FIDO Server Settings.
-
Copy the following values and paste them in a text editor:
- FIDO URL
- SAE URL
-
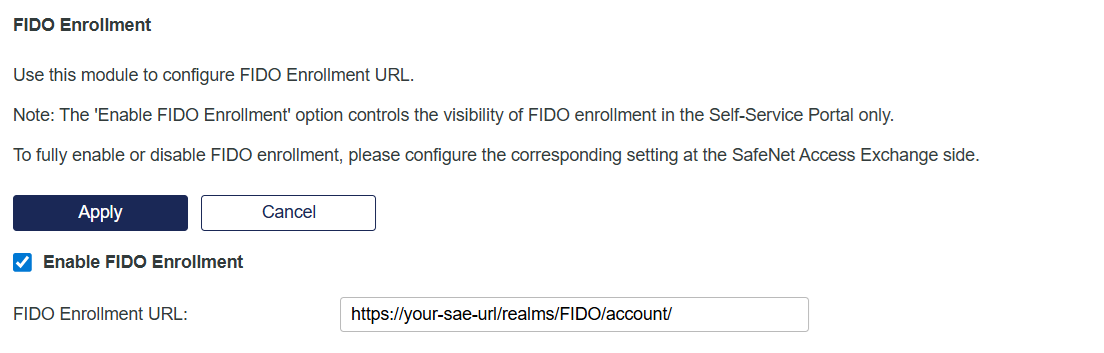
Go to Virtual Server > Self-Service > Configuring Self-Service > FIDO Enrollment.
-
Copy the FIDO Enrollment URL and paste it in your text editor.
-
On the local drive where you installed the agent, go to Program Files > SafeNet > SAS > SafeNetMFA > bin, and open the ADFSConfig.agent file in a text editor.

-
Locate the string:
"SAE":{"url":"<SAE_URL>","realmName":"<SAE_REALM_NAME>","tenantId":"<SAE_TENANT_ID>","username":"<SAE_USERNAME>","password":"<SAE_PASSWORD>"} -
Replace the values in the agent configuration file with the information that you copied from SAS PCE as follows:
Value in ADFSConfig.agent Value to use urlEnter the SAE URL from the FIDO Server Settings realmNameEnter the name of the realm. The name must match the master realm where the user with the generate-jwt role was created during the operator realm setup for FIDO on SAE tenantIdEnter the tenant-specific realm ID. It is located after /realmsin the FIDO Enrollment URL, such ashttps://<SAE_URL>/realms/<SAE_TENANT_ID>/account/.userNameEnter the username that was created in SafeNet Access Exchange (SAE).The user must have the generate-jwt role. Before proceeding, ensure that these are the most recent credentials, and that they are correctly configured in SAE. passwordEnter the password for the specified SAE username. The user must have the generate-jwt role. Before proceeding, ensure that these are the most recent credentials, and that they are correctly configured in SAE. 
All the content in the ADFSConfig.agent file must be in one line.
-
On the local drive where you installed the agent, go to Program Files > SafeNet > SAS > SafeNetMFA > ini, and open the SAFENET-MFA.ini file in a text editor.
-
Update the values in the agent initialization file with the information that you copied from SAS PCE as follows:
Value in SAFENET-MFA.ini Value to use FIDO2_API_URLFIDO URL from FIDO Server Settings FIDO_ENROLLMENT_URLFIDO Enrollment URL from FIDO Enrollment -
Save both the ADFSConfig.agent and SAFENET-MFA.ini files.
-
To ensure that all changes made in the
ADFSConfig.agentandSAFENET-MFA.inifiles are applied successfully, on the ADFS Management Console (SafeNet Agent for ADFS), disable and then re-enable the agent.