



SafeNet Access Exchange Setup
Configuring SafeNet Access Exchange requires creating a client in SafeNet Access Exchange.
Perform the following steps to create a client in SafeNet Access Exchange:
-
Log in to SafeNet Access Exchange as an administrator.
-
On the administrator console, select your realm (for example, SailPoint).
-
In the left pane, under Manage, click Clients, and in the right pane, click Create client.
-
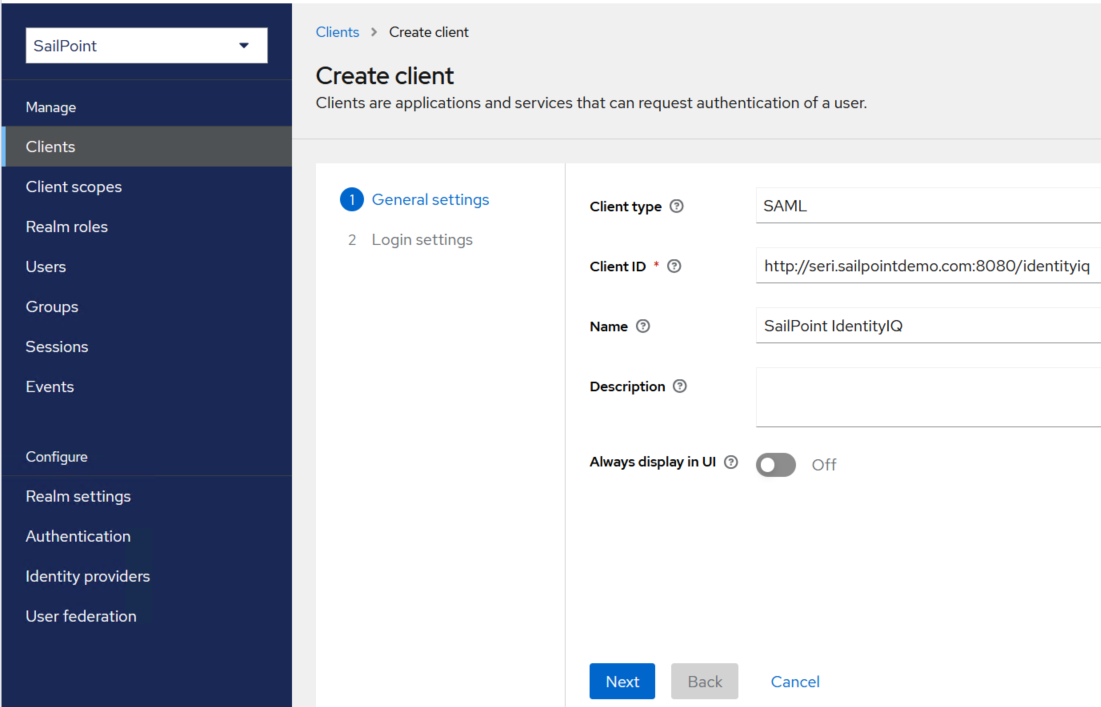
On the General Settings tab, perform the following steps:
-
In the Client type field, select SAML.
-
In the Client ID field, enter the <IIQ server base URL>/identityiq URL (for example, http://seri.sailpointdemo.com:8080/identityiq).
-
(Optional) In the Name field, enter a name of your choice (for example, SailPoint IdentityIQ).
-
Click Next.
-
-
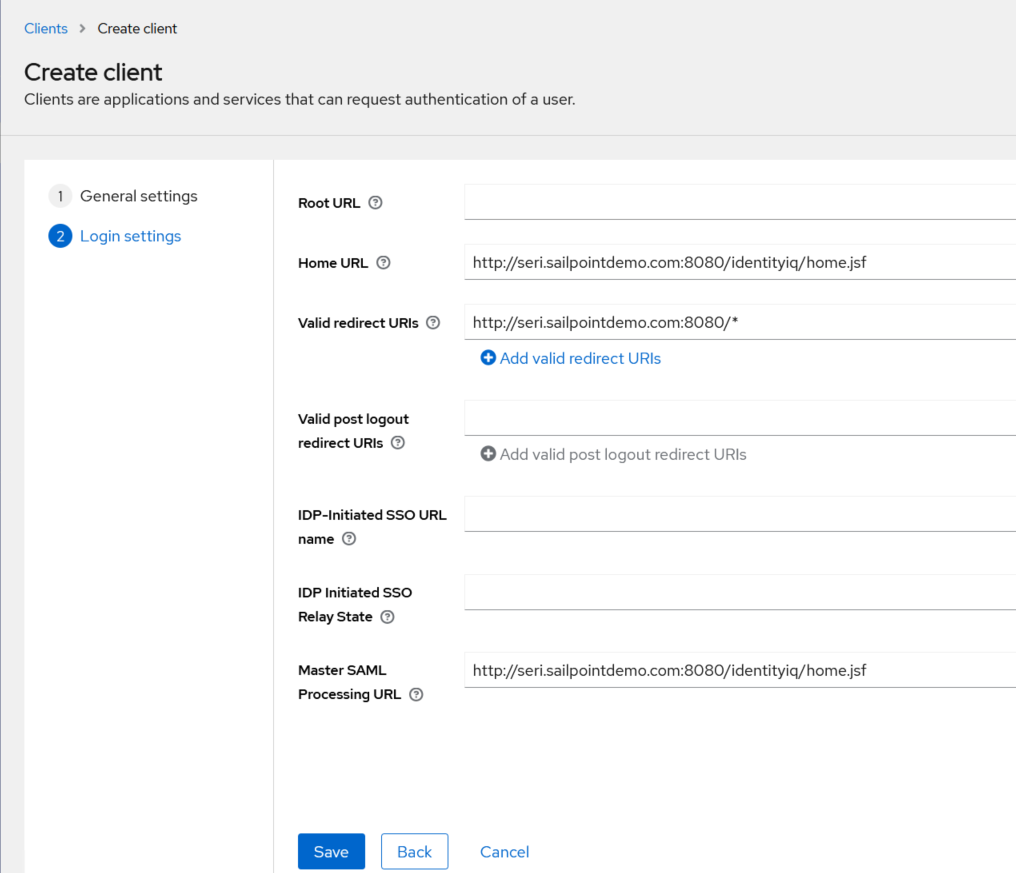
On the Login Settings tab, perform the following steps:
-
In the Home URL field, enter the http://<IIQ server base URL>/identityiq/home.jsf URL (for example, http://seri.sailpointdemo.com:8080/identityiq>/home.jsf).
-
In the Valid redirect URI field, enter the http://<IIQ server base URL>/* URL (for example, http://seri.sailpointdemo.com:8080/*).
-
In the Master SAML Processing URL field, enter the http://<IIQ server base URL>/ identityiq/home.jsf URL (for example, http://seri.sailpointdemo.com:8080/identityiq/home.jsf)
-
Click Save.
-
-
After creating the client, go to the Settings tab, and configure the following parameters:
-
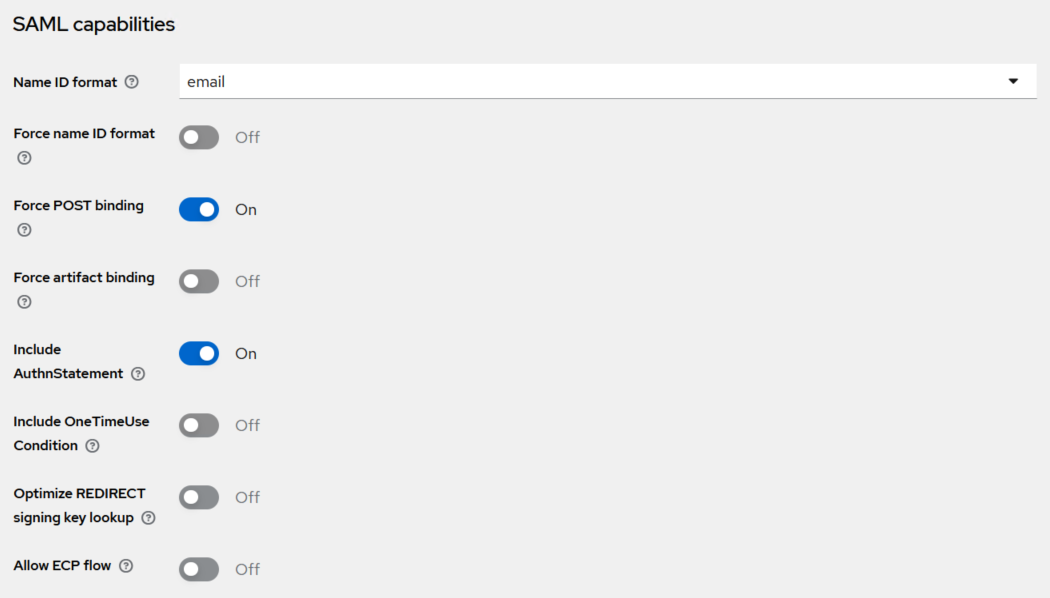
Under SAML Capabilities,
-
In the Name ID format field, select email.
-
Turn On the Force POST binding toggle.
-
Turn On the Include AuthnStatement toggle.
-
-
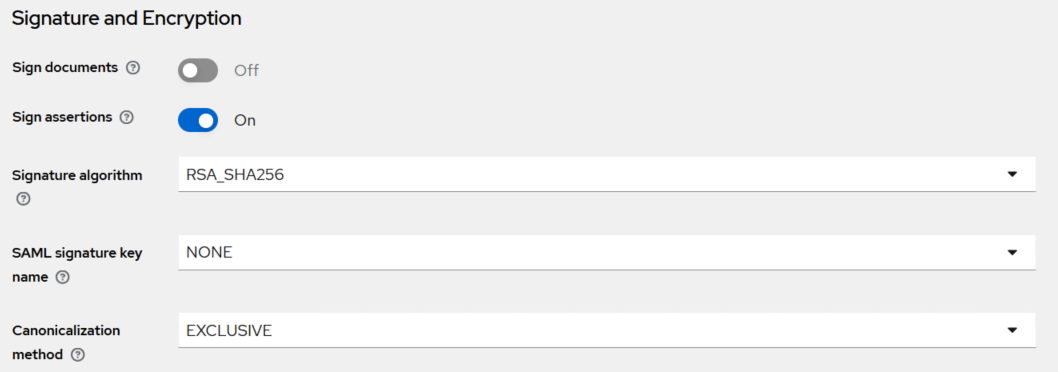
Under Signature and Encryption,
-
Turn On the Sign assertions toggle.
-
In the Signature algorithm field, select RSA_SHA256.
-
-
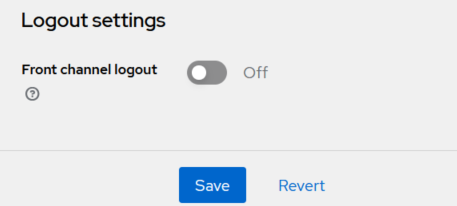
Under Logout settings, turn Off the Front channel logout toggle.
-
-
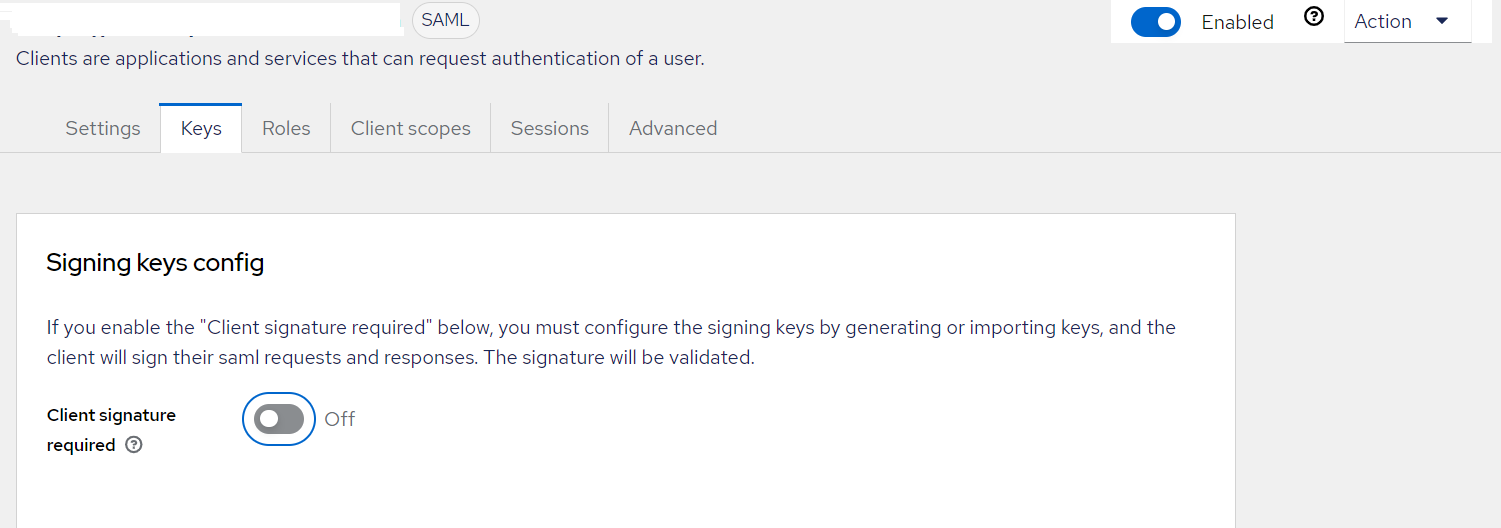
Go to the Keys tab and turn Off the Client Signature required toggle.
-
Go to the Settings tab and click Save to save the configuration.
Adding Return Attributes to Meet MFA Requirements
The following types of user return attributes must be included in SafeNet Access Exchange to meet multifactor authentication (MFA) requirements:
- First Name
- Last Name
- Email Address
Perform the following steps to add the return attributes:
-
Under Client details, go to the Client scopes tab.

-
Under Assigned client scope, click
/identityiq-dedicated (for example, http://seri.sailpointdemo.com:8080/identityiq-dedicated).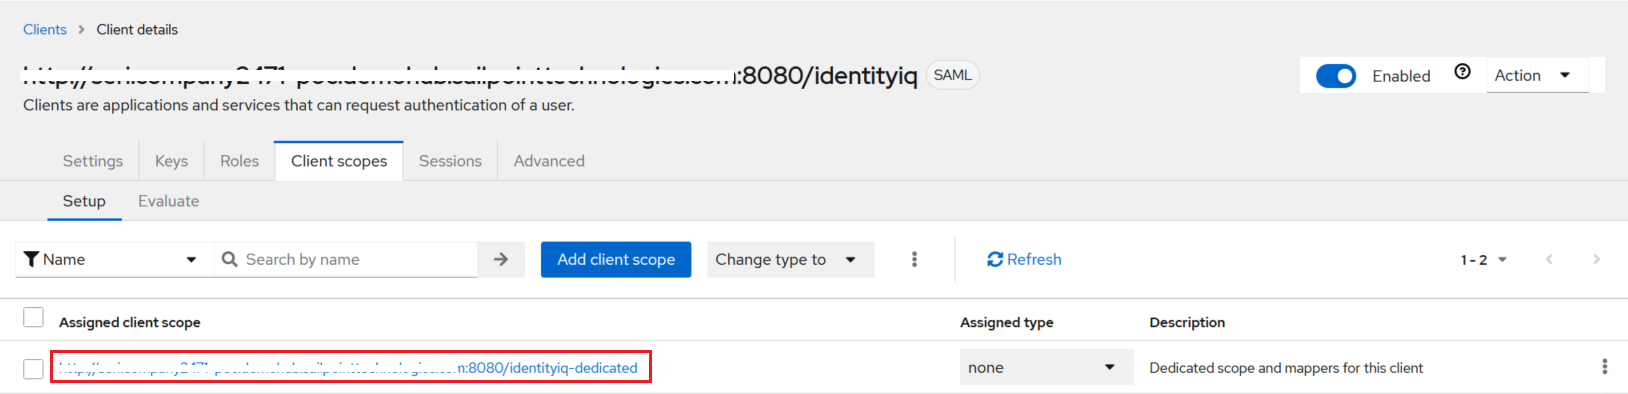
-
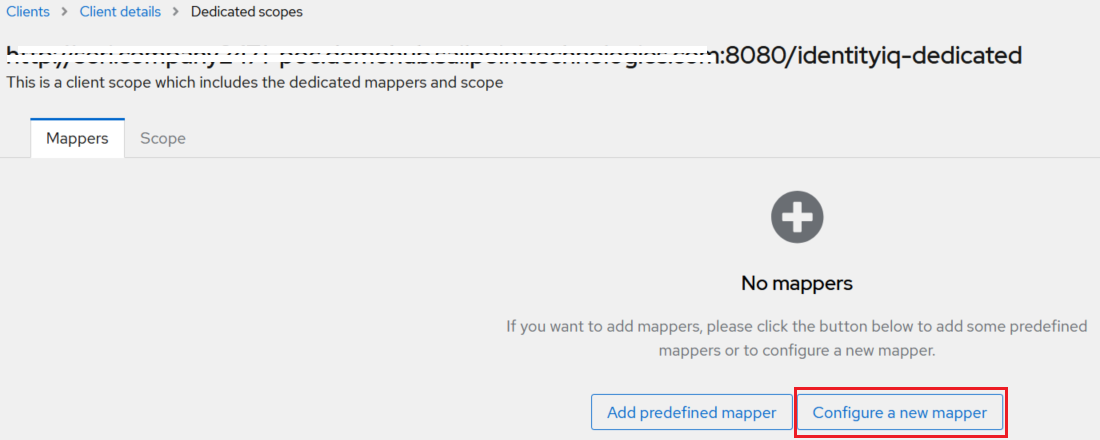
Under Dedicated scopes, on the Mappers tab, click Configure a new Mapper.
-
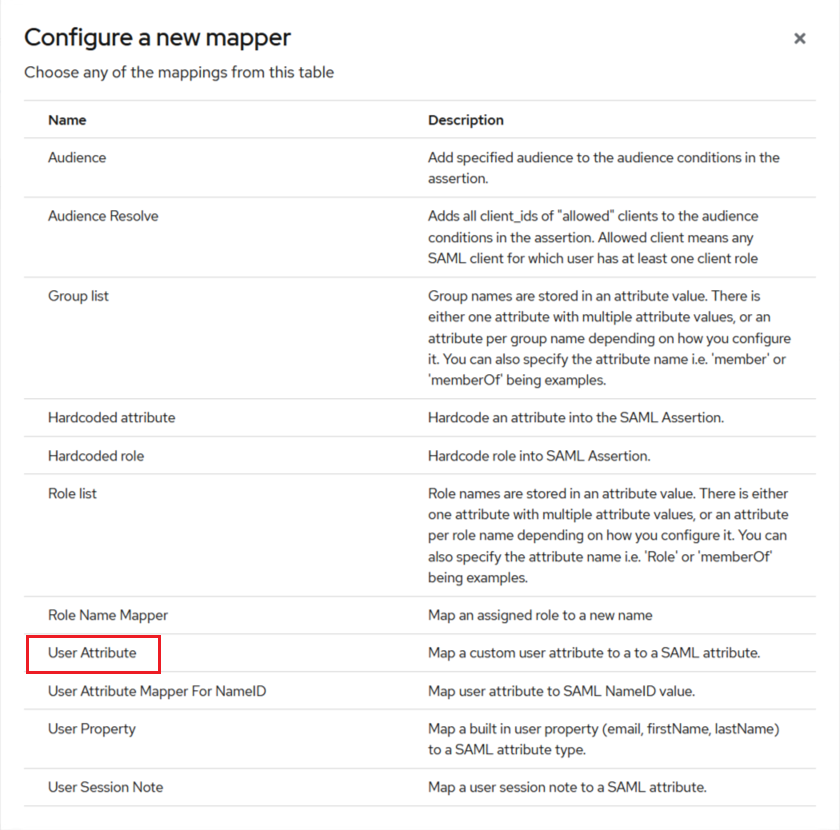
Under Configure a new mapper, click User Attribute.
-
Under Add mapper, update the fields' values as per the table below, and click Save.
Field Value Mapper type User Attribute Name First Name User Attribute First Name Friendly Name First Name SAML Attribute Name firstName SAML Attribute NameFormat Basic 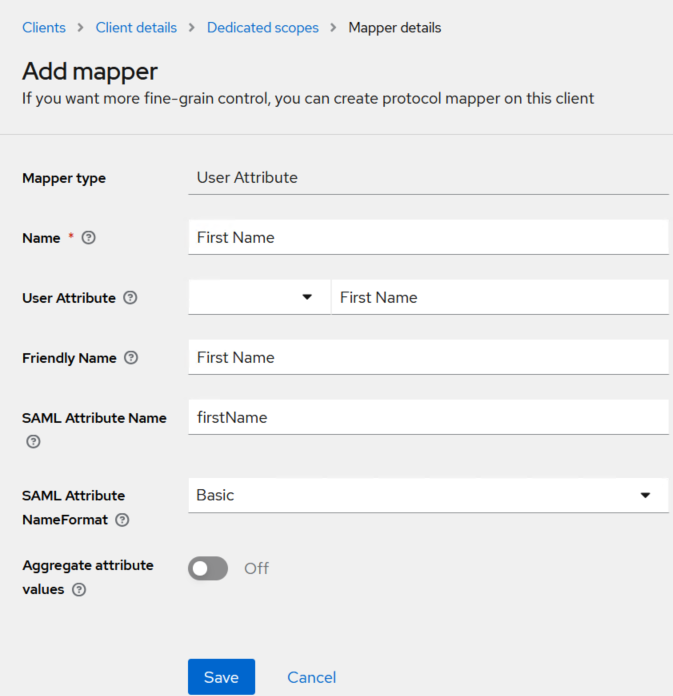
-
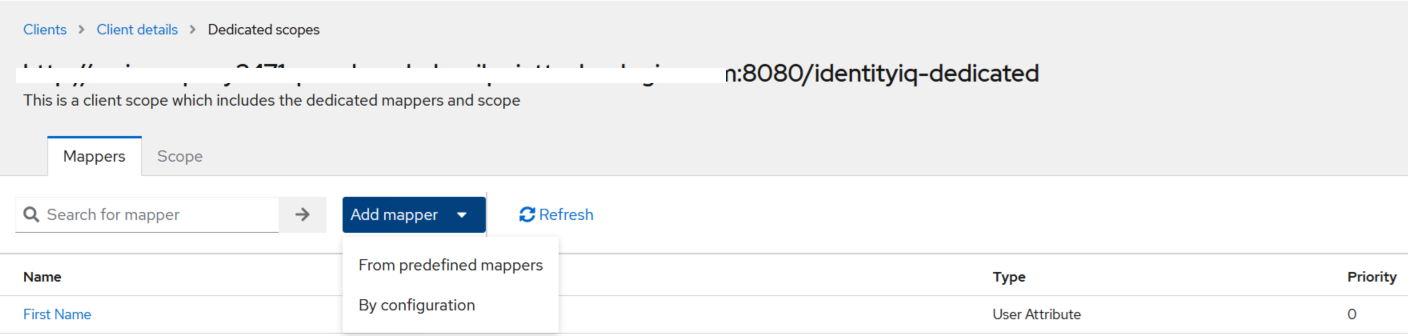
The User Attribute mapper for the First Name return attribute is successfully added.
-
On the Mappers tab, click Add mapper, and select By configuration.
-
Perform the above steps 4 and 5 to add the rest of the two user return attributes, Last Name and Email Address.
Refer to the table below for the corresponding field values needed to add and configure the return attributes.
Mapper type Name User Attribute Friendly Name SAML Attribute Name SAML Attribute NameFormat User Attribute Email Address Email Address Email Address email Basic User Attribute Last Name Last Name Last Name lastName Basic 

