Identity Provider (SafeNet Access Exchange) Setup
Configuring Entra ID as an application in SafeNet Access Exchange requires:
Configuring the SafeNet Access Exchange Realm
Perform the following steps to configure a SafeNet Access Exchange Realm:
-
Log into SafeNet Access Exchange as an administrator and select your desired realm.
Note
If a realm does not exist, create a new one by importing the SafeNetOTP.json file. For steps to create a realm, refer to the Realm creation and authentication flow section.
Caution
When creating a realm, ensure that SafeNet OTP Flow is configured with an Agent BSID Key and a Token Validator URL. If these settings are not configured, refer to the Manual configuration of the realm section before proceeding.
-
In the left pane, click Realm settings, and perform the following steps:
-
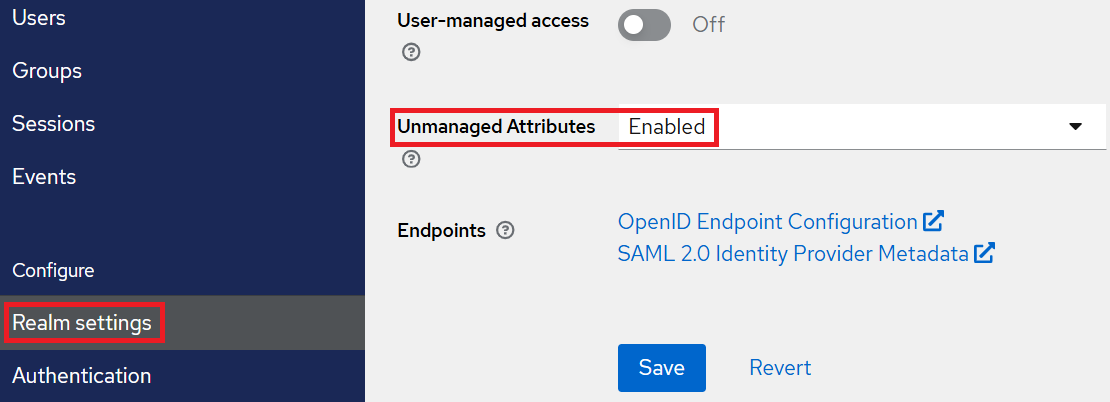
In the right pane, on the General tab, scroll down to Unmanaged Attributes, and set it to Enabled.
-
Click Save.
-
-
Under Endpoints, click on the Open ID Endpoint configuration link.
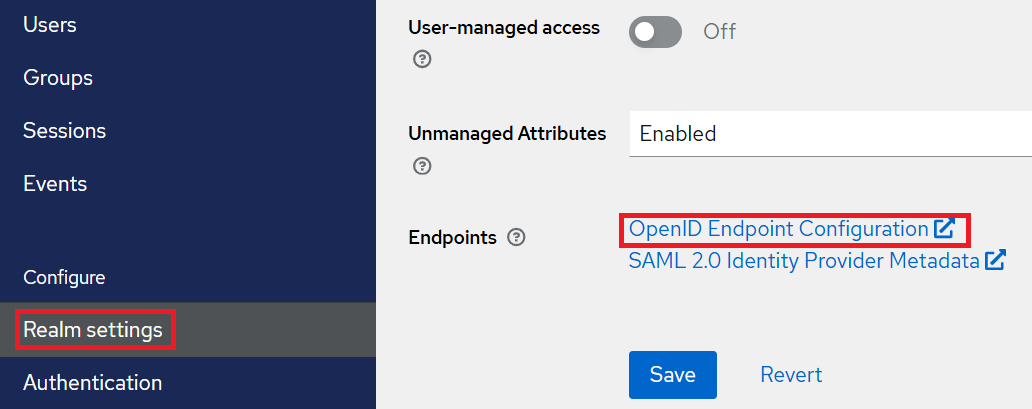
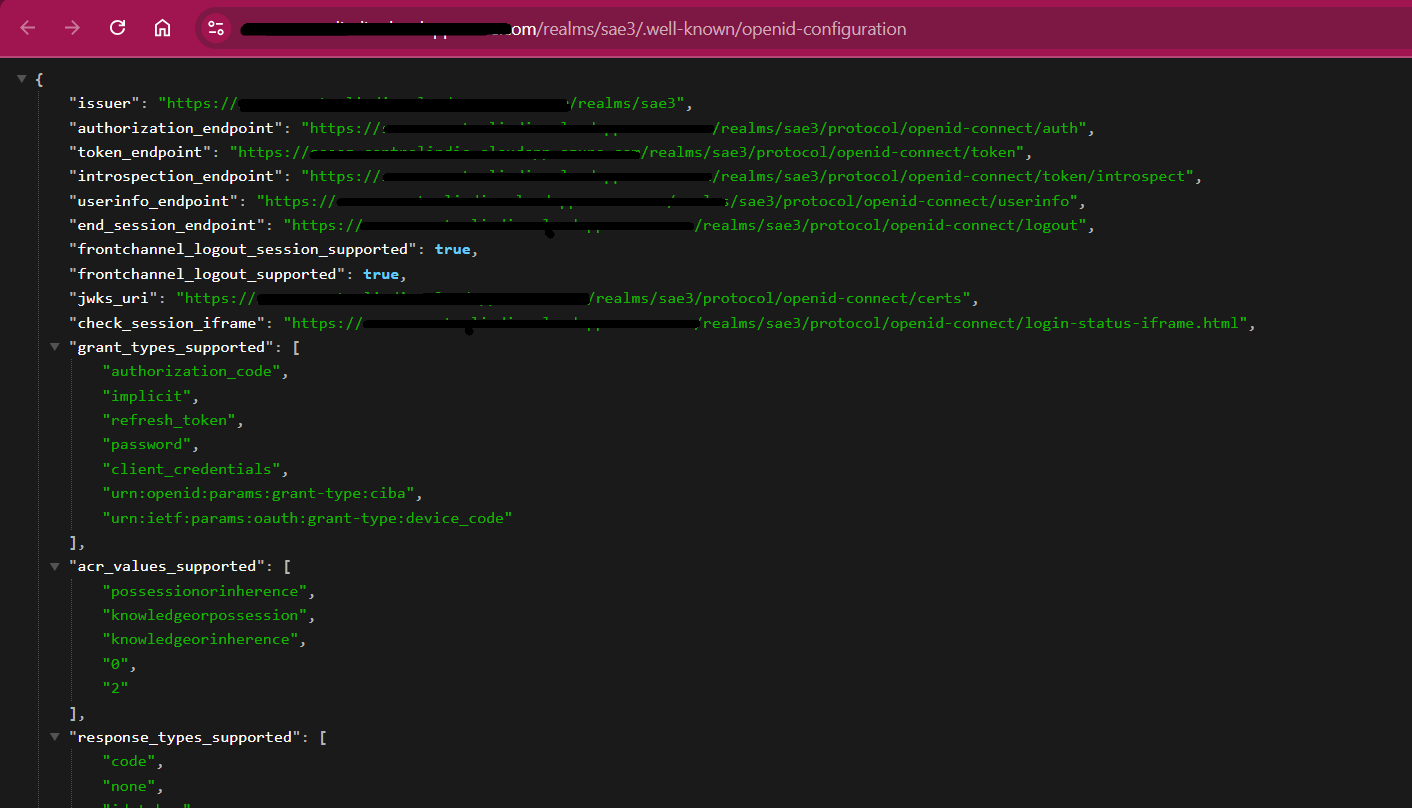
The OIDC discovery endpoint is opened in a new tab.
-
Copy the following values and paste them into a text editor. You will need these values later while configuring Entra ID.
-
OIDC discovery endpoint URL from the address bar.
-
Authorization endpoint from the list of URLs.

-
-
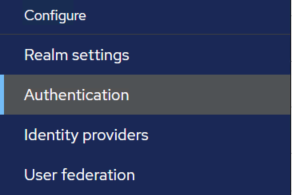
In the left pane, under Configure, click Authentication.
-
In the right pane, go to the Flows tab, and click SafeNet OTP Flow.
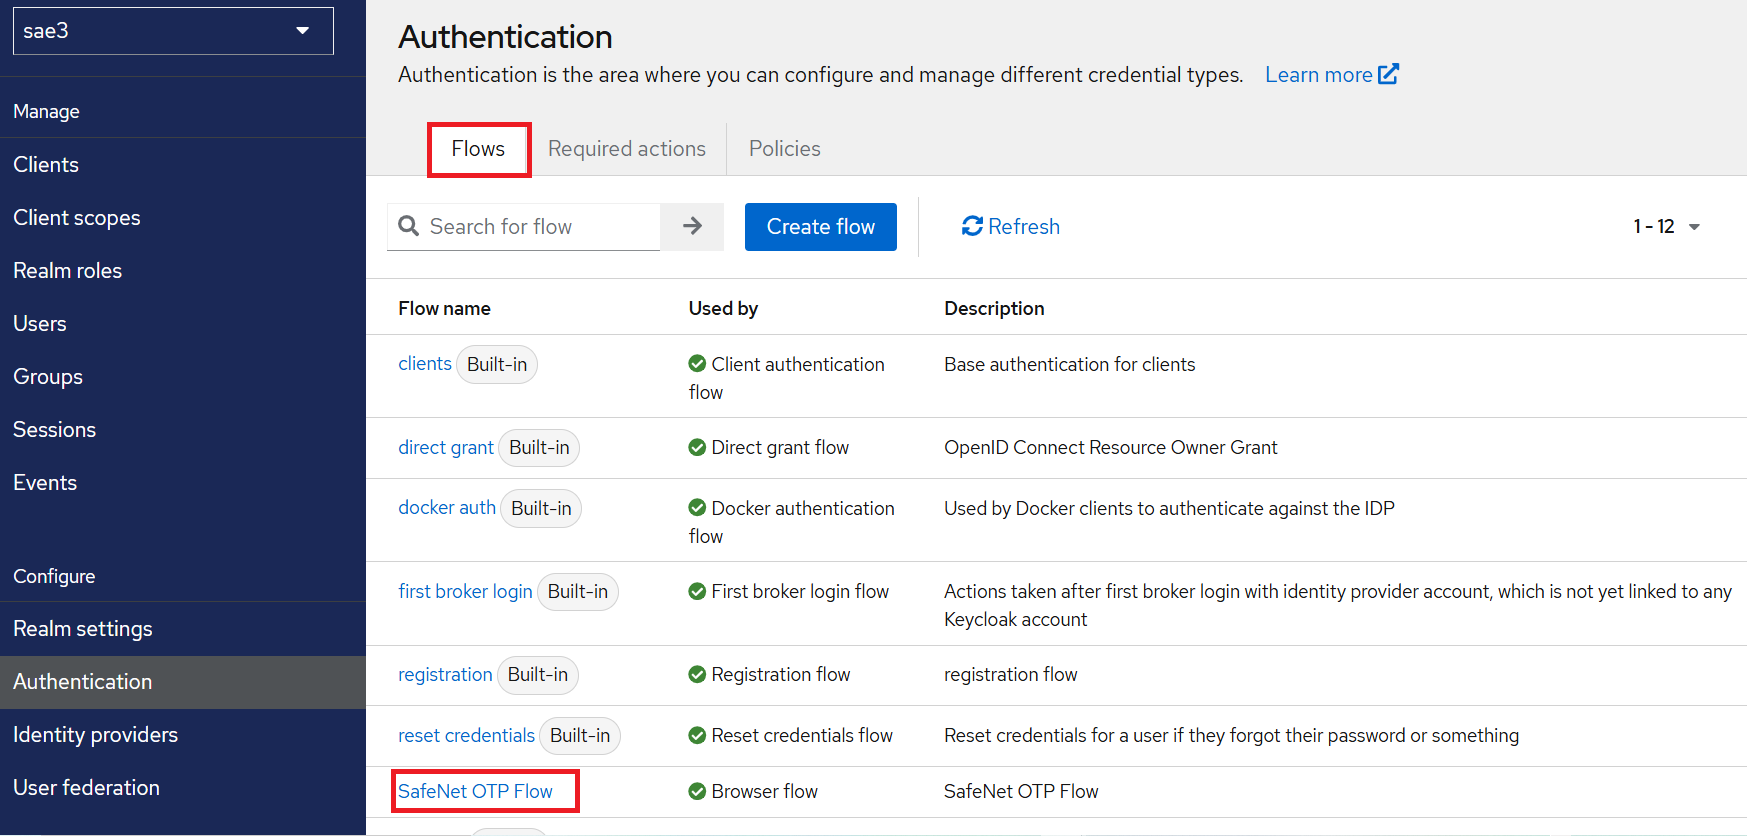
The SafeNet OTP Flow configuration is displayed.
-
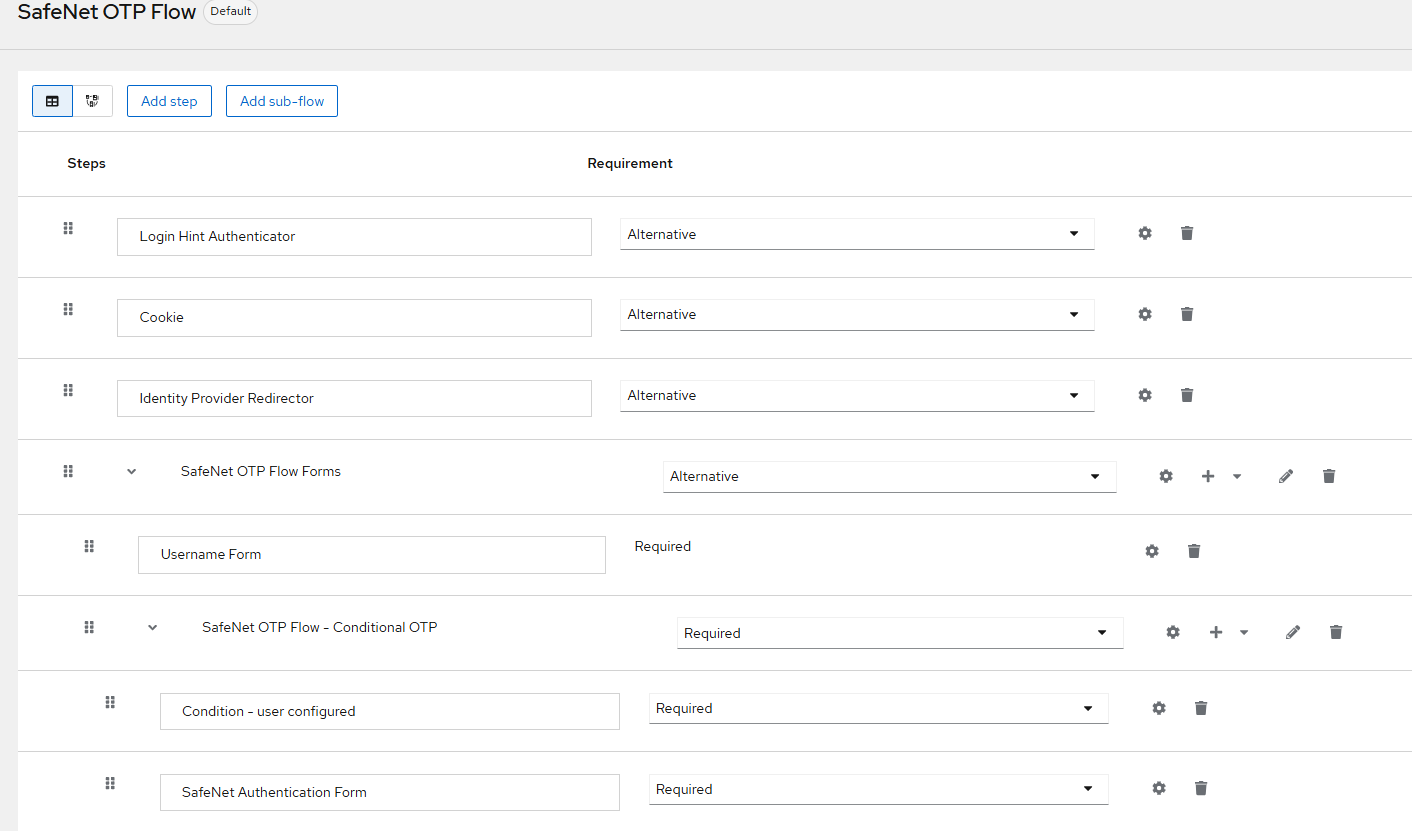
On the SafeNet OTP Flow window, under SafeNet OTP Flow Forms, perform the following steps:
-
For Username Form, click ⚙️.

-
On the Username Form config window, modify the fields' values as given below, and click Save.
Name Value Alias possessionorinherence Authentication Reference possessionorinherence 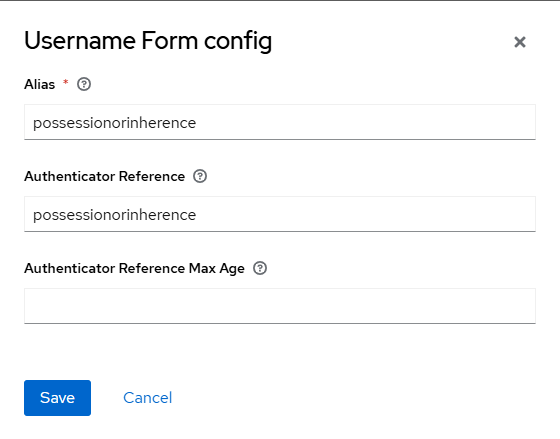
-
-
Next to SafeNet OTP Flow – Conditional OTP, click on the drop-down menu, and select Add condition.

-
Select the Condition – Level of Authentication option and click Add.
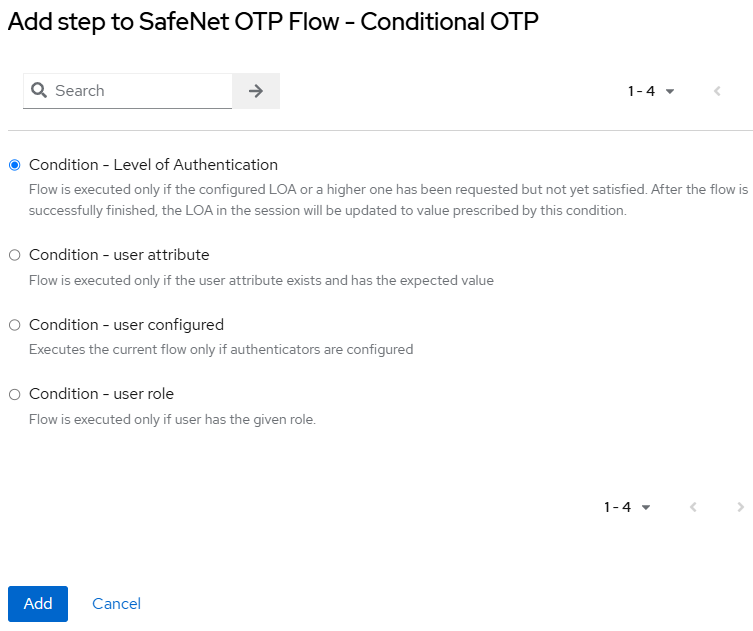
A Condition – Level of Authentication form is added at the end.
-
For Condition – Level of Authentication, click ⚙️.
-
On the Condition- Level of Authentication config window, modify the fields' values as given below, and click Save.
Name Value Alias knowledgeorpossession Authenticator Reference knowledgeorpossession loa-condition-level 2 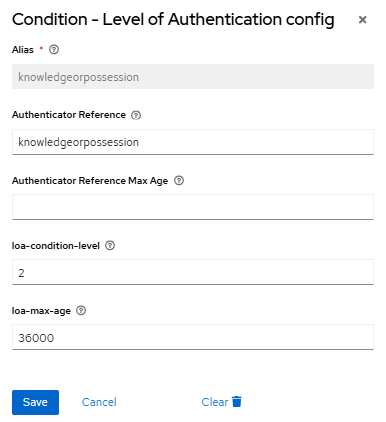
-
Set the newly added Condition -Level of Authentication form to Required. Then, drag and drop the Condition -Level of Authentication form before the SafeNet Authentication Form as shown below.

-
For SafeNet Authentication Form, click ⚙️.
-
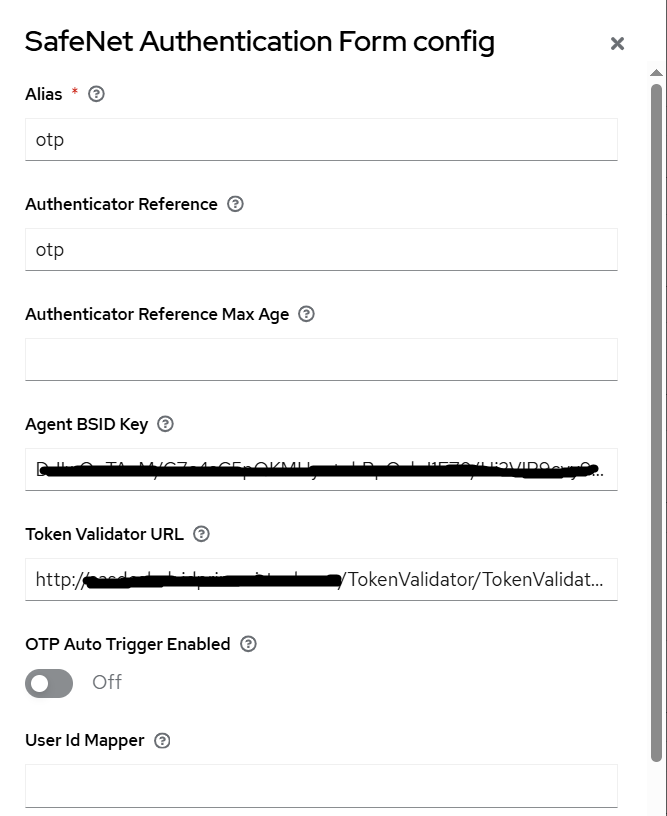
On the SafeNet Authentication Form config window, perform the following steps to modify the fields' values:
-
If the existing Alias is set to other than otp, click Clear at the end of the form window. The form window will be closed.
-
Again, for SafeNet Authentication Form, click ⚙️. Then, on the SafeNet Authentication Form config window, modify the fields' values as given below:
Name Value Alias otp Authenticator Reference otp -
Click Save.
-
Configuring an Entra ID Client
As a prerequisite to configure an Entra ID client in SafeNet Access Exchange, download the entraid_client_cba.zip file on your local machine, and extract the EntraID_Client_CBA.json file from it.
For the non-federated domain use case, perform the following steps to configure an Entra ID client in SafeNet Access Exchange:
-
Log into the SafeNet Access Exchange realm that you configured earlier.
-
In the left pane, under Manage, click Clients.
-
Under Clients, click Import client.

-
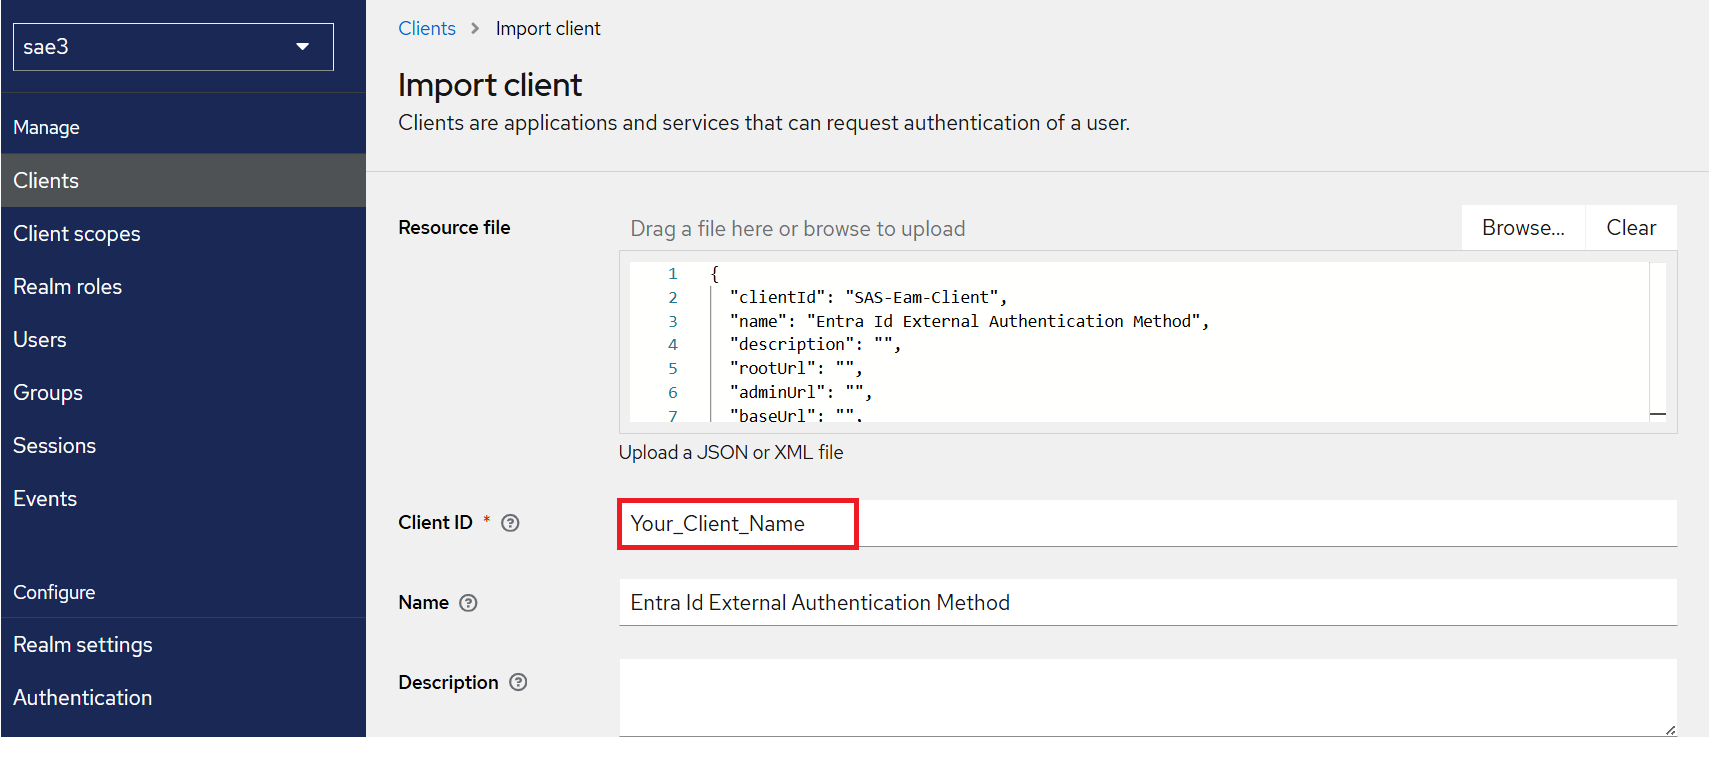
Under Import client, perform the following steps:
-
Under Resource file, click Browse to search and select the EntraID_Client.json file that you obtained as a prerequisite.
-
Modify the Client ID with a client name of your choice.
-
Copy the new client ID and paste it into the text editor. You will need the client ID while configuring Entra ID.
-
Click Save.
Note
For the federated domain use case, an additional client is required to be configured in this realm. Perform the steps given in the Identity Provider (SafeNet Access Exchange) Setup section to configure the additional client.
-
-
Under your client (for example, Your_Client_Name), perform the following steps:
-
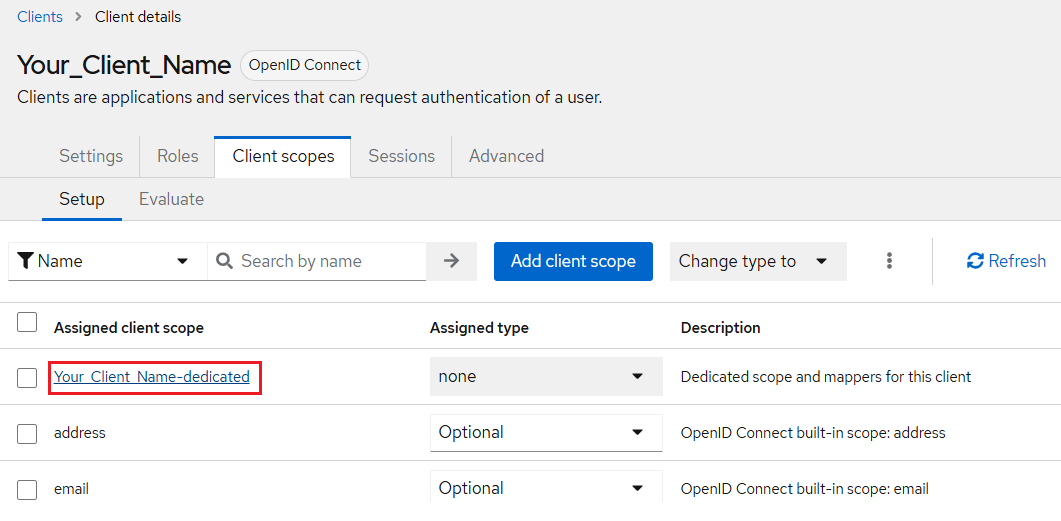
Go to the Client Scopes tab.

-
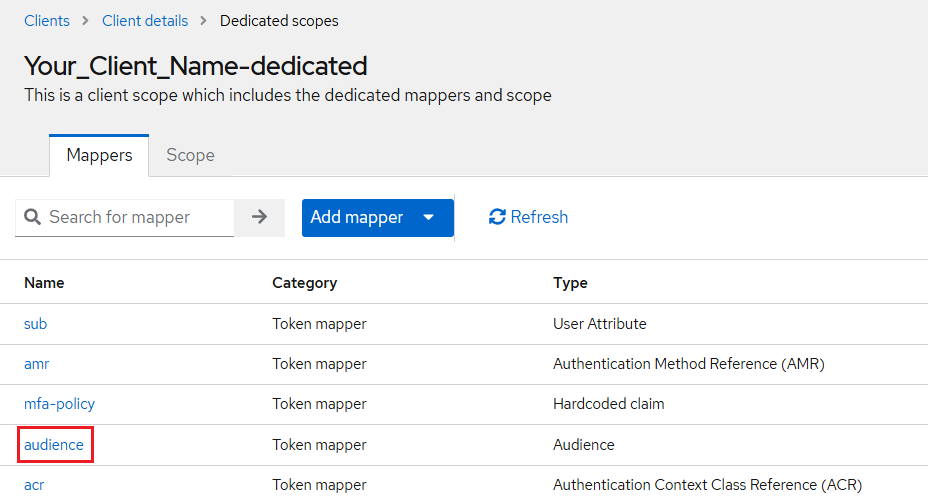
On the Client Scopes tab, under Assigned client scope, click on your client scope (for example, Your_Client_Name-dedicated).
-
Under your client scope (for example, Your_Client_Name-dedicated), on the Mappers tab, under Name, click audience.
-
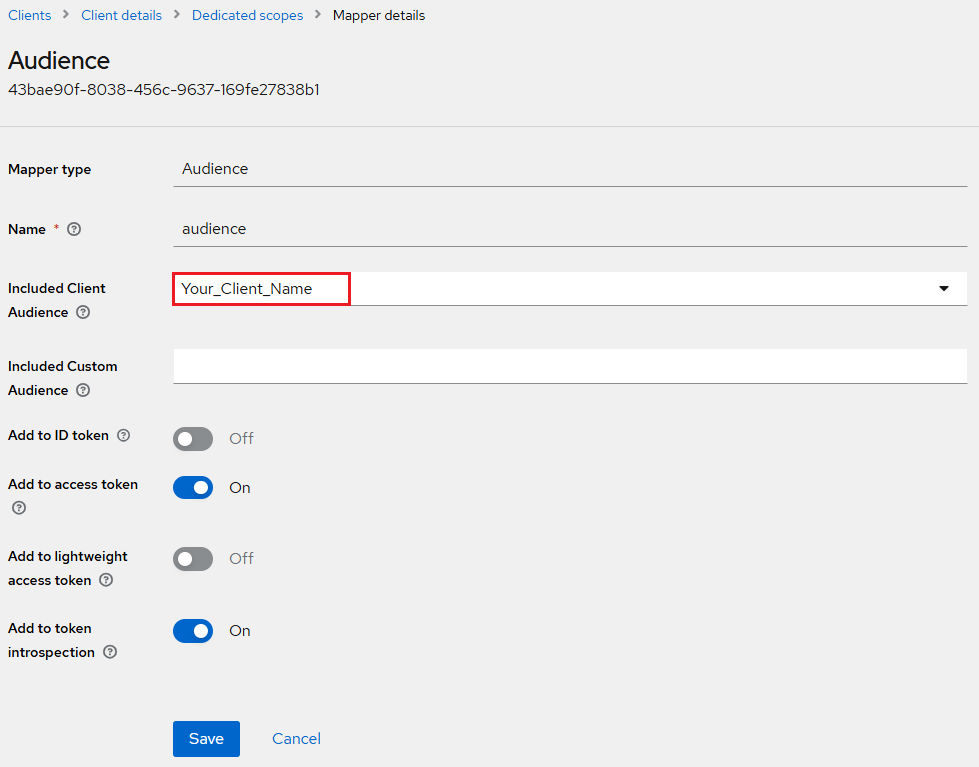
Under Audience, in the Included Client Audience field, enter your client name (for example, Your_Client_Name) that you added previously.
-
Click Save.
-
-
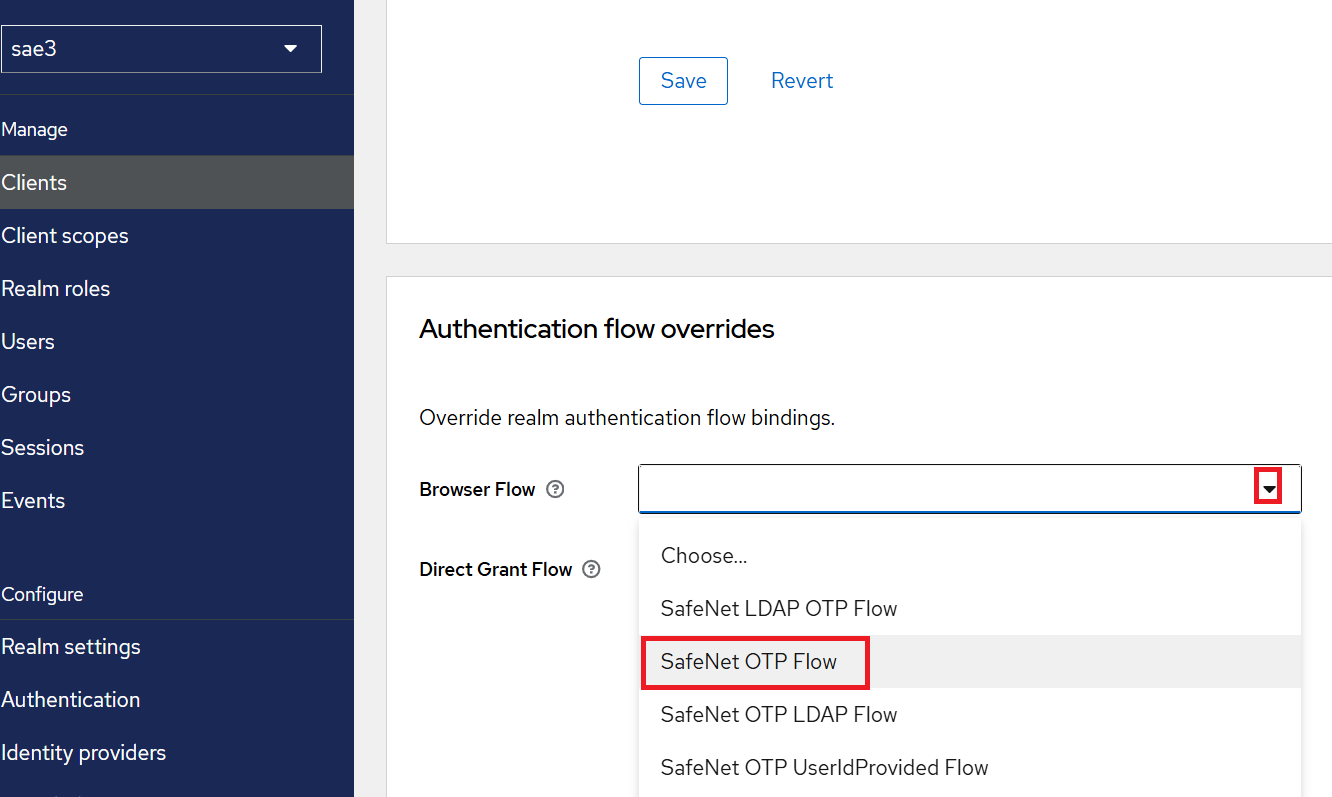
(Optional) Under Clients, select Advanced, scroll down to Authentication flow overrides, and select SafeNet OTP Flow.
-
Click Save.

