Microsoft Entra ID Setup
Configuring Entra ID requires:
Registering an Application and Setting up its Permissions
Perform the following steps:
-
Log into the Microsoft Entra ID Admin Centre as a Cloud Application Administrator.
-
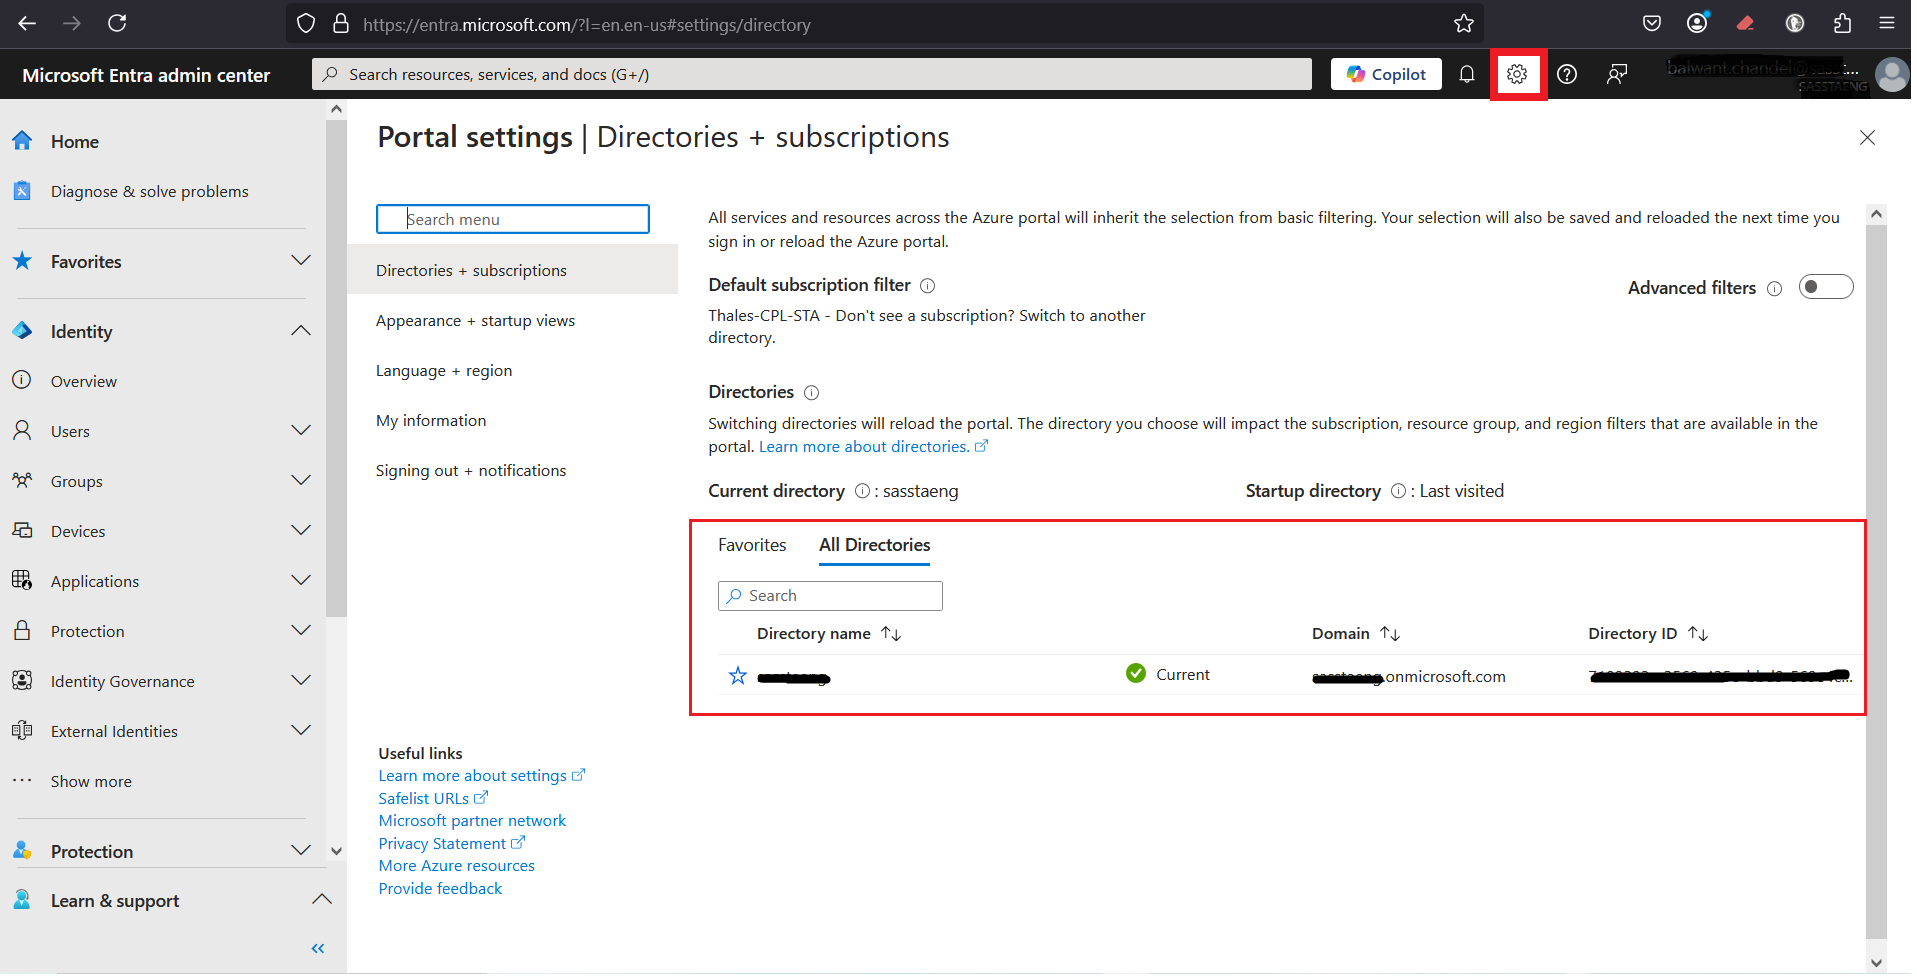
If you have access to multiple tenants, switch to the correct tenant by performing the following steps:
-
On the Microsoft Entra admin center, click on the Settings icon
 , and on the All Directories tab, select the directory you want to switch to.
-
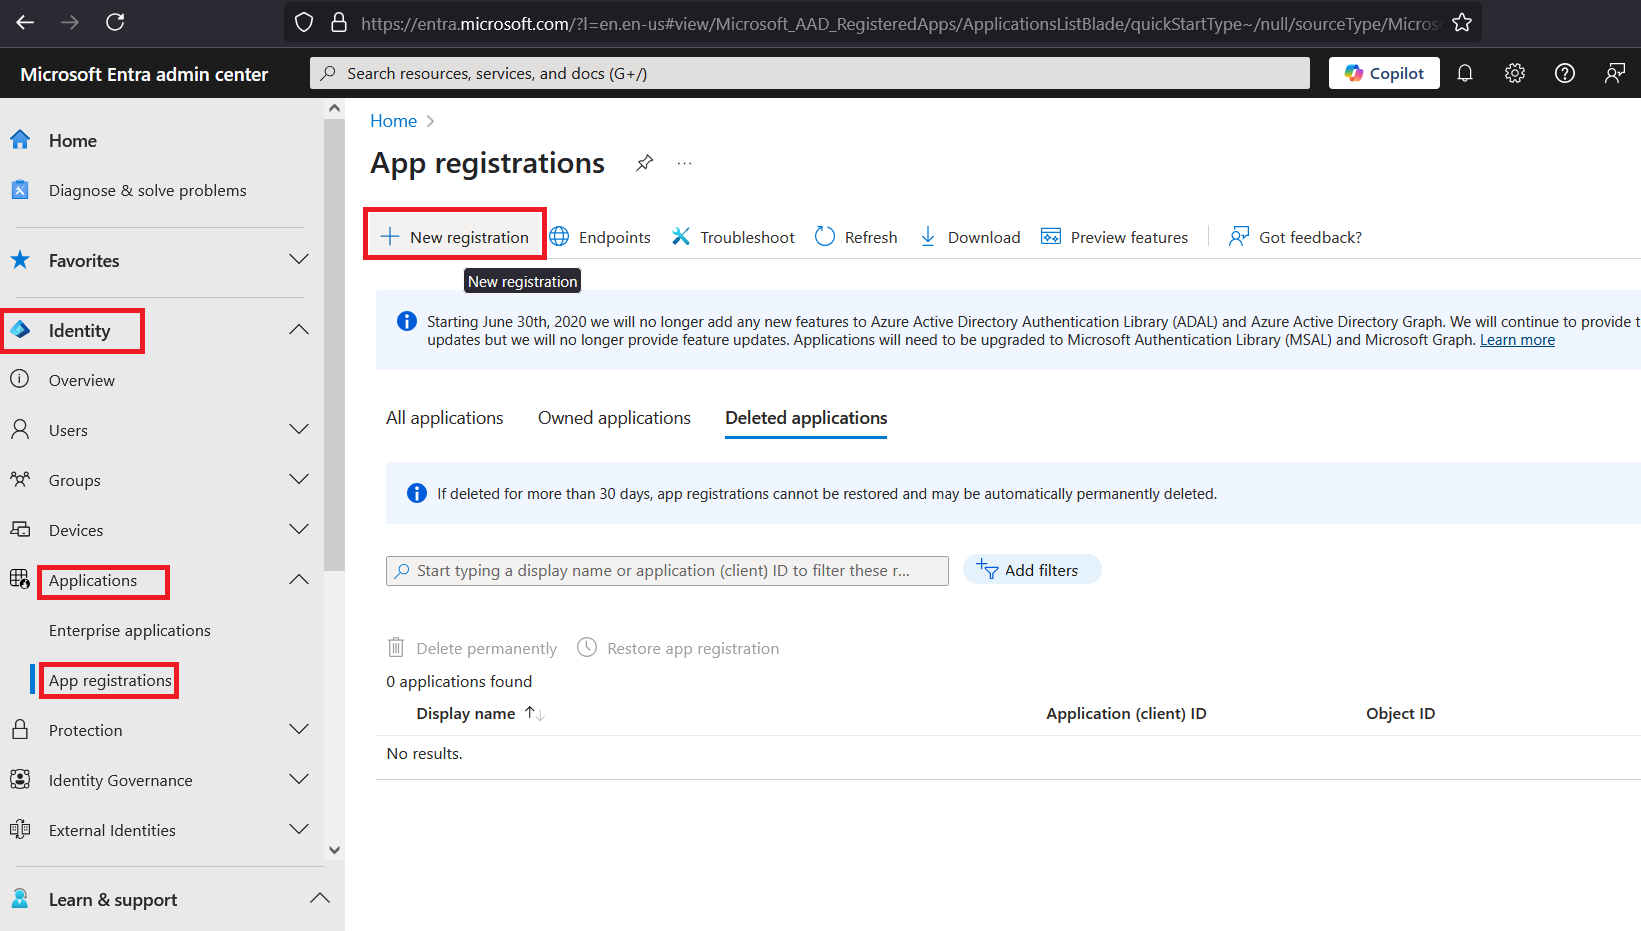
In the left pane, click Identity > Applications > App registrations, and in the right pane, click New registration.
-
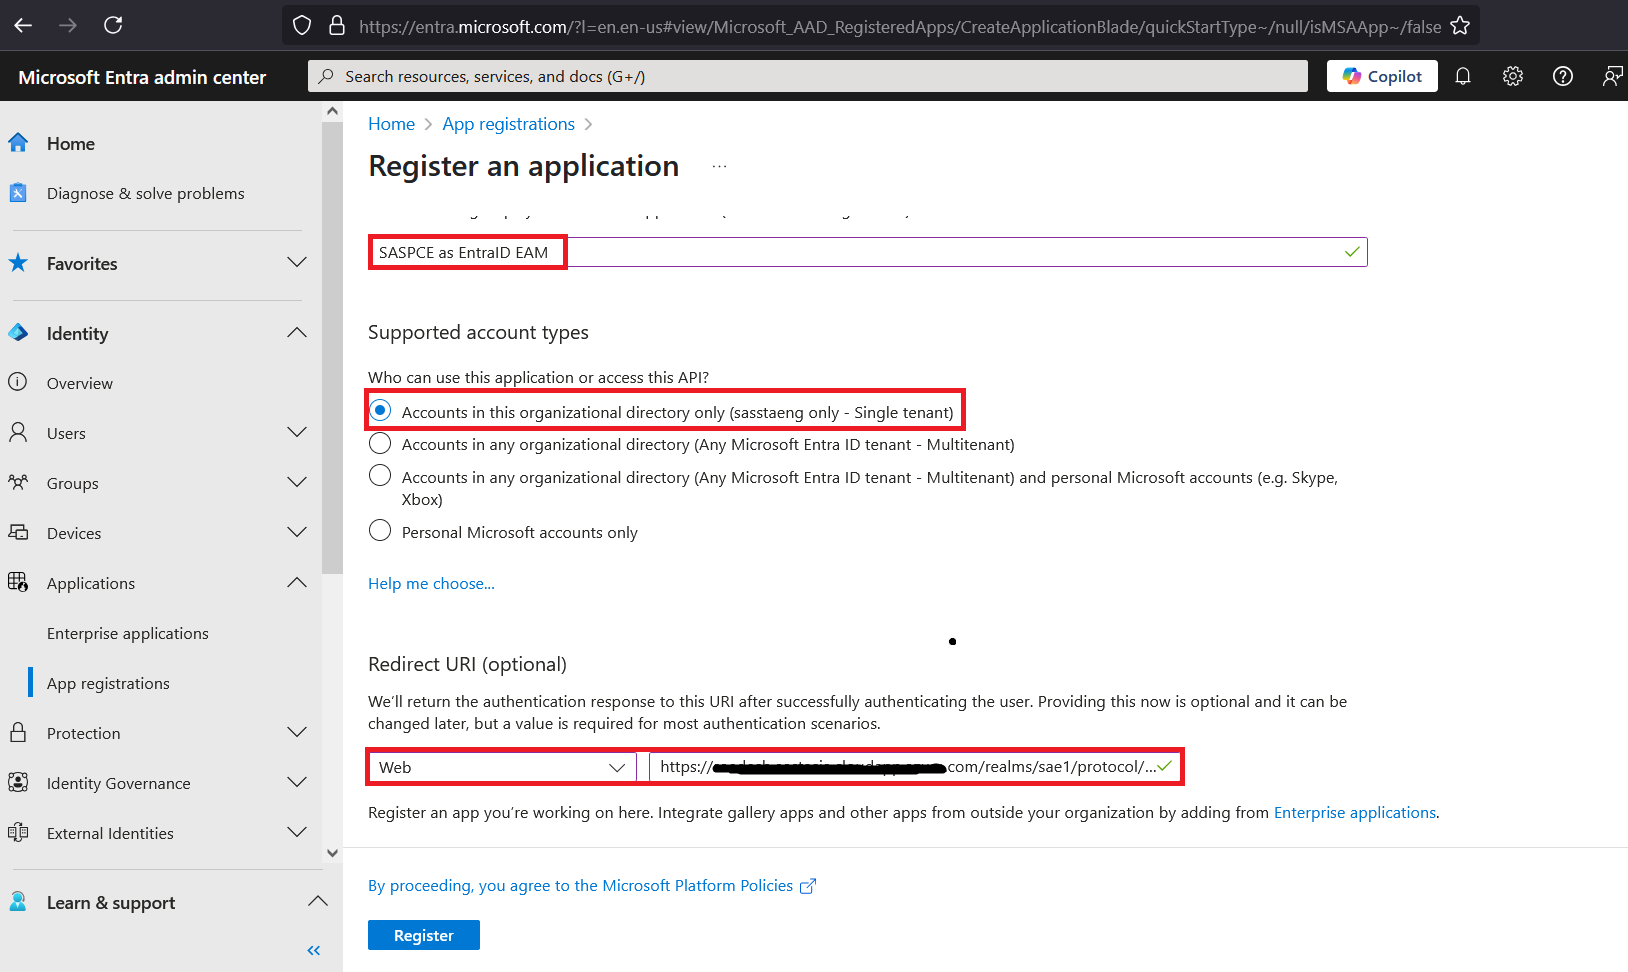
In the right pane, under Register an application, perform the following steps:
-
Enter a display name for your application (for example, SASPCE as EntraID EAM).
-
Under Supported account types, select the Accounts in this organizational directory only (
only - Single tenant) option. -
Under Redirect URI (optional), from the drop-down list, select Web and in the field, paste the authorization endpoint that you obtained in Step 4 of the Configuring the SafeNet Access Exchange Realm section.
-
Click Register.
-
-
-
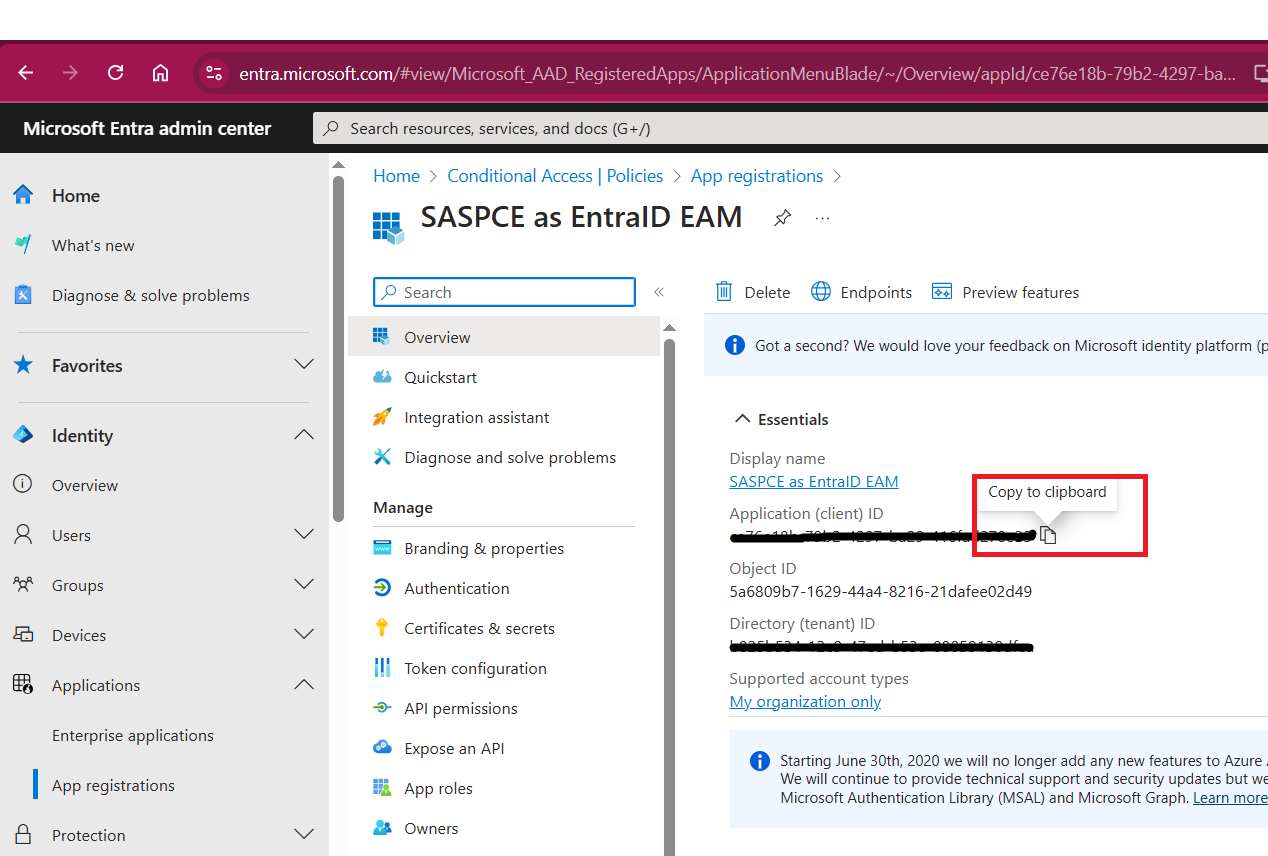
Under the Overview section of the newly added application, copy the Application (client) ID and paste it in a text editor. You will need the application ID while configuring Entra ID.
-
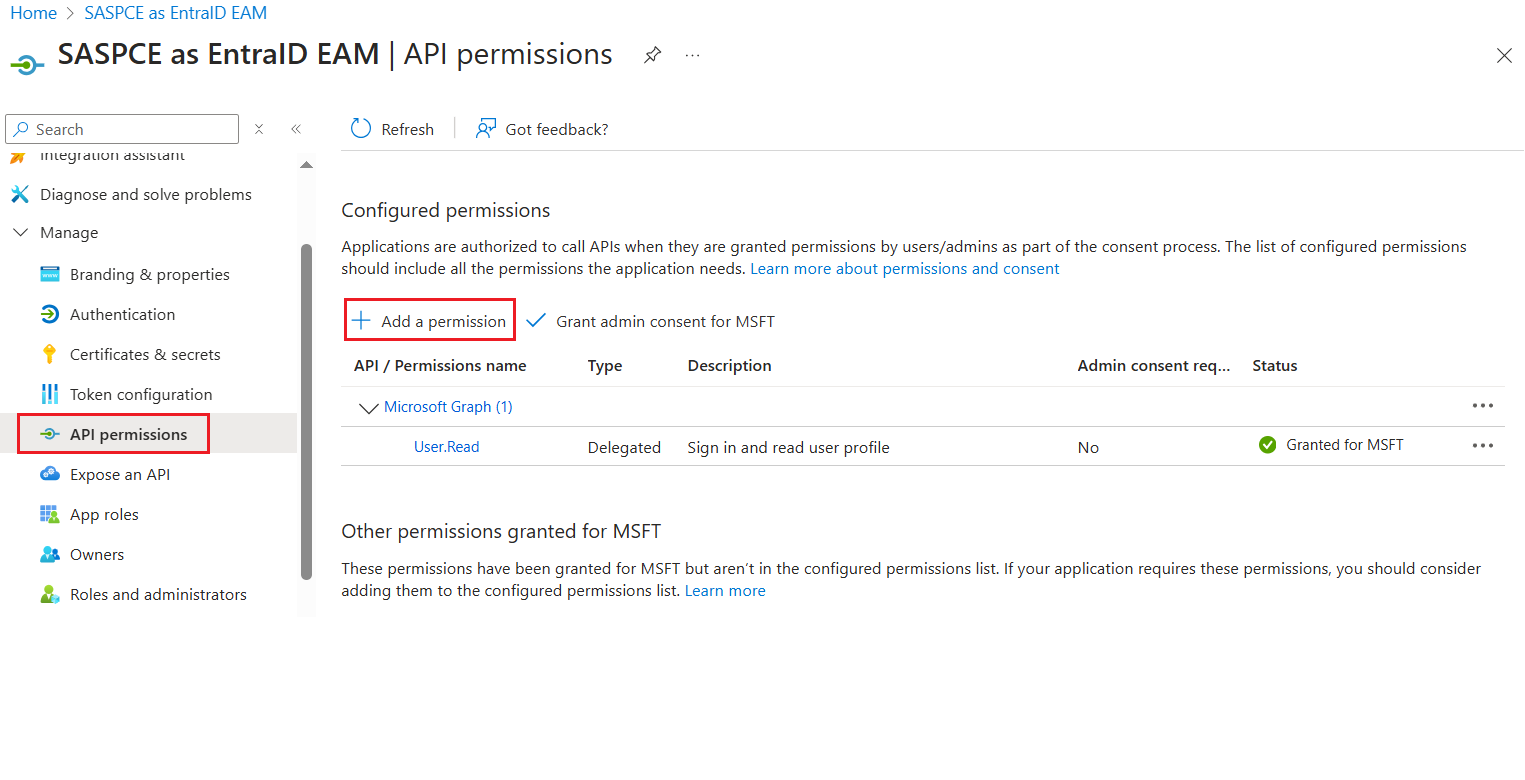
In the left pane, under Manage, click API permissions.
-
In the right pane, perform the following steps:
-
Under Configured permissions, click Add a permission.
-
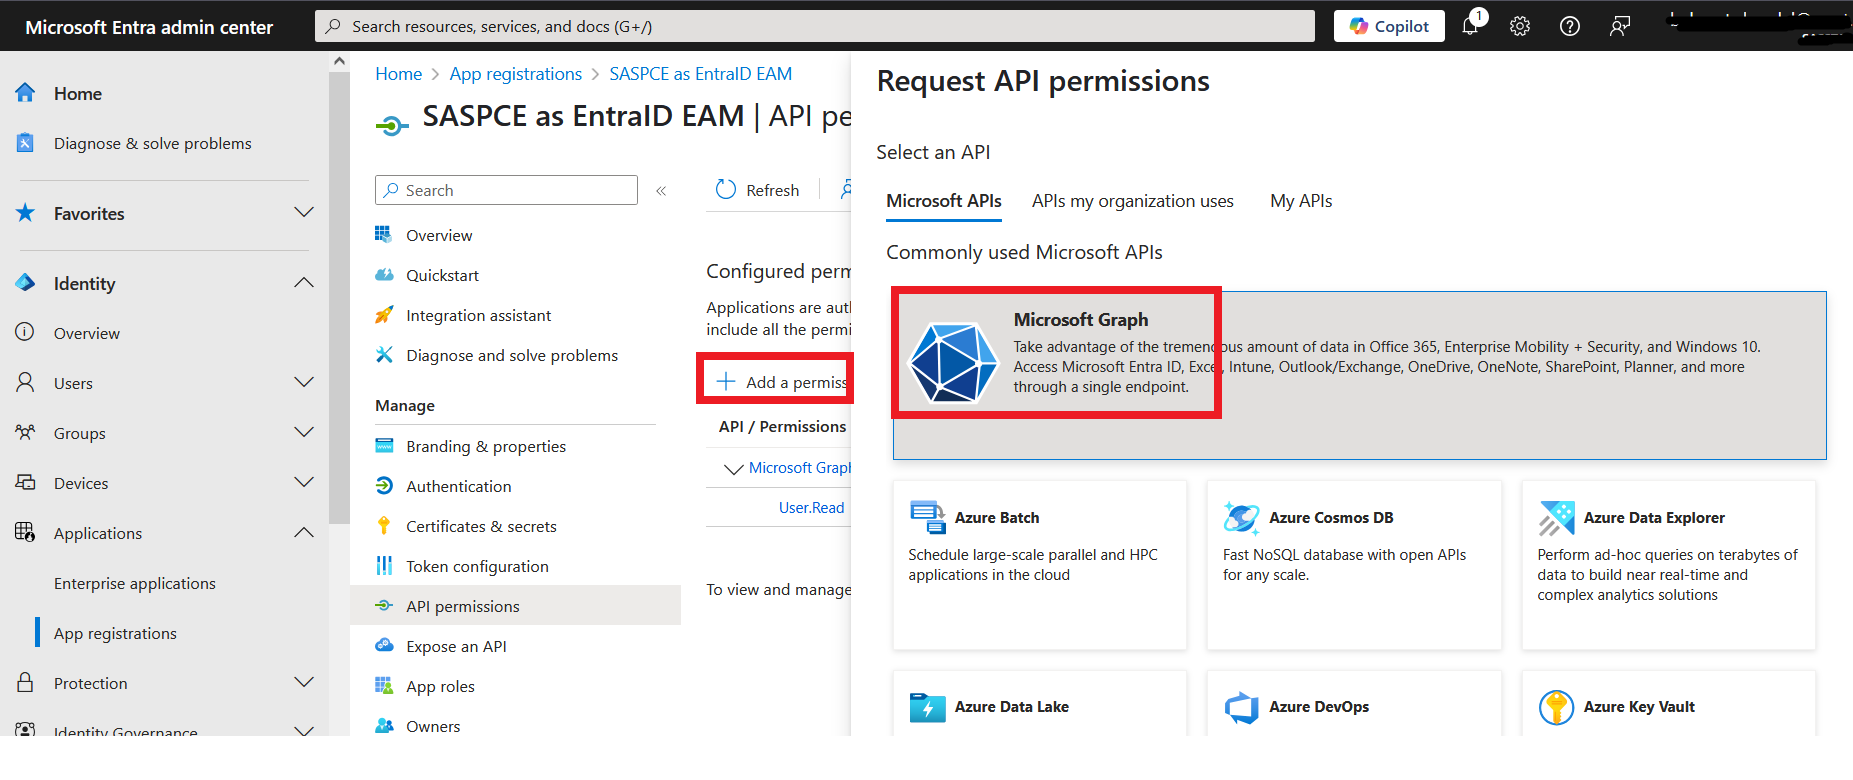
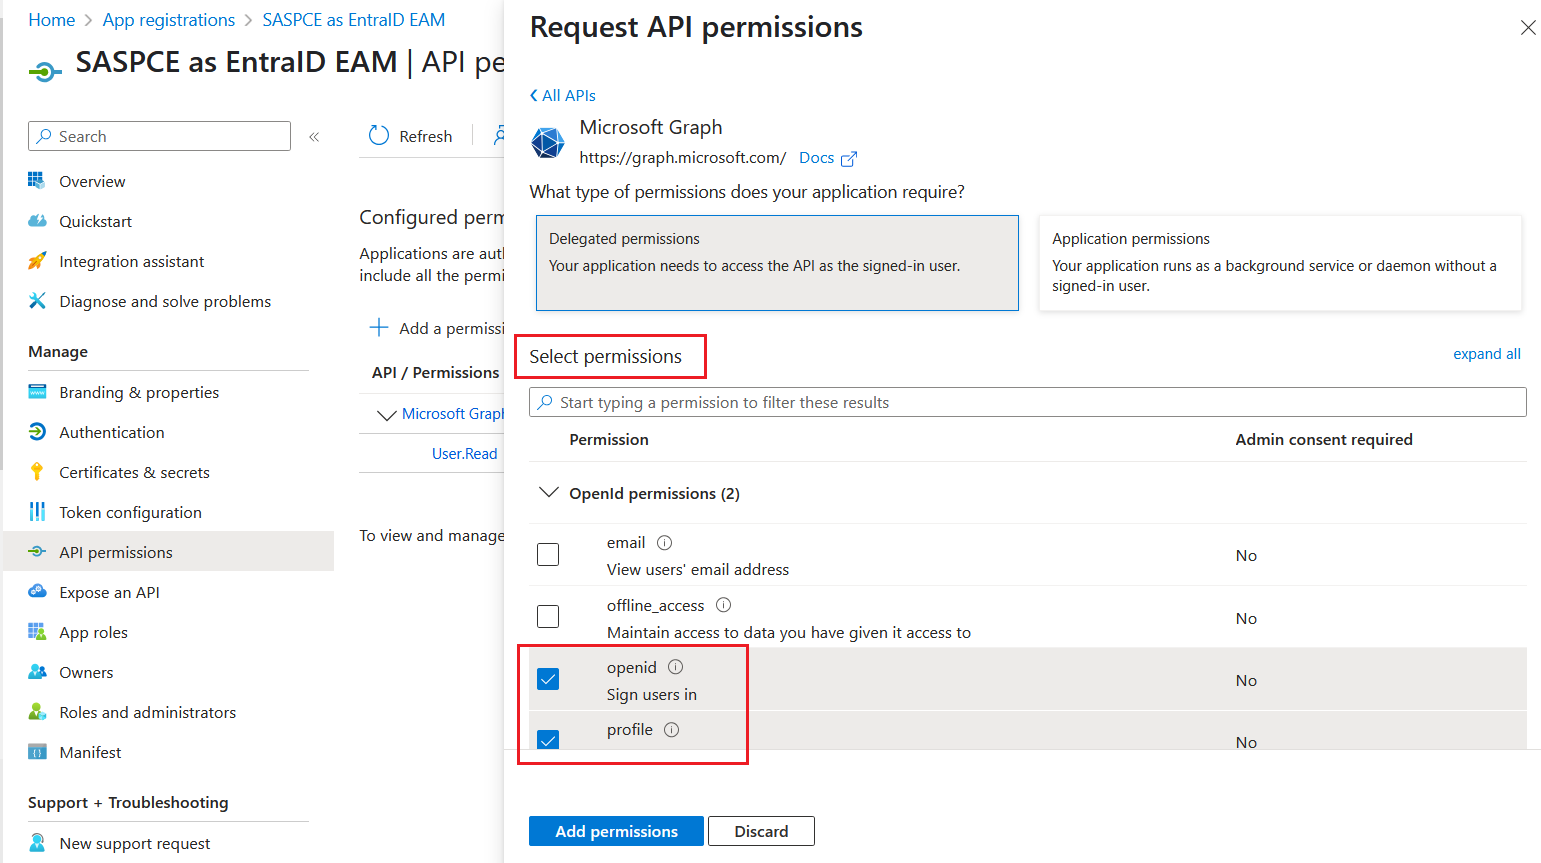
On the Request API permissions window, on the Microsoft APIs tab, select the Microsoft Graph tile.
-
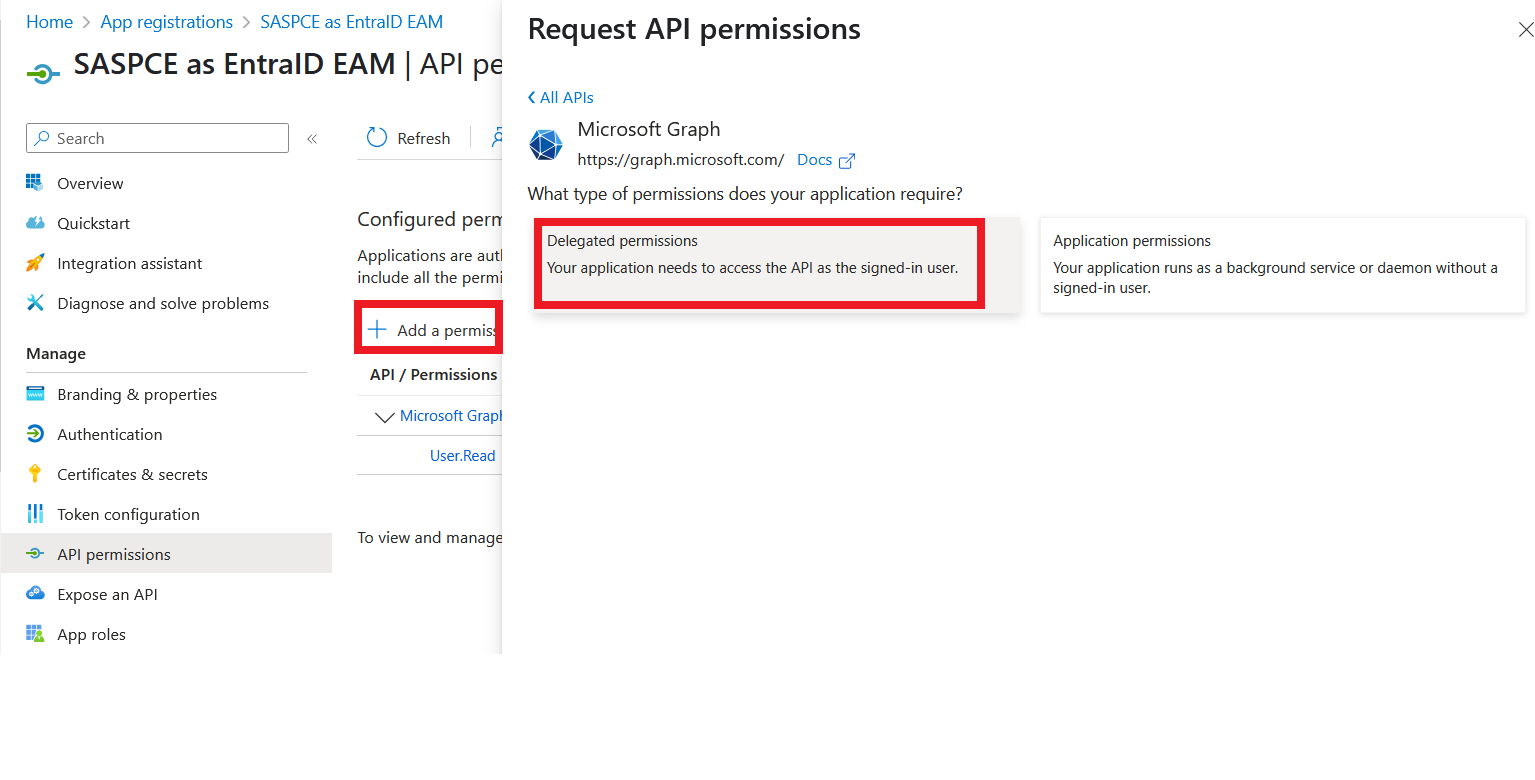
Under Microsoft Graph, select the Delegate permissions tile.
-
Under Select permissions, search and select the following permissions, and click Add permissions.
-
User.Read
-
openid
-
profile
Click here for more information on permissions.
-
-
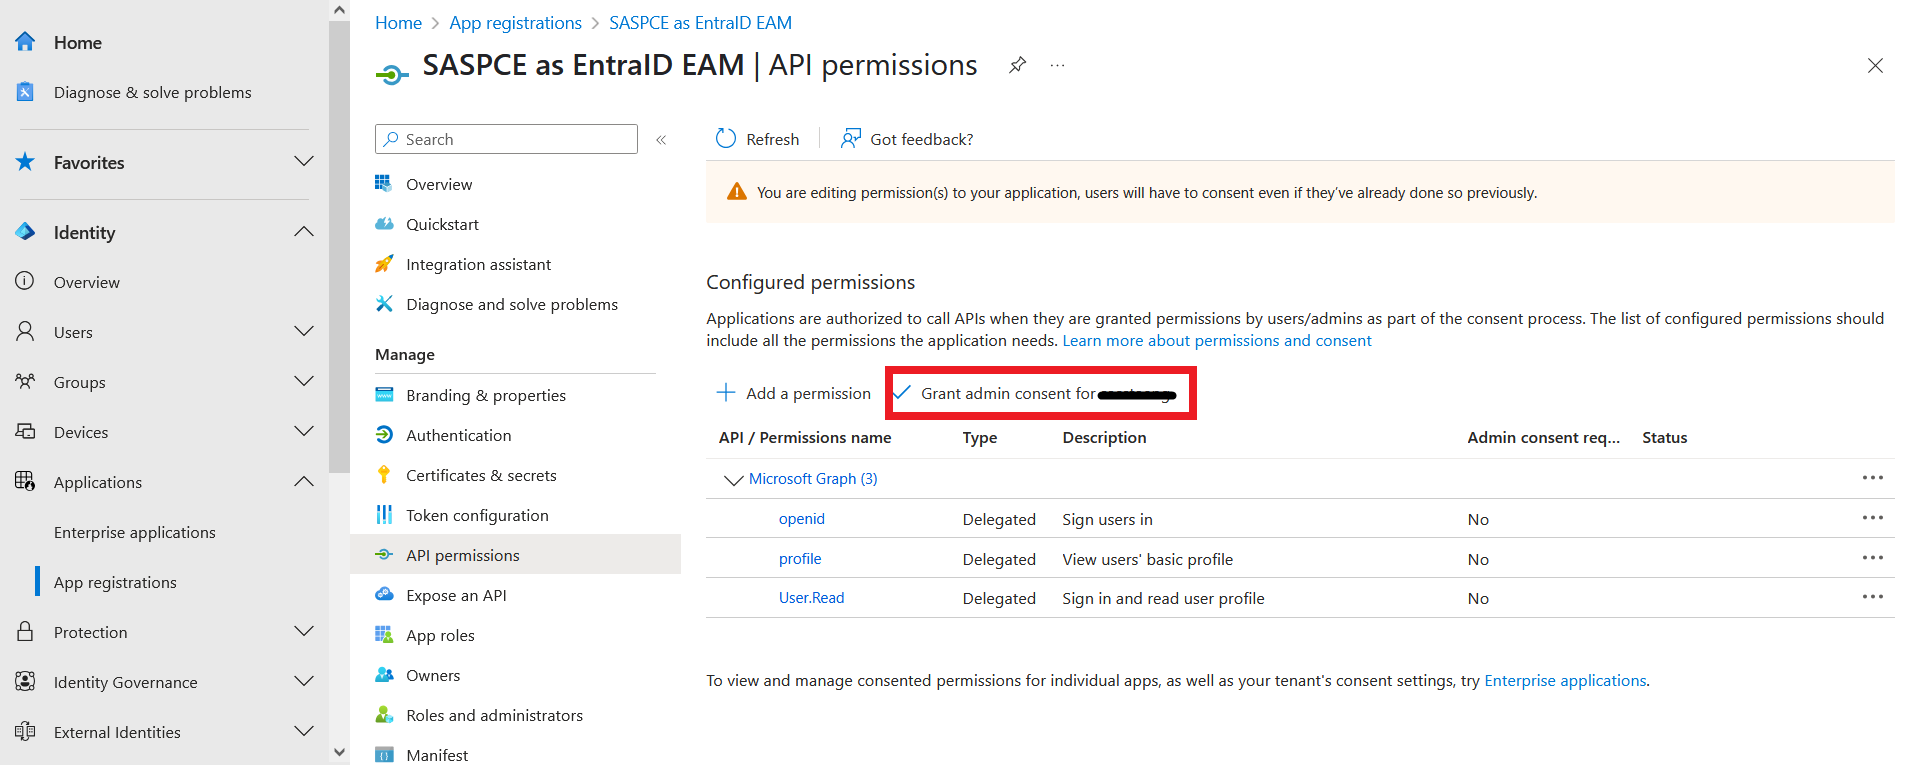
Click Grant admin consent for <tenant_name>.
-
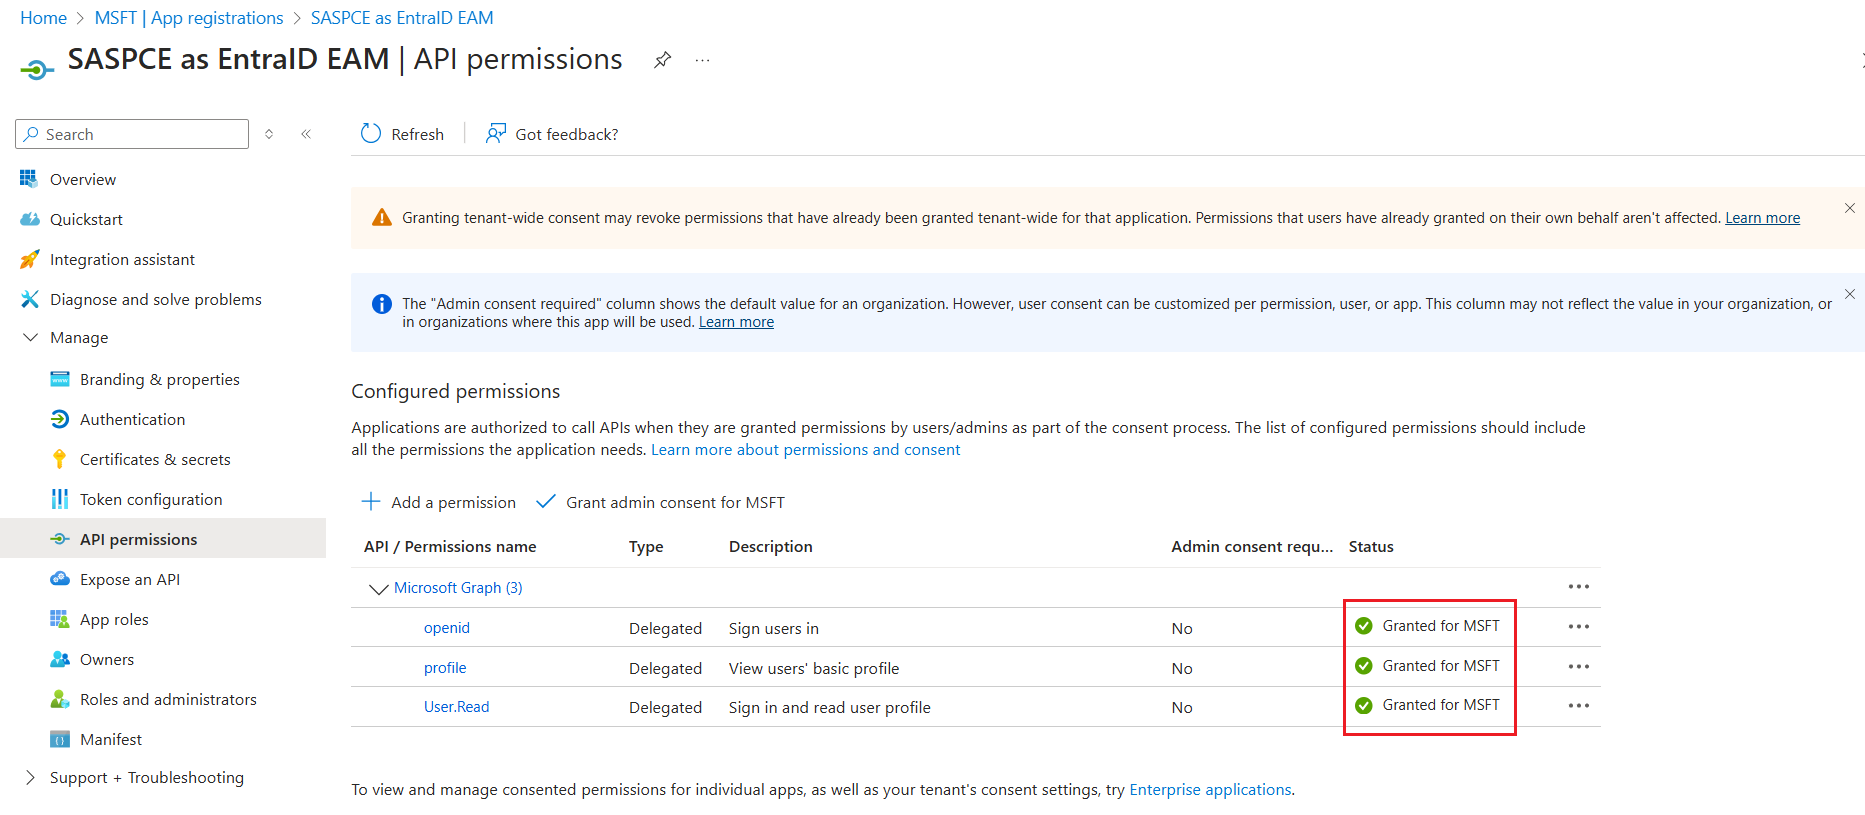
Under Grant admin consent confirmation, click Yes. The permissions' Status will be changed to Granted.
-
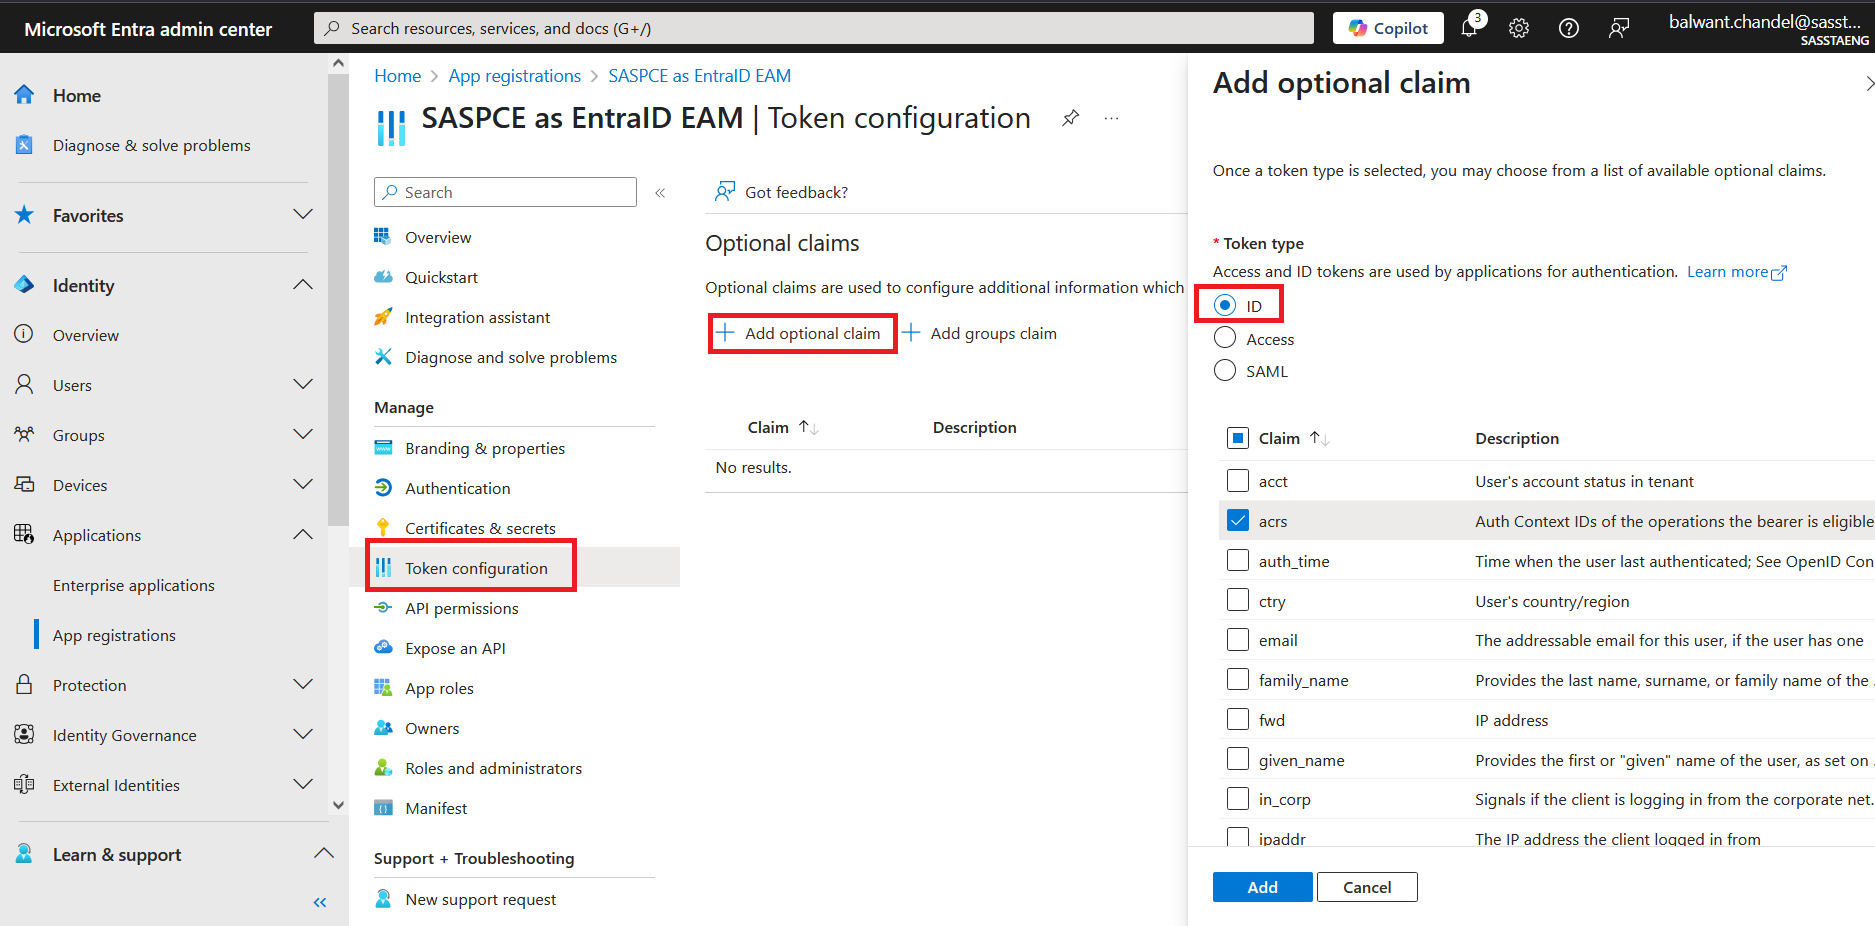
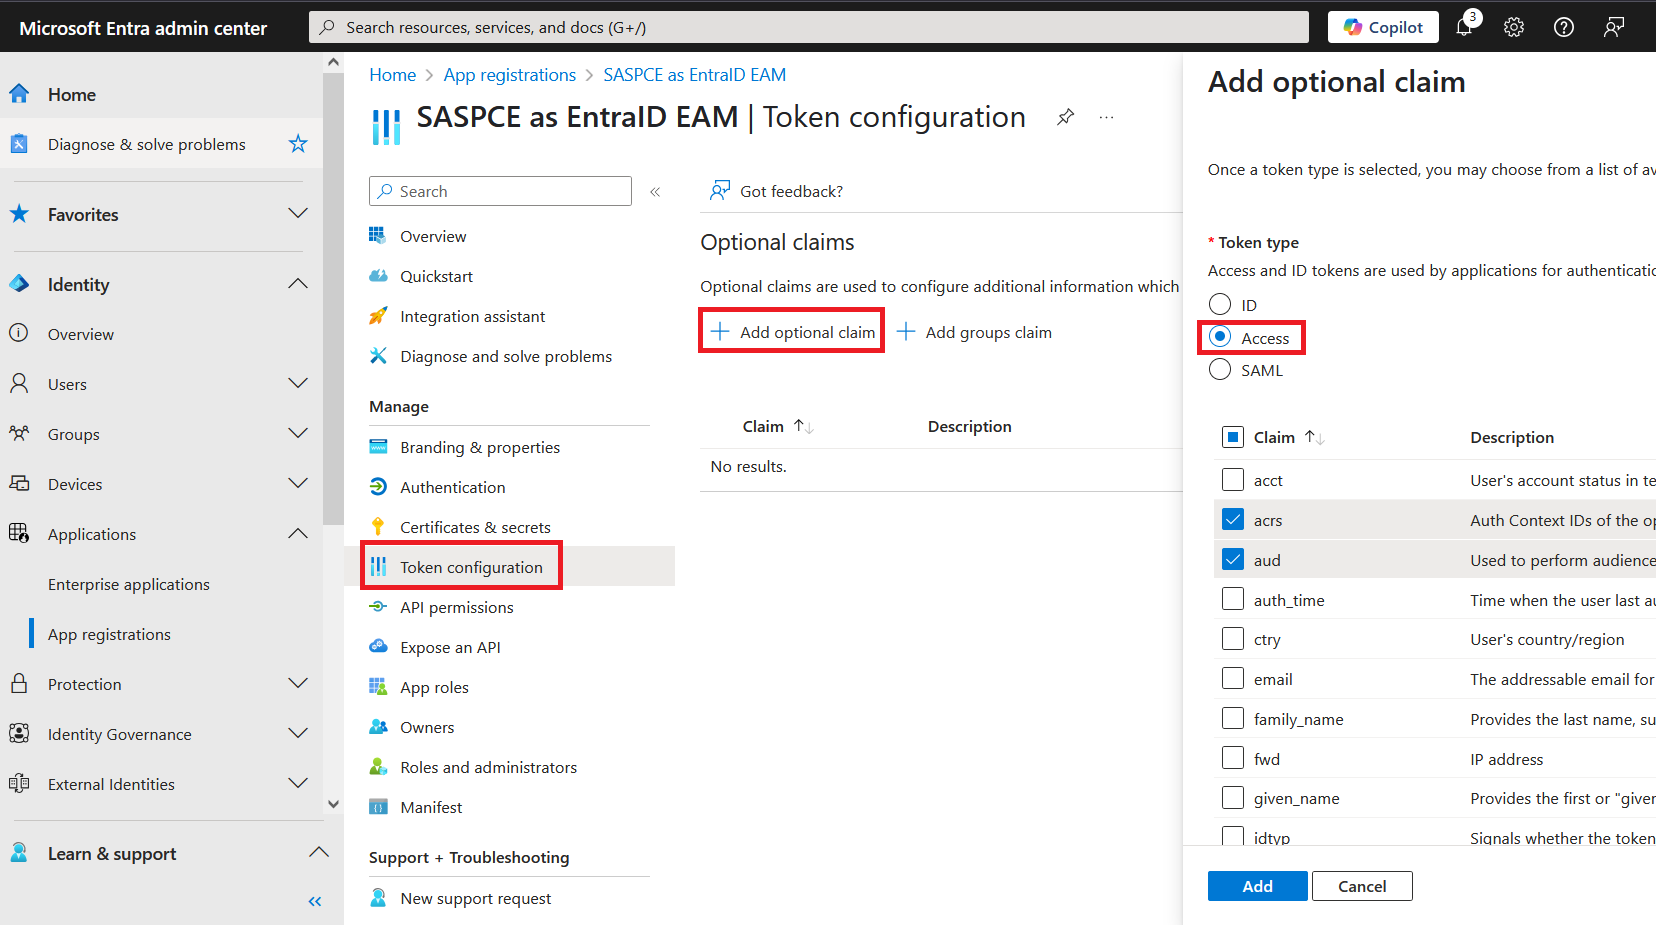
Under Token Configuration > Optional claims, click Add optional claim.
-
In the right pane, under Add optional claim > Token type, select the ID token option, and perform the following steps:
-
Select the acrs, login_hint, and upn claims.
-
Click Add to add the claims.
-
-
Under Token type, select the Access token option, and perform the following steps:
-
Select the acrs, aud, and upn claims.
-
Click Add to add the claims.
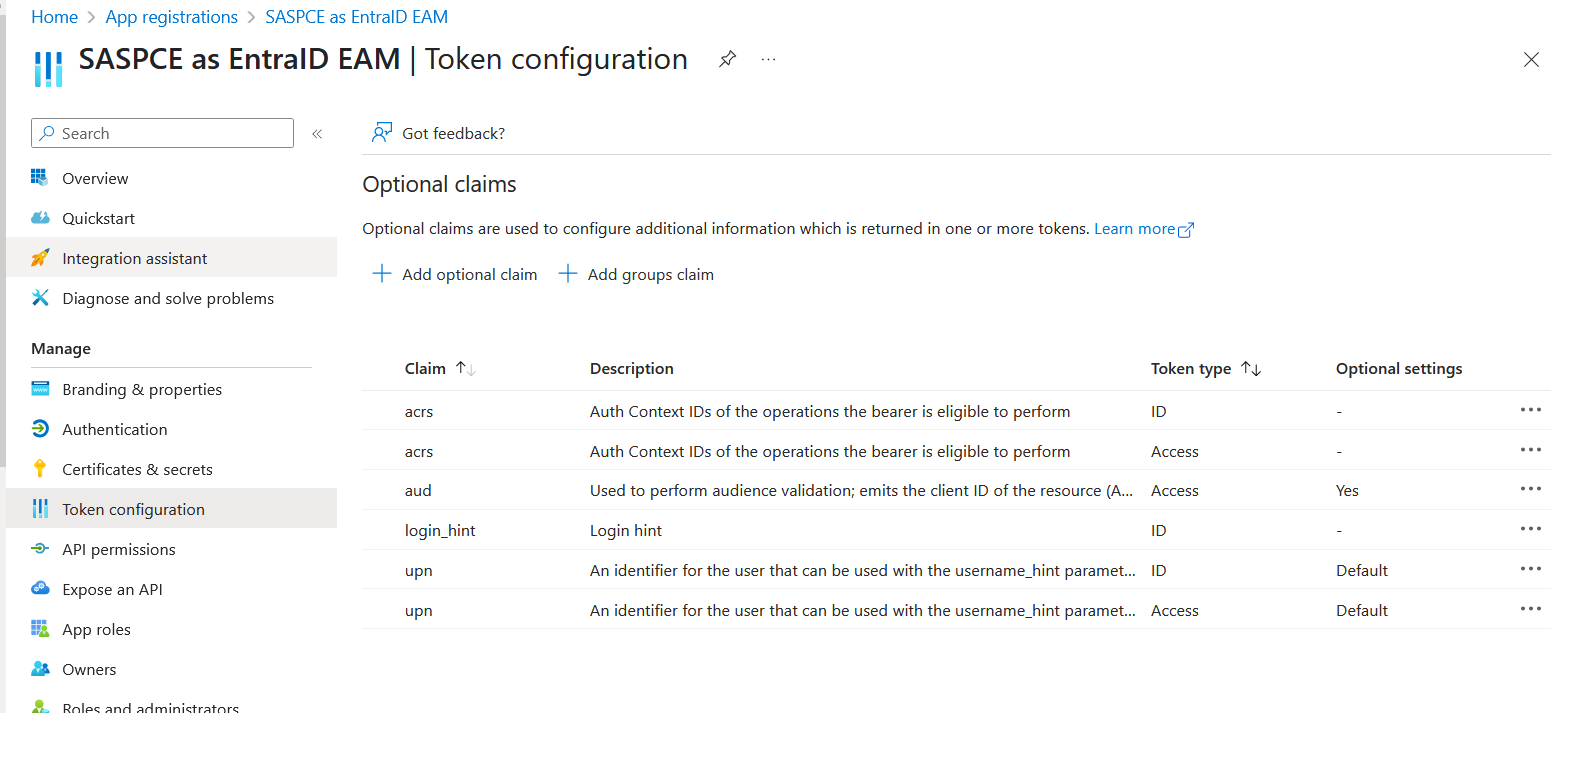
The claims for both the Access and ID tokens are added as shown in the screenshot below:
-
-
Configuring an External Authentication Method (EAM)
Perform the following steps to configure an external authentication method:
-
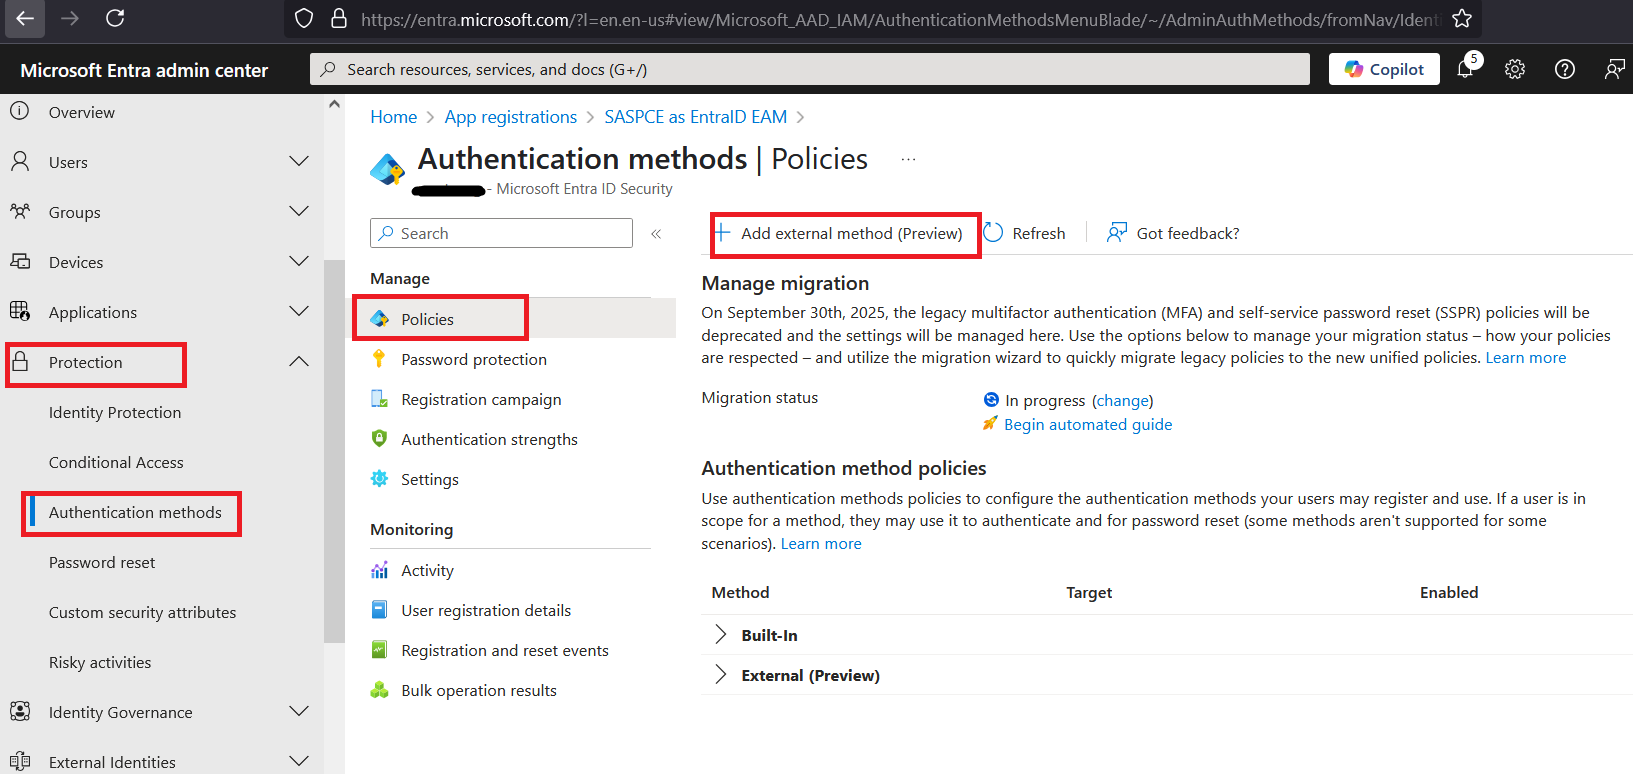
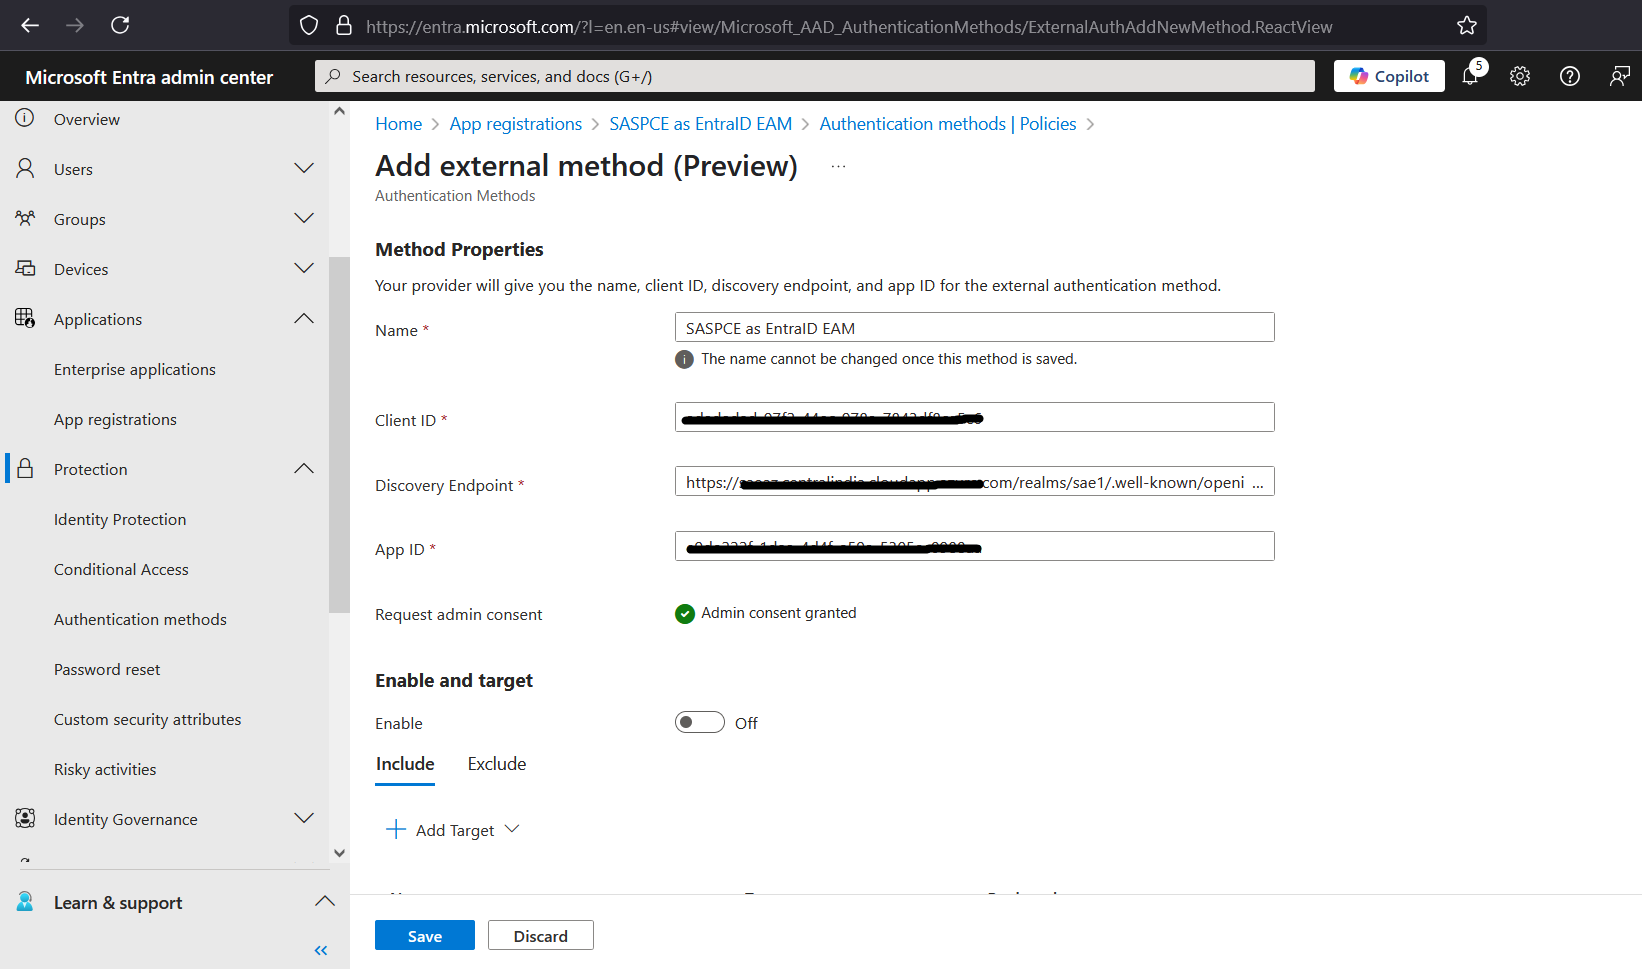
On the Microsoft Entra ID Admin Centre, in the left pane, click Protection > Authentication methods, and in the right pane, under Policies, click Add external method (Preview).
-
Under Method Properties, perform the following steps:
-
In the Name field, enter a name (for example, SASPCE as EAM) for the external method.
-
In the Client ID field, enter the Client ID that you obtained in step 4 (c) of the Configuring an Entra ID Client section.
-
In the Discovery Endpoint field, enter the OIDC Discovery Endpoint URL that you obtained in step 4 of the Configuring the SafeNet Access Exchange Realm section.
-
In the App ID field, enter the application identifier that you obtained in step 3 of the Registering an Application and Setting up its Permissions section.
-
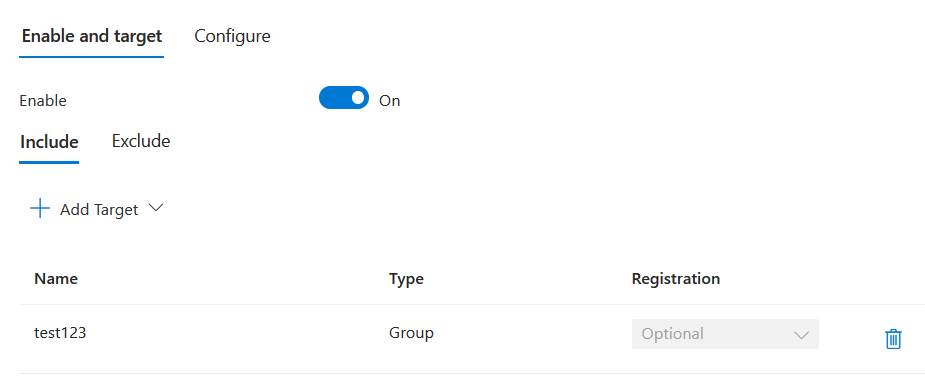
Enable the policy.
-
Use the Include or Exclude tabs to manage which users or groups are to be included in or excluded from the External Authentication Method.
Note
It is recommended to exclude the global administrator account or group if not needed.
-
Click Save.
-
Creating a Conditional Access Policy
-
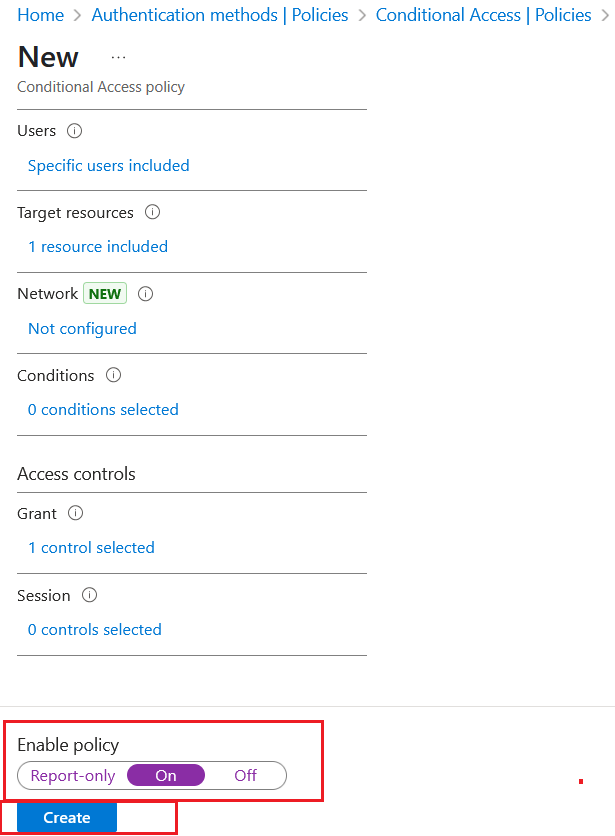
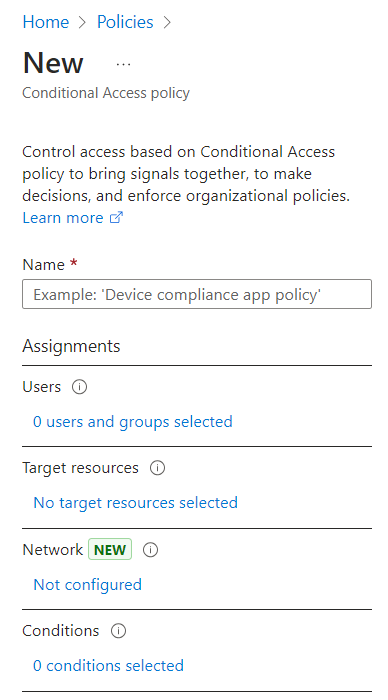
On the Microsoft Entra ID Admin Centre, in the left pane, click Protection > Conditional Access > Policies, and select New policy.
-
Under New, enter a Name for the policy.
-
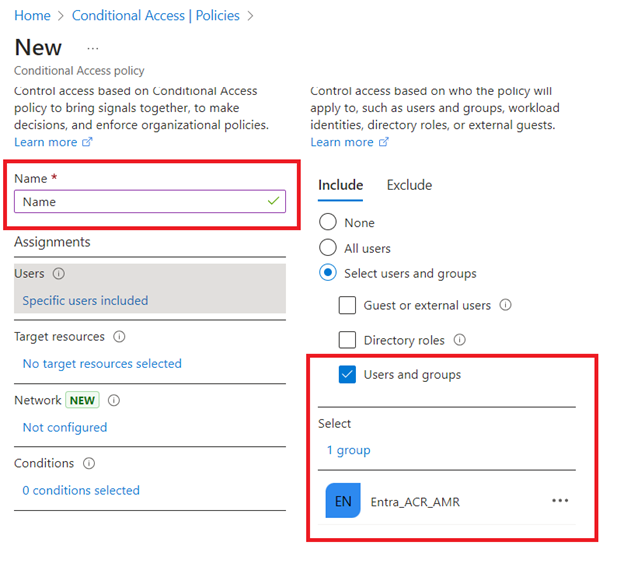
Under Assignments, perform the following steps:
-
Under Users, select users and groups selected.
-
On the Include tab, select the Select user and groups option, and then select the User and groups checkbox.
-
Search and select the user type and group name, and then click Select.
Note
It is recommended to exclude global administrator groups.
-
-
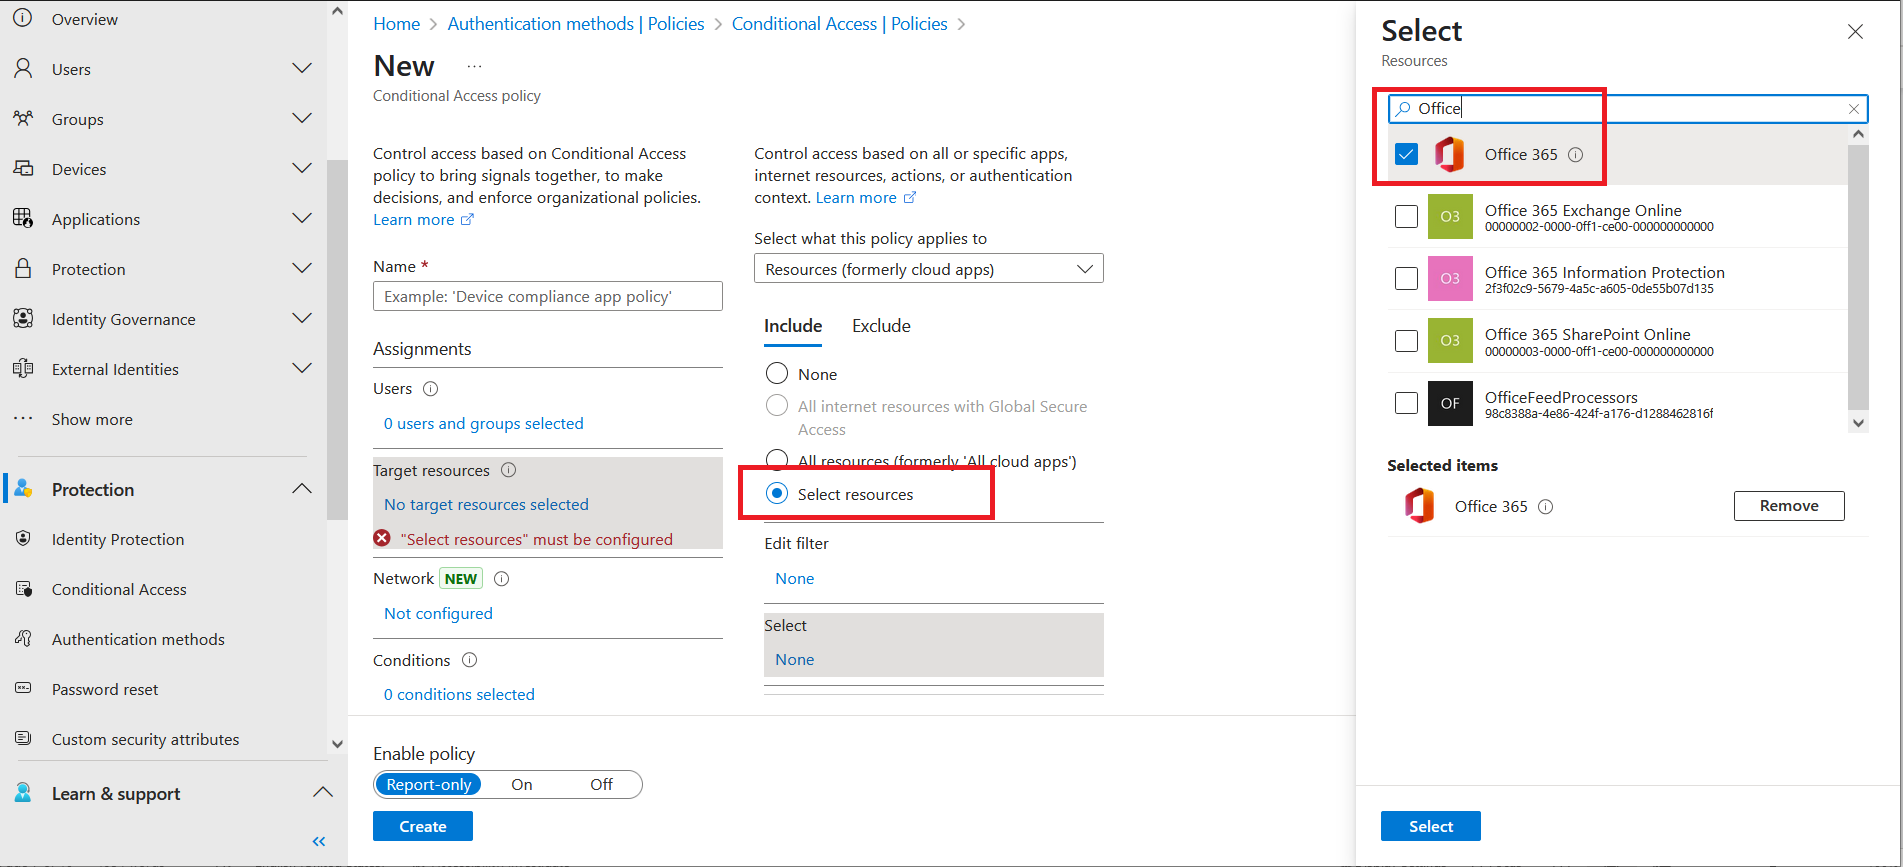
Under Target resources, perform the following steps:
-
Select No target resources selected.
-
On the Include tab, select the Select resources option.
-
Under Edit filter, select None.
-
In the right pane, under Select, search and select the resource application (for example, Office 365) to be protected using EAM, and then click Select.
-
-
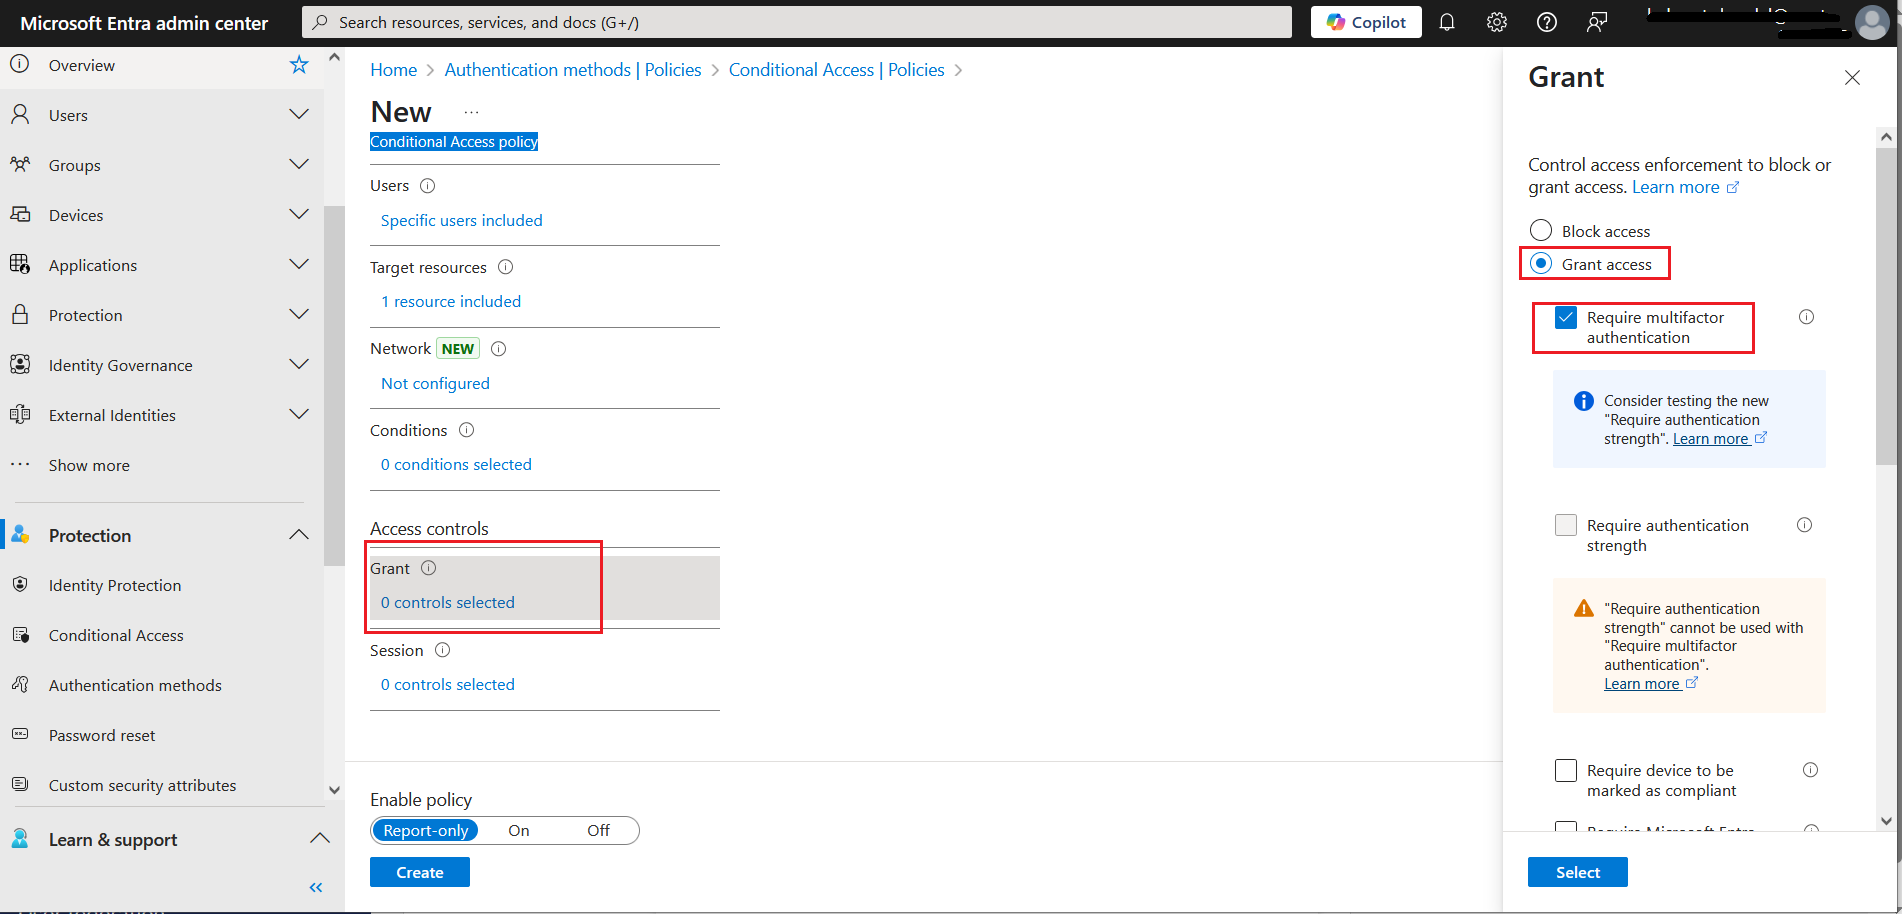
Under Access controls, perform the following steps:
-
Select 0 controls selected as Grant.
-
In the right pane, under Grant, select the Grant access option, and then select the Require multifactor authentication checkbox.
-
-
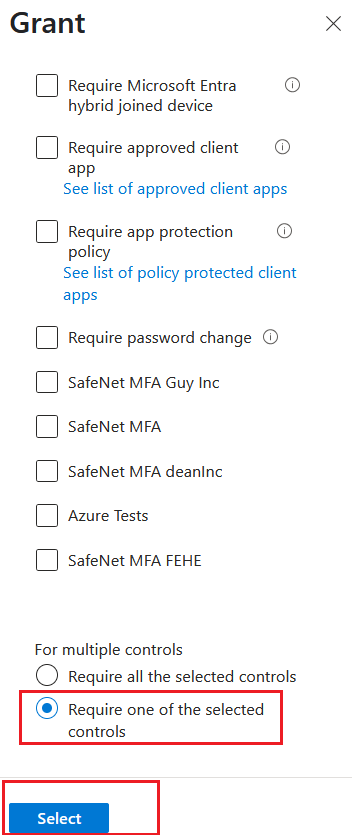
On the Grant window, scroll down, select Require one of the selected controls option, and click Select.
-
At the bottom, select On to Enable policy, and then click Create.
