Silverfort Setup
Configuring SafeNet Access Exchange in Silverfort requires:
-
Adding SafeNet Access Exchange as an Identity Bridge to Silverfort
-
Creating an Identity Bridge Policy for Domain-Joined Machines
Adding SafeNet Access Exchange as an Identity Bridge to Silverfort
Perform the following steps to add SafeNet Access Exchange as an Identity Bridge to Silverfort:
-
Log into the Silverfort admin dashboard.
-
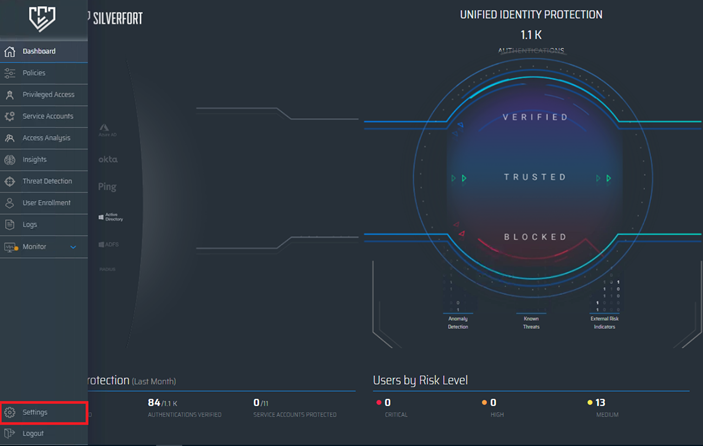
In the left pane, click Settings.
-
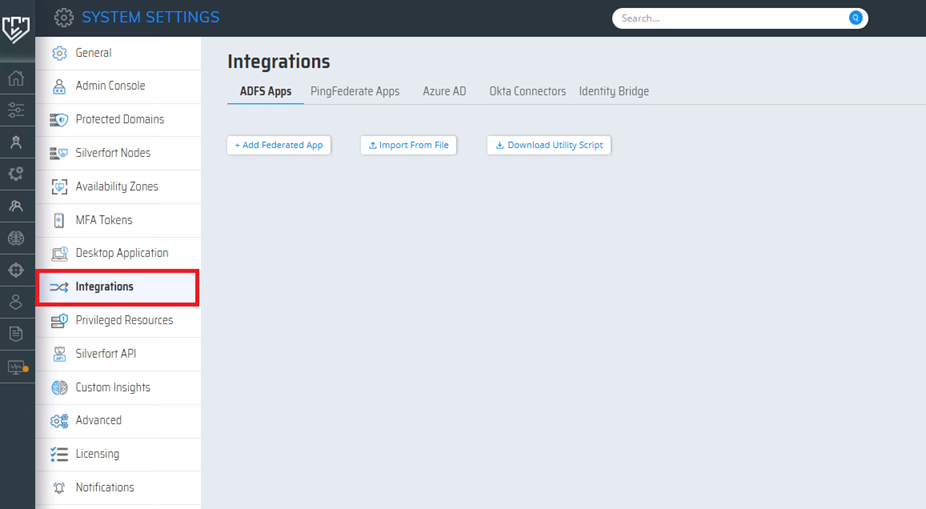
On the SYSTEM SETTINGS window, in the left pane, click Integrations.
-
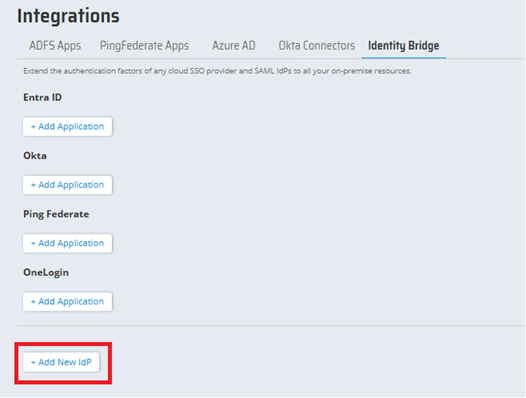
In the right pane, under Integrations, go to the Identity Bridge tab, and click Add New IdP.
-
On Application window, perform the following steps:
-
Complete the following fields.
Field Value IDP Name Enter SafeNet Access Exchange. Login URL Enter the SingleSignOnService URL that you obtained as prerequisite. Issuer Enter the entityID that you obtained as a prerequisite. Application Name Enter a name for the application (for example, SafeNet Access Exchange). Audience Enter the Audience value as per your preferred configuration. You will need to enter the same value for Silverfort Entity ID while configuring Silverfort in SafeNet Access Exchange. 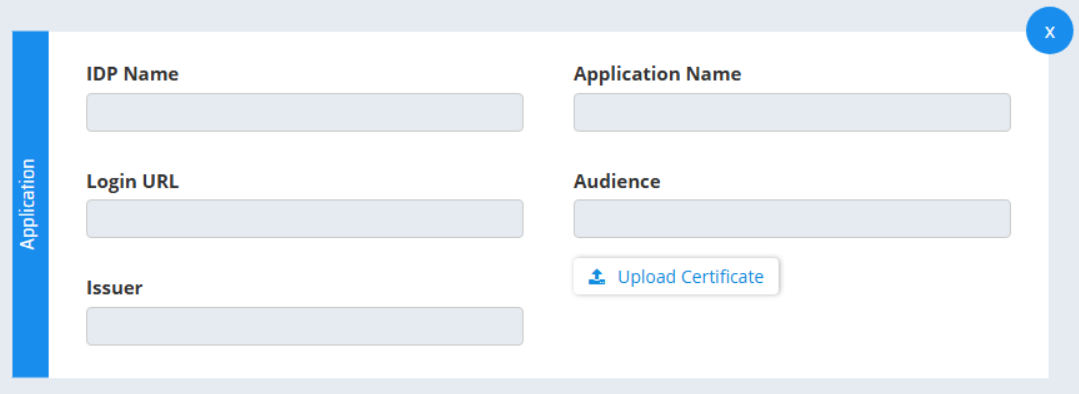
-
Click Upload Certificate to upload the IDP certificate that you created as a prerequisite.
-
Click Save all.
-
Creating an Identity Bridge Policy for Domain-Joined Machines
Perform the following steps to create an Identity Bridge Policy so that MFA gets applied to the resources hosted on domain-joined machines:
-
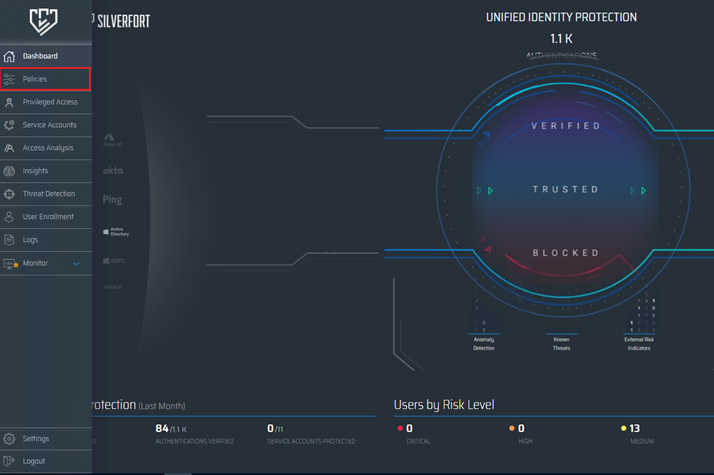
On the Silverfort admin dashboard, in the left pane, click Policies.
-
On the POLICIES window, on the top right corner, click CREATE POLICY.

-
On the New policy window, perform the following steps:
-
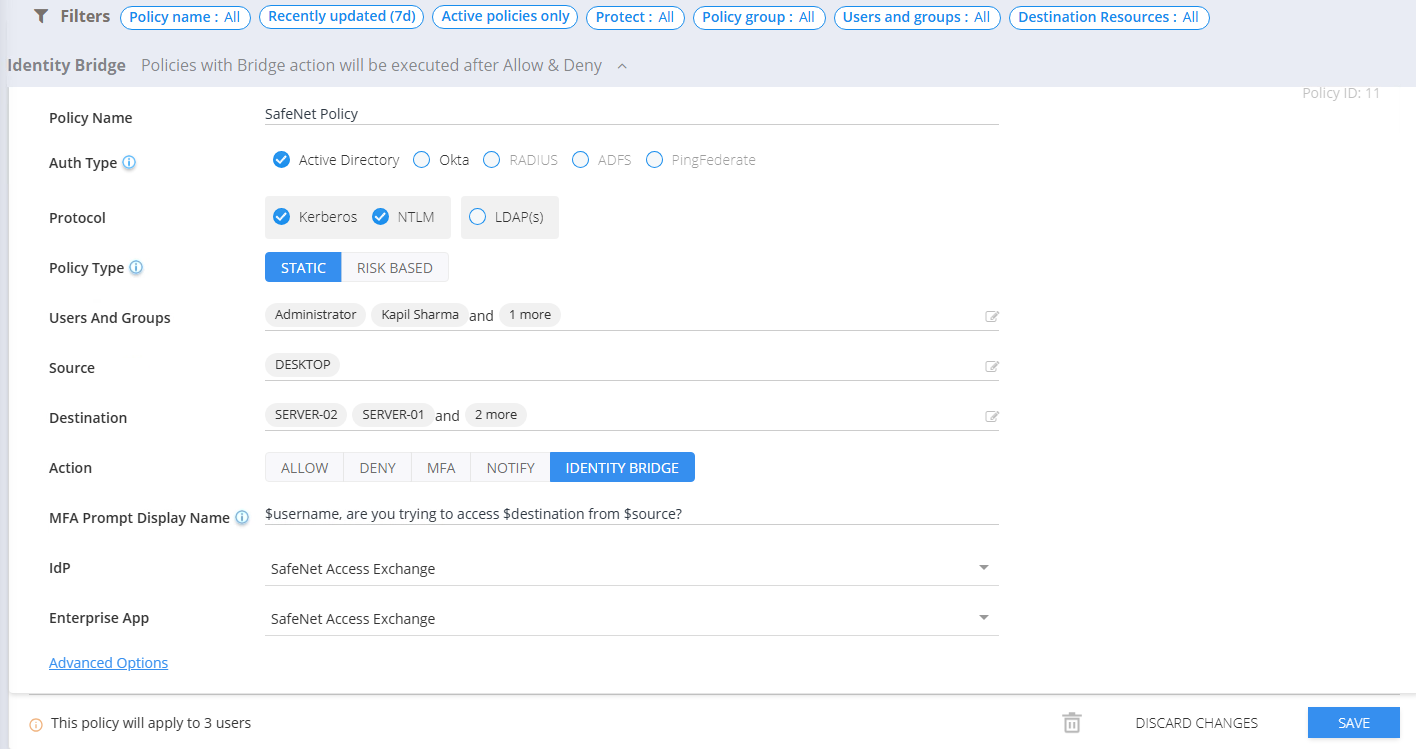
Complete the following fields:
Field Value Policy Name Enter a name for the policy (for example, SafeNet Policy). Action Select IDENTITY BRIDGE. IdP Select the IDP Name (for example, SafeNet Access Exchange) you created earlier by Adding SafeNet Access Exchange as an Identity Bridge to Silverfort. Enterprise App Select the Application Name (for example, SafeNet Access Exchange) that you configured earlier by Adding SafeNet Access Exchange as an Identity Bridge to Silverfort. -
Enter values in the rest of the fields as per your preferred configuration.
-
Click SAVE.
-
-
On the CHANGE STATUS window, click YES.

Note
The policies are customizable and should be created as per your organizational requirements. For more information on creating and configuring policies, refer to the Silverfort official documentation.

