
G-Suite
How to Add a G-Suite Data Store? See Adding a G-Suite Data Store to CM.
How to Scan a G-Suite Data Store? See Scanning a G-Suite Data Store in CM.
How to Generate a New Key? See Generating a New Key for the Service Account.
How to Add G-Suite Scan Parameters? See Tunable Scan Parameters.
Adding a G-Suite Data Store to CM
1 Open the Data Stores page in CM.
2 Click on Add Data Store button.
3 In the select store type section select cloud-based data store and then select G-drive or G-Mail data store from the Select Type drop-down.
4 In the Configure connection section, enter the credentials of Google Domain, Username, and Service Account ID, and browse the key available on your system for that particular service account.
!!! note The number of agents can also be configured under the agent selection.
5 In the General Info section enter the name, description, branch location, and sensitivity level then check on enable data store checkbox and move to next.
6 In the Add Tags & Access Control section, enter the right access group, apply tags if required, and then click on the save button to enable your data stored on CM.
7 If you get any error check for credentials and keys again, make sure they are valid.
Scanning a G-Suite Data Store in CM
1 Open the Scans page in CM.
2 Click on Add Scan button to start configuring new scans.
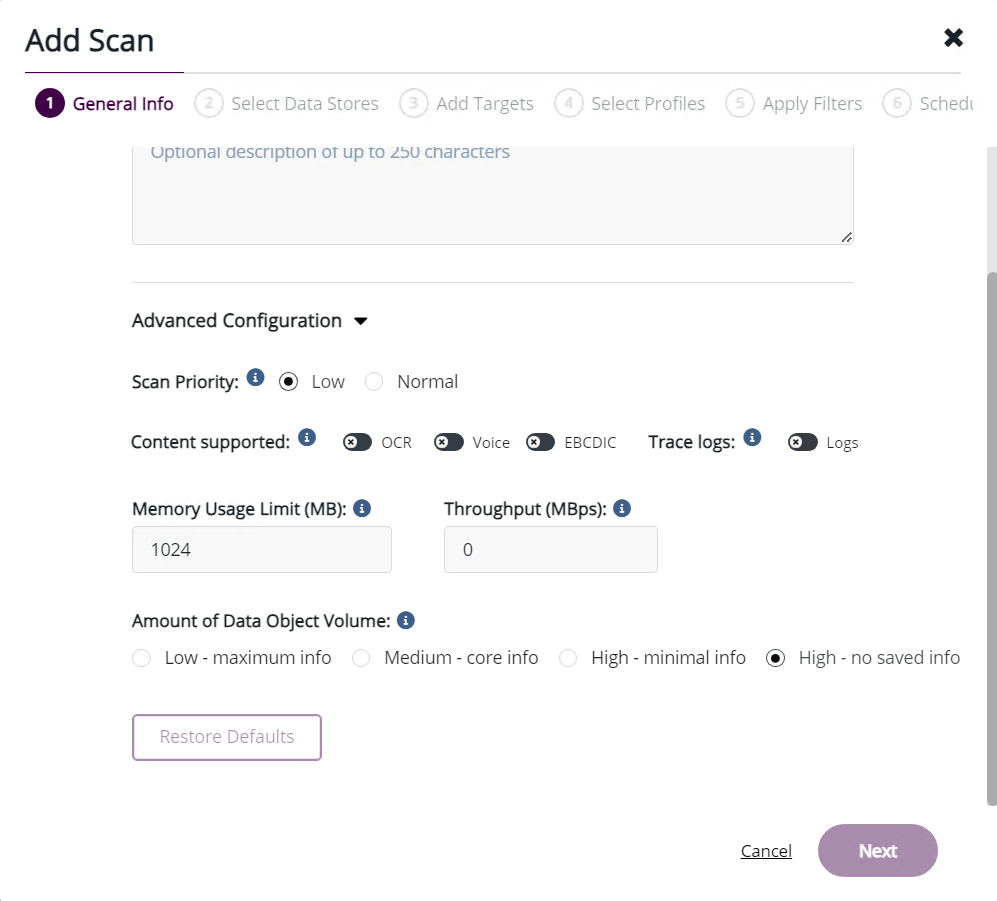
3 In the General Info section add a name for the scan and provide a description if needed. There is a section of Advance Configuration in which you can enter the details for tunable scans, more details are mentioned below inside tunable scan parameters section.
4 In the Select Data Store section check for the data store you have added for G-Mail or G-Drive.
5 In Add Targets section set the path for which you want to scan or leave it blank, the blank path will scan the full data store.

To run scans on a particular path or folder you can follow the same syntax as mentioned below inside the target field while configuring the scans.
| Path | Syntax | Example |
|---|---|---|
| User account | <user_name> | datastorecicduser |
| Folder in user account | <user_name/folder_name> | datastorecicduser/My Drive |
- For a G-Drive data store:
1 To scan particular user:

2 To scan a particular folder inside the user:

!!! note To scan a G-Drive data store, use the following syntax to avoid invalid path error "<username>/My Drive/
- For a G-Mail data store:
1 To scan a particular user:

2 To scan a particular folder inside the user:

!!! note To scan the user mailbox at user_name@example.com, enter user_name. To scan the "Inbox" folder in the user mailbox user_name@example.com, enter user_name/inbox; to scan the "Sent Mail" folder, enter user_name/sent.
6 In the Select Profiles section check the box of profiles for which you want to search data.
7 In the Apply Filters section you can apply filters for excluding and including files based on their extension, file path, recent modification, file size, and modification date.
8 in the Schedule Scan section, scans can be scheduled for some other time or you can directly run it manually which will trigger the scan at the same time.
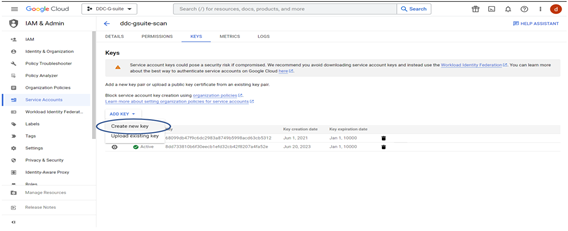
Generating a New Key for the Service Account
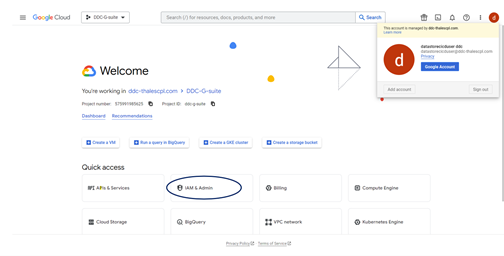
1 Log in to the cloud platform with your credentials and get into the IAM & Admin.
2 Get into the service account.
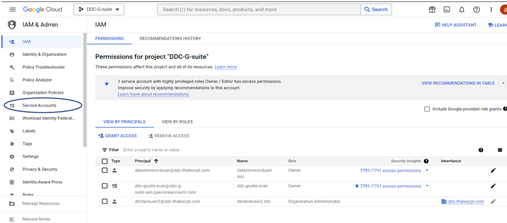
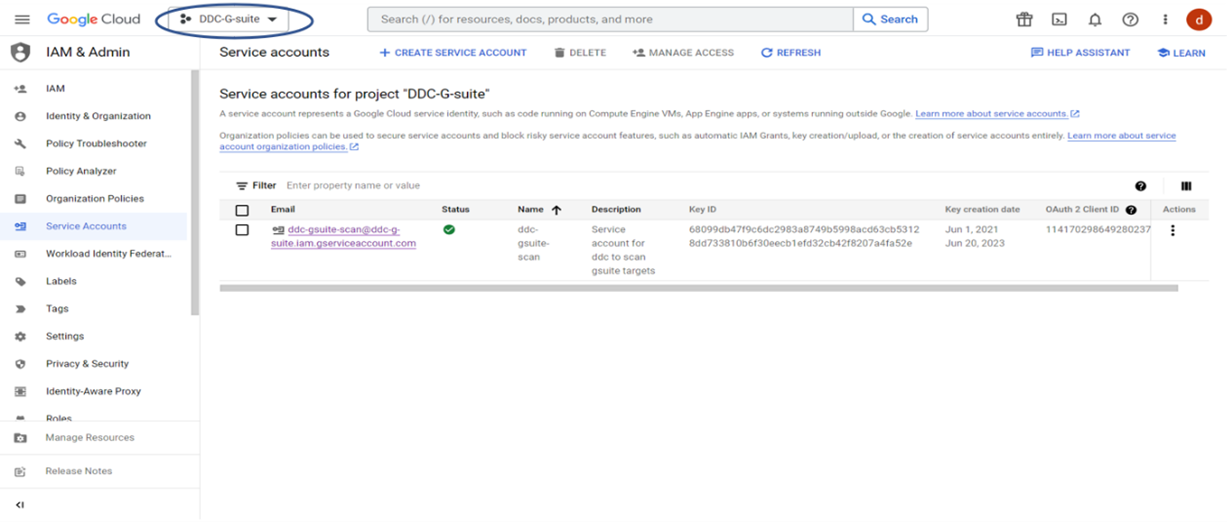
3 Check for the project, in which the required service account is available.
4 Get into the Manage keys option.
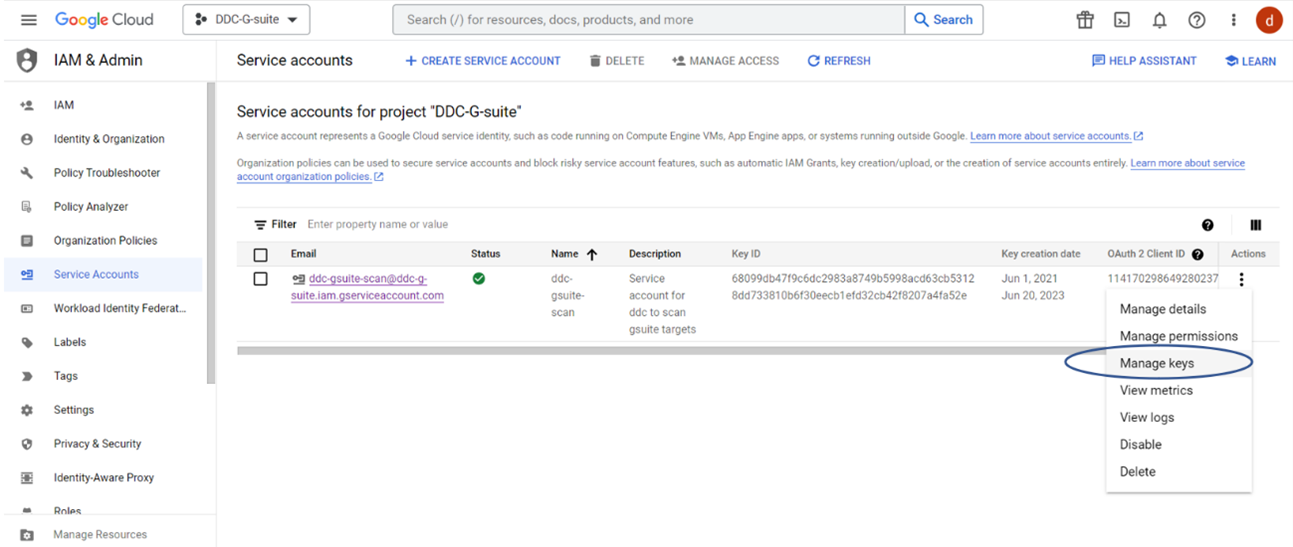
5 Generate a new key and it will automatically get downloaded into your system.
Tunable Scan Parameters
Inside Add scan → General info part there is a section of advanced configuration which has different parameters for a tunable scan. It has parameters of:
1 Scan Priority: set the scan priority compared to other application in terms of CPU utilization. it only works for local storage.
2 Content Supported: It has three other content type which can be scanned:
OCR (Optical Character Reader): recognizes text from the digital image.
Voice: To scan audio data
EBCDIC (Extended Binary Coded Decimal Interchange Code): To scan encoded 8-bit data.
3 Trace Logs: enabling it allows to download the logs for the scan.
4 Memory Usage Limit (MB): Set the maximum amount of memory agent can use on a data store.
5 Throughput (MBps): maximum data which can be throughput from the application when searching each data store.
6 Amount of Data Object Volume: select the amount of data object volume prioritizing either quantity of data object or information of matches per data object.
Here are some report differences between a tunable scan report and a normal scan report for the same data store:
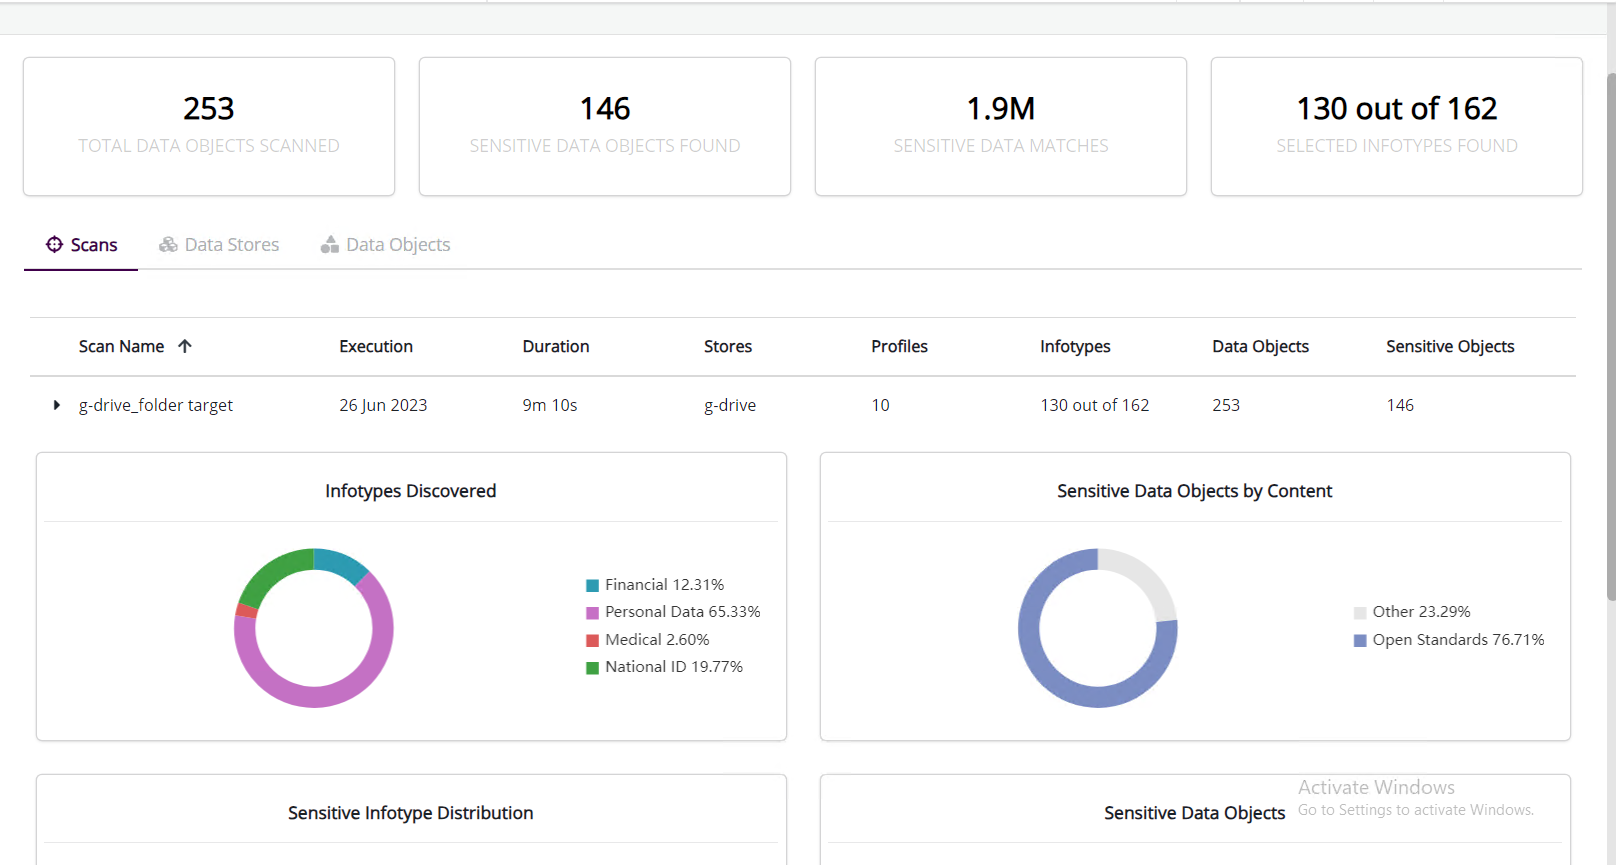
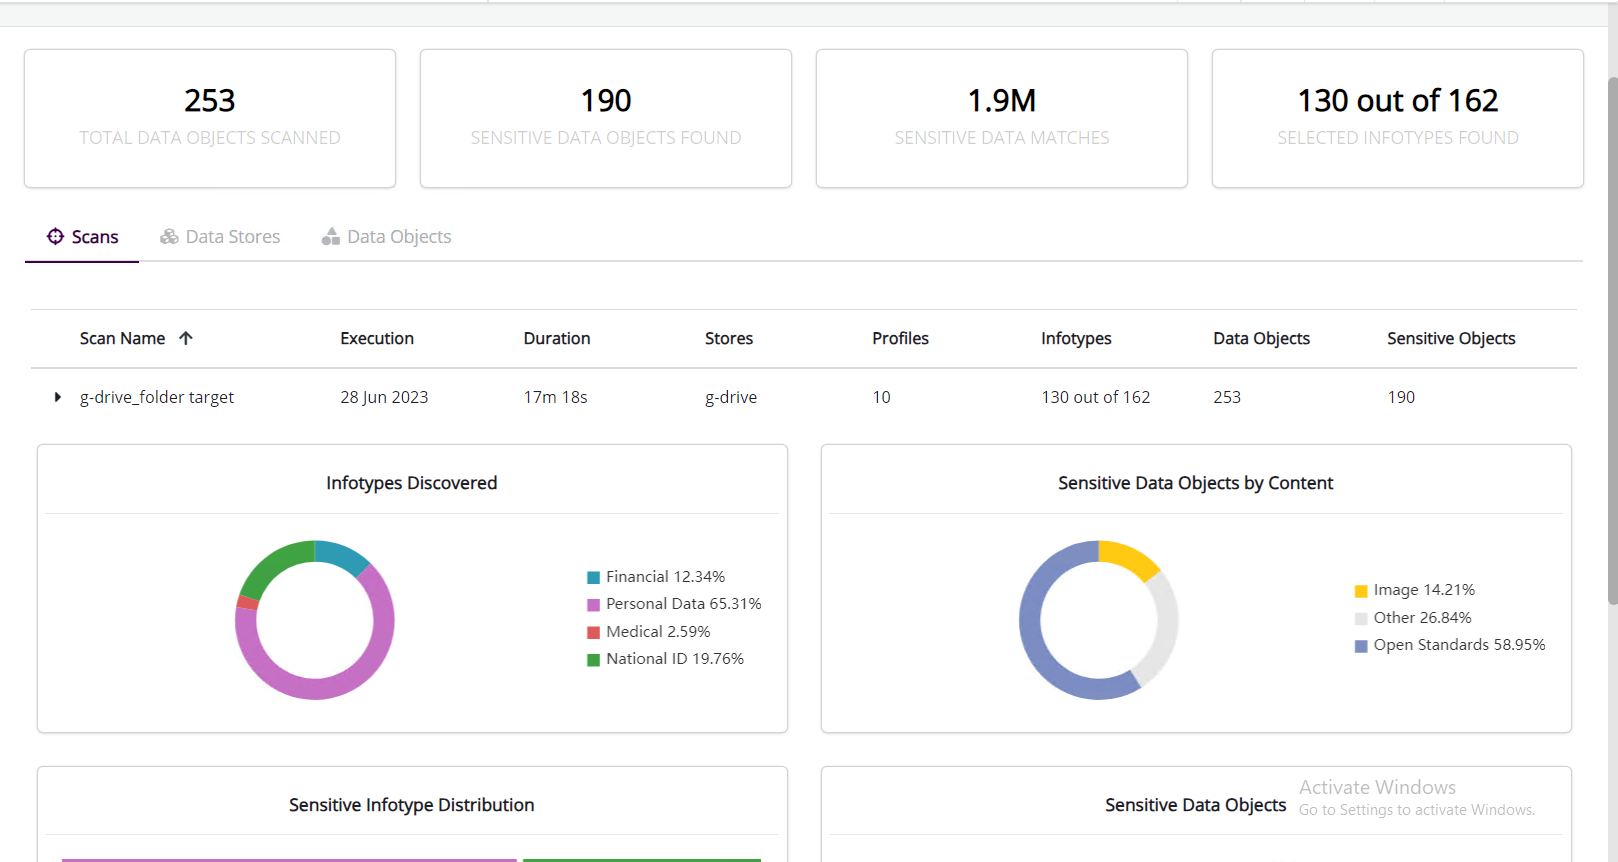
The reports are almost same except the image data that is available in a tunable scan report with OCR enabled and not there in normal scan report, which increased the sensitive data object count in tunable scan report.