
Office365: Exchange Online
How to add the Office365: Exchange Online Data Store? See Adding Office365 Exchange Online Data Store.
How to configure Office365: Exchange Online Scan? See Configuring Office365 Exchange Online Scan.
How to fetch the scan path from Microsoft Azure portal? See Fetching the Scan Path from Microsoft Azure Portal
Adding Office365 Exchange Online Data Store
To add an Office365: Exchange Online data store, provide the following information in the “Add Data Store” wizard:
| Settings | Description |
|---|---|
| Recommended Proxy Agents | Proxy Agent host with direct Internet access. |
| TCP Allowed Connection | Port 443. |
| Exchange Online Domain | Enter a domain to scan mailboxes that reside on that domain. This is usually the domain component of the email address, or the Windows Domain. Example: example.onmicrosoft.com To scan multiple domains within your organization's Microsoft 365 environment, add these domains as separate Exchange Online Targets. |
| Client ID | Enter your Exchange Online client ID (application ID) Example: clientid-1234-5678-abcd-6d05bf28c2bf |
| Client Secret Key | Enter your Exchange Online client secret key. Select the Show Client Secret Key check-box to view the key. |
| Tenant ID | Enter your Office 365: Exchange Online tenant ID. Your Microsoft 365 tenant ID is a globally unique identifier (GUID) that is different than your organization name or domain. |
Configuring Office365 Exchange Online Scan
To scan an Office365: Exchange Online data store, follow the scan wizard. In the wizard, follow the configuration steps:
- General Info - Name the scan and give a short description.
- Select Data Stores - Select which data stores will be scanned.
- Add Targets - Narrow down the scan scope by selecting specific scan targets.
- Select Profiles - Choose which Classification Profile you want to scan for.
- Apply Filters - Add a list of rules to filter some targets when the scan is launched.
- Schedule Scan - Configure when you want your scan to run.
Consider the targets and filters documented in the sections that follow, as you may want to apply them for your Office365: Exchange Online data store.
Targets
To scan an Office365: Exchange Online data store, the default option is to run a full scan1. If you need to scan a specific target, use the following syntax:
| Mailbox/Folder to Scan | Target |
|---|---|
| All user accounts in a specific group | Syntax: <Group Display Name> Example: Engineering (SG) |
| Specific user account in a group | Syntax: <Group Display Name>/<User Principal Name> Example: Engineering (SG)/user1@example.onmicrosoft.com |
| Specific folder for a user account in group (e.g. Calendar, Contacts, Notes etc) | Syntax: <Group Display Name>/<User Principal Name>/<Mailbox Folder> Example: Engineering (SG)/user1@example.onmicrosoft.com/ProjectA |
| All user accounts | Syntax: All Users1 |
| Specific user account Recommended for scanning mailboxes of user accounts that do not belong to any Microsoft 365 group. | Syntax: All Users/<User Principal Name> Example: All Users/user1@example.onmicrosoft.com |
| Specific folder for a user account (e.g. Calendar, Contacts, Notes etc) Recommended for scanning mailboxes of user accounts that do not belong to any Microsoft 365 group. | Syntax: All Users/<User Principal Name>/<Mailbox Folder> Example: All Users/user1@example.onmicrosoft.com/ProjectA |
Note
If there are multiple Microsoft 365 groups with the same display name in your domain, the solution will only retrieve the first group occurrence. For example, if there are three groups with the same display name, "Engineering", DDC will only scan and return results for the first "Engineering" group for the Exchange Online data store.
Filters
To filter the locations to scan an Office365 Exchange Online data store, consider the following syntax for each filter:
Exclude location by prefix
| Filter | Syntax |
|---|---|
| Group | All Users |
| User/Account | 1. All Users/sample@sjcpl.onmicrosoft.com or 2. *sample@sjcpl.onmicrosoft.com Note: The second option would filter out "sample@sjcpl.onmicrosoft.com" user data objects from every group. |
| Folder | 1. All Users/sample@sjcpl.onmicrosoft.com/inbox 2. *inbox Note: Folder name is case-sensitive. The second option would filter out inbox data objects of every user and group. |
| Attachment | 1. All Users/sample@sjcpl.onmicrosoft.com/Inbox/Mail a/2021-02-22T06:40:18Z/maildir-a.zip or 2. All Users/sample@sjcpl.onmicrosoft.com/Inbox/Mail a/*/maildir-a.zip or 3. maildir-a.zip or 4. All Users/sample@sjcpl.onmicrosoft.com/folder_name/subject or 5. All Users/sample@sjcpl.onmicrosoft.com/Inbox/Mail a/2021-02-22T06:40:18Z or 6. *subject Note: The second example would be recommended to the user to avoid manually checking mail's date and time and converting it to required format. The third option would filter out data objects with attachment maildir-a.zip. The fourth option is used if you want to filter out a specific mail and all its content with a corresponding subject name. The fifth and sixth option would filter out data objects with given timestamp and subject name. |
Exclude location by suffix
| Filter | Syntax |
|---|---|
| Group | All Users* (You have to use a trailing * to exclude a given location) |
| User/Account | All Users/sample@sjcpl.onmicrosoft.com* or *sample@sjcpl.onmicrosoft.com* |
| Folder | All Users/sample@sjcpl.onmicrosoft.com/inbox* or *inbox* |
| Attachment | o All Users/sample@sjcpl.onmicrosoft.com/Inbox/Mail a/2021-02-22T06:40:18Z/maildir-a.zip* or o All Users/sample@sjcpl.onmicrosoft.com/Inbox/Mail a/*/maildir-a.zip* or o *maildir-a.zip* |
Exclude locations by expression
| Filter | Syntax |
|---|---|
| Group | All Users* (You have to use a trailing * to exclude a given location.) |
| User/Account | All Users/sample@sjcpl.onmicrosoft.com* or *sample@sjcpl.onmicrosoft.com* |
| Folder | All Users/sample@sjcpl.onmicrosoft.com/inbox* or *inbox* |
| Attachment | o All Users/sample@sjcpl.onmicrosoft.com/Inbox/Mail a/2021-02-22T06:40:18Z/maildir-a.zip* or o All Users/sample@sjcpl.onmicrosoft.com/Inbox/Mail a/*/maildir-a.zip* or o *maildir-a.zip* |
Include locations within modification date
Not supported
Include locations modified recently
Not supported
Exclude locations greater than file size
Not supported
Fetching the Scan Path from Microsoft Azure Portal
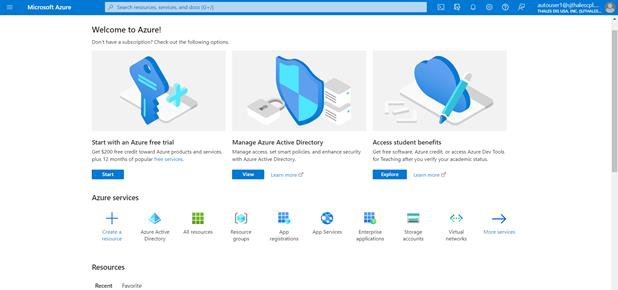
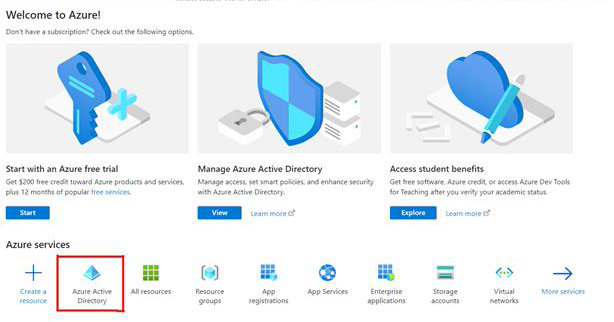
- Log in to the Azure portal by using the correct credentials. After a successful login you will be redirected to the home page.
- On the home page, click on the Azure Active directory, under the Azure Services section. You will be redirected to the Active Directory page.
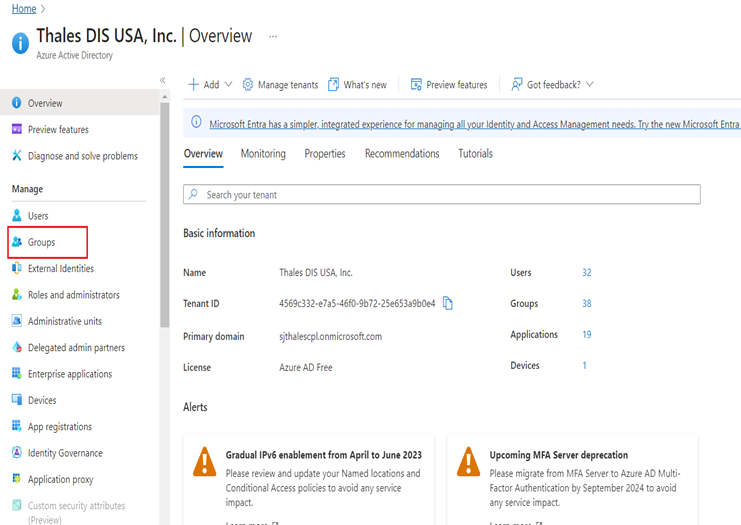
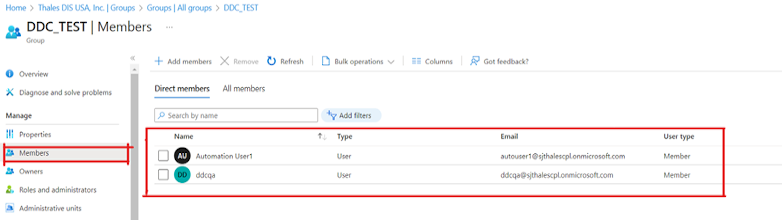
- On the Active directory page, you can click on Groups, under the Manage section to check the available groups.
Link: https://portal.azure.com/#view/Microsoft_AAD_IAM/GroupsManagementMenuBlade/~/AllGroups .
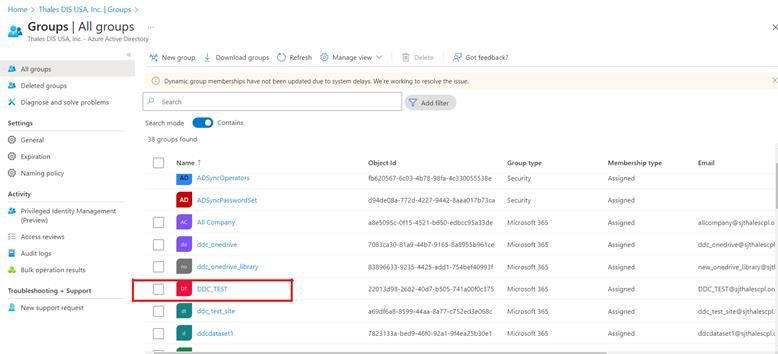
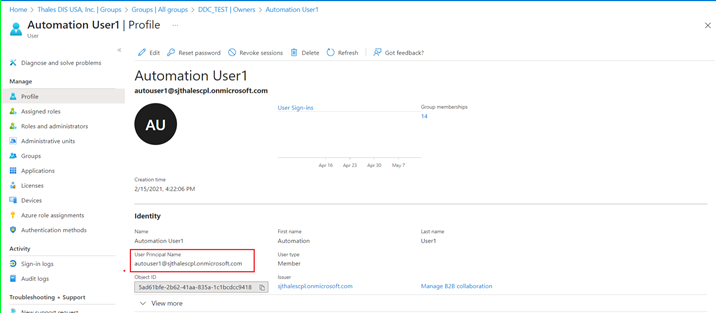
- After clicking on the Groups, all the groups will displayed, and you can click on a particular group to check the details (Members of the group:- user principal)
"All Users" is the default, non-configurable virtual group in DDC that automatically includes all user accounts in the Microsoft 365 domain. If a similar "All Users" group pre-exists in your Microsoft 365 environment, we recommend that you change the display name for that group as it will be viewed as a duplicate group and will not be displayed in DDC. ↩↩