Configure for MobilePASS and MobilePASS+ Enrollment
Customers must run their SAS PCE instances under a valid certificate from a public certificate authority (such as DigiCert, VeriSign, GoDaddy). Self-signed or non-public signed certificates do not work for MobilePASS+ Push functionality. Without a valid public trusted certificate, the self-enrollment process of MobilePASS+ tokens fail.
To enroll MobilePASS and MobilePASS+ tokens on Windows Desktop systems, a certificate must be generated and associated with the SAS in Microsoft IIS.
Requirements:
- A certificate Authority (CA) capable of issuing a web server certificate
-
An SAS server installed and configured (standalone or domain)
SAS can also work with a certificate that is issued by a publicly trusted third-party root CA (for example, Verisign, Comodo, GoDaddy). This is recommended for installations where self-enrollment is published to the internet.
To configure SAS for MobilePASS and MobilePASS+ enrollment, do the following:
- Step 1: Create certificate request
- Step 2: Generate certificate
- Step 3: Import IIS and Microsoft Root certificate
- Step 4: Modify SAS Self-Enrollment URL
- Step 5: Self-Enrollment configuration
Step 1: Create certificate request
To create a certificate request from IIS:
On the SAS server, select Information Internet Services (IIS).
-
In the left pane, click the server name.
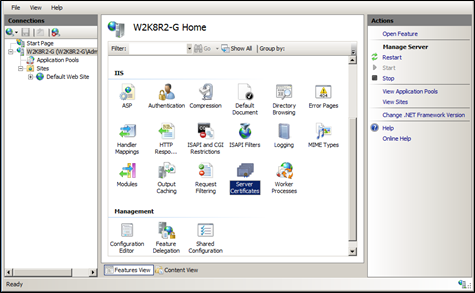
(The screen image above is from Microsoft. Trademarks are the property of their respective owners.)
-
In the middle pane, scroll down and select Server Certificates.
-
In the right pane of the Server Certificates window, click Create Certificate Request.
-
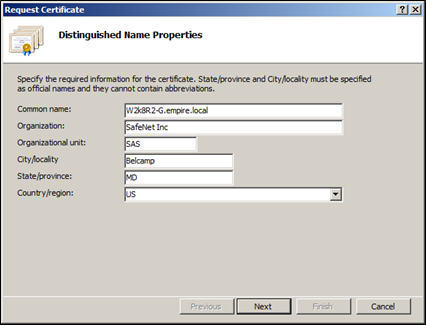
On the Distinguished Name Properties window, enter the relevant information for your organization and click Next.
The Common name must be configured with the SAS full qualified domain name (or wildcard).
-
On the Cryptographic Service Provider Properties window, select Cryptographic service provider.
-
Select Bit length, and click Next.
-
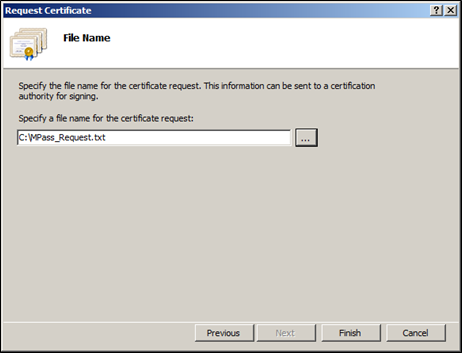
On the File Name window, click the browse button (…). Select a location to save the certificate request text file.
-
Enter a name for the certificate request.
-
Click Open and click Finish.
By default, the request (.txt file) is saved in the System32 folder.
When the CA is installed on the same server as the SAS, the Root certificate of your CA is listed automatically in the certificates list on your IIS server.
Step 2: Generate certificate
The certificate can be generated from Microsoft CA, using one of the following methods:
-
Web Enrollment (see Generate Certificate through Web Enrollment)
-
SAS Server (see Issue Server Certificate from Microsoft Standalone CA)
Generate certificate through web enrollment
To generate a certificate from a Microsoft CA:
-
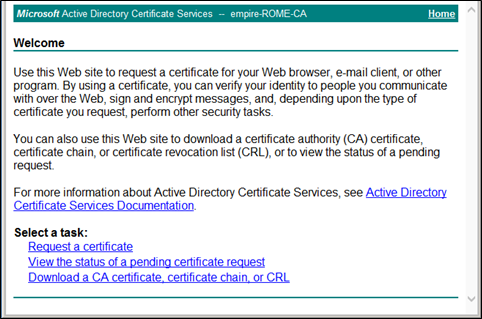
On the SAS Server, open a browser window and visit:
<https://> IP addressofCA/certsrvIf SAS is not part of a domain, the site prompts for a login.
-
On the Welcome page, click Download a CA certificate, certificate chain, or CRL. If a pop-up message is displayed, click No.
-
Ensure DER is selected, and click Download a CA certificate.
-
Save the file to the desktop as MS Root CA.cer.
-
Return to the previous web page and click Request a certificate.
-
On the Request a Certificate window, click Advanced certificate request.
-
Click Submit a certificate request by using a base-64-encoded CMC or PKCS #10 file, or submit a renewal request by using a base-64-encoded PKCS #7 file link.
-
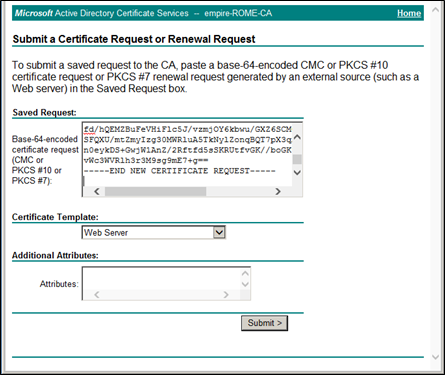
On the SAS server, open the certificate request text file that was created and copy all contents of the file.
-
On the Submit a Certificate Request or Renewal Request window, go to the Saved Request section and paste the content copied from the certificate request file.
-
In the Certificate Template section, select Web Server, and click Submit.
-
On the Certificate Issued window, select the DER encoded, and click Download certificate.
-
Name the certificate file IIS_Cert.cer and save it to a location where it can be accessed by SAS.
Issue server certificate from Microsoft Standalone CA
As an alternative to the web enrollment, you can use the SAS server to request a certificate from the standalone CA.
To issue the Server Certificate from the Microsoft standalone CA:
-
From Administrative tools, select Certification Authority.
-
Highlight the CA server.
-
Right-click the server and select All Tasks > Submit New Request.
-
Select the certificate request file you saved previously (see Step 1 – Create Certificate Request) and click Open (view all files). The request is listed in the Pending requests folder of the CA console.
-
Right-click the certificate request and select All Tasks > Issue. The certificate is displayed in the Issued Certificates folder in the CA console.

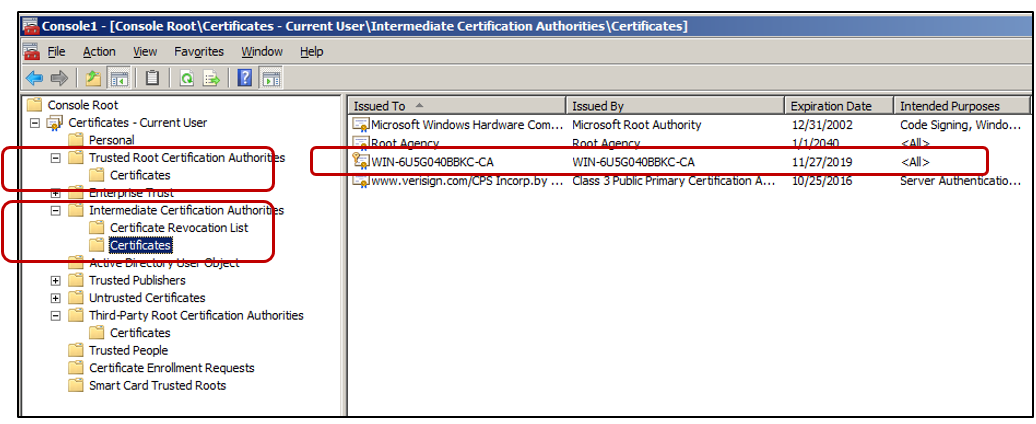
If the certificate is not issued, check the Failed Requests folder. A certificate request fails if the root certificate is not added to the trusted certificate store and to the intermediate certificate store.
Step 3: Import IIS and Microsoft Root Certificate
Import Certificate to SAS Server
To import the certificate to the SAS server:
-
On the SAS server, select Start > Run, type mmc, and then press the Enter key.
-
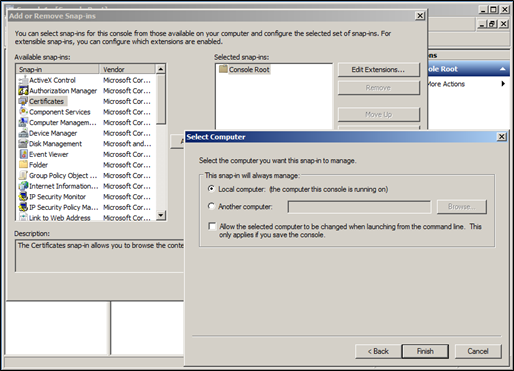
On the MMC window, click File > Add/Remove Snap-in.
-
On the Add or Remove Snap-ins window, in the left pane, click Certificates and then click Add.
-
On the Certificates snap-in window, select Computer account and click Next.
-
Select Local computer (the computer this console is running on), click Finish, and then click OK.
-
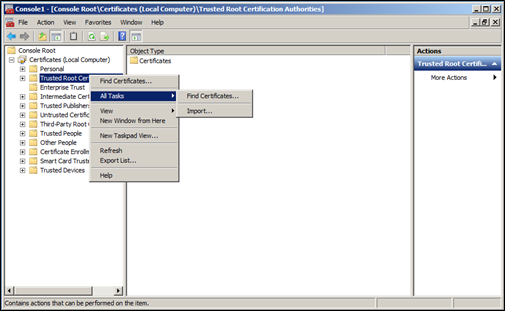
In the left pane, expand the Certificates section, and then right-click Trusted Root Certification Authorities.
-
Click All Tasks > Import.
-
On the Certificate Import Wizard window, click Next to continue.
-
Click Browse and then locate the root certification authority .CER file. Select the file, click Open, and click Next.
-
Ensure the option Place all certificates in the follow store is selected, and that Certificate Store is set to Trusted Root Certification Authorities.
-
Click Next and then click Finish to complete the wizard.
-
When prompted, click OK to confirm that the certificate was imported successfully.
Import certificate to IIS server
To import the certificate to the IIS server:
-
In the Certification Authority console, right-click the issued certificate and select Open.
-
Verify that the certificate is set to Ensures the identity of a remote computer.
-
Select the Certification Path tab and verify that the certificate is OK (root certificate is trusted).
-
Select the Details tab and click Copy to File. The certificate Export Wizard opens.
-
Click Next.
-
Select the file format to be DER encoded and click Next.
-
Enter a name and path to the certificate file. By default, it is exported to the System32 folder.
-
Click Next and then click Finish. A message confirms that the export was successful.
-
In the IIS Manager console, highlight the IIS server and select Server Certificates.
-
In the Actions pane, select Complete Certificate Request.
-
Select the certificate file you have exported from the CA (.CER) and click Open.
-
Enter a friendly name for the certificate and click OK. The certificate is imported to the IIS server.

Bind certificate to website
To bind the certificate to the website for SSL communication:
-
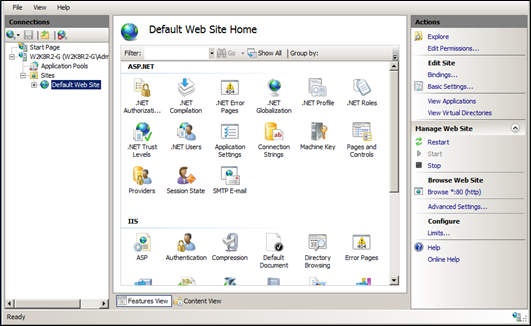
In the left pane, expand Sites, click Default Web Site, and then click Bindings.
-
On the Site Bindings window, click Add.
-
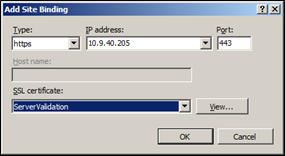
In the Add Site Binding window, enter the details as follows:
- In the Type field, select https.
- In the IP address field, select the server name or fixed IP.
-
In the SSL certificate field, select the domain SSL certificate.
-
Click OK to bind the certificate to the website.
Any desktop system that is enrolling MobilePASS and MobilePASS+ tokens and is not part of the domain requires the MS Root Certificate to be imported into the Trusted Root Certification Authorities.
Step 4: Modify SAS Self-Enrollment URL
To modify the SAS Self-Enrollment URL to use SSL:
-
On the SAS server, browse to
<http://localhost/console>. -
Login to SAS as an Operator.
-
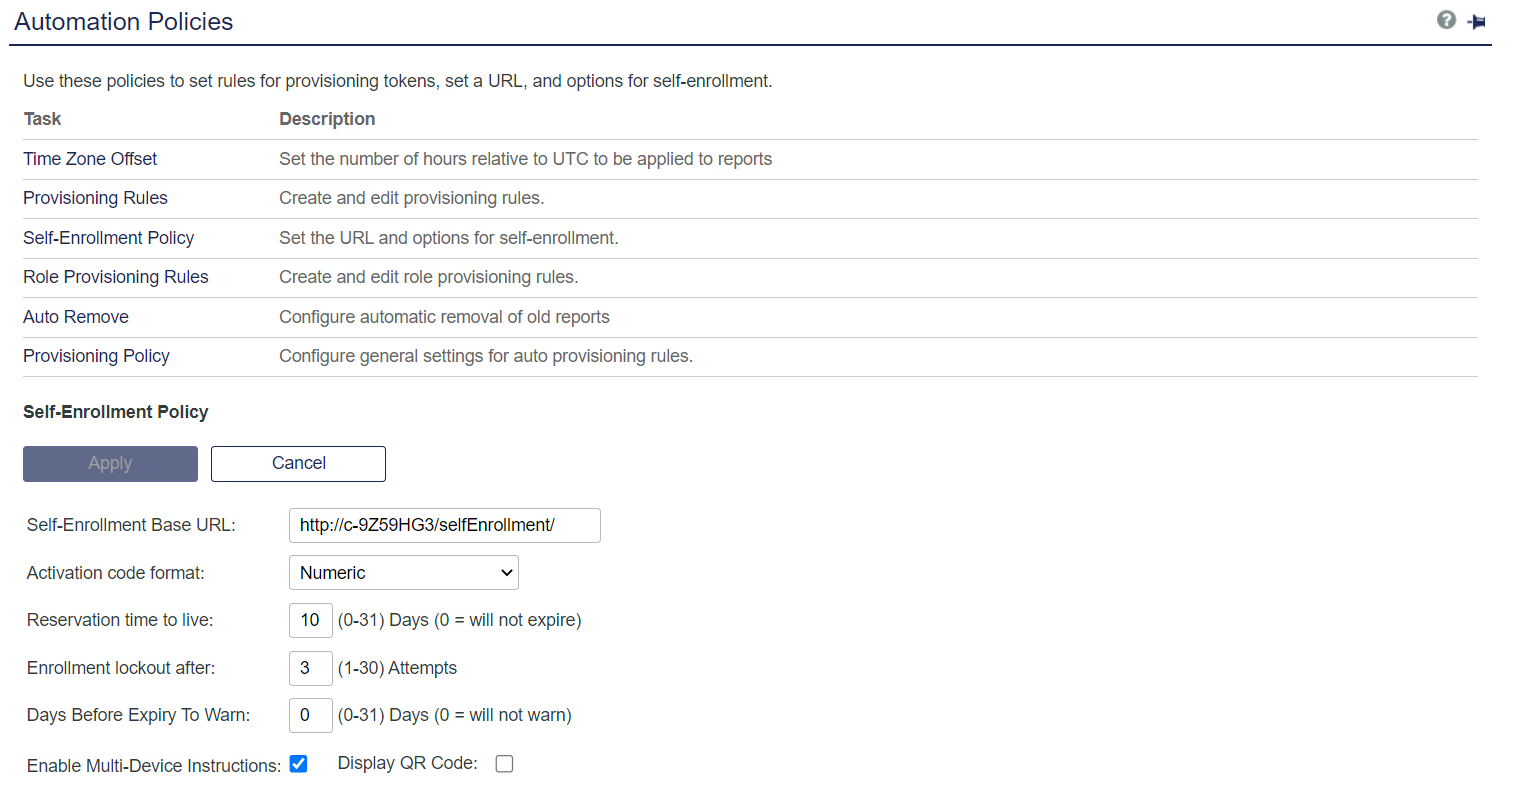
Click Virtual Server > Virtual Server Account Name > Policy > Automation Policies > Self-enrollment Policy.
-
In the Self-Enrollment Base URL field, select the certificate DNS name that was bonded in IIS to the website:
For example, change<http://W2k8R2-G/selfEnrollment>to<https://W2k8R2-G.empirel.local/selfEnrollment> -
When finished, click Apply.
Step 5: Self enrollment configuration
Option 1: Separate Self-Service and Self-Enrollment portals in DMZ
This section describes the steps required to configure the Self-Service and the Self-Enrollment portals when the SAS server is in a demilitarized zone (DMZ) with no internet connectivity.
To configure Separate Self Service and Self Enrollment portals in DMZ:
-
Install the SAS PCE (On Premise) server on a server in DMZ.
-
Add the SAS-PCE server as a site to the existing SAS core server. Ensure that the new SAS Site has access to the SAS database server.
-
Enable Self Service and Self Enrollment services only on this new SAS Site on DMZ.
-
As the new SAS site is only for Self Service and Self Enrollment purpose, on this new SAS site on DMZ go to IIS manager and shut down the rest of the applications pools, such as BSID-Console, BSIDCA, and TokenValidator. The only App Pools left enabled should be BSID-Enroll and BSID-SS
-
Shutdown all the BlackShield Windows services using services.msc.
-
On the Core SAS server, login to the SAS console.
-
Go to Policy tab > Automation Policy > Self Enrollment Policy, and edit the Self Enrollment Base URL with Self Enrollment portal's installed on DMZ server.
-
Go to Self Service tab > Self Service Policy, and edit the Self Service URL with Self Service portal's URL on DMZ server.
Since the self-service and the self-enrollment portals require a database connection, it is mandatory to open the database ports first. It might also require configuration of the firewall system.
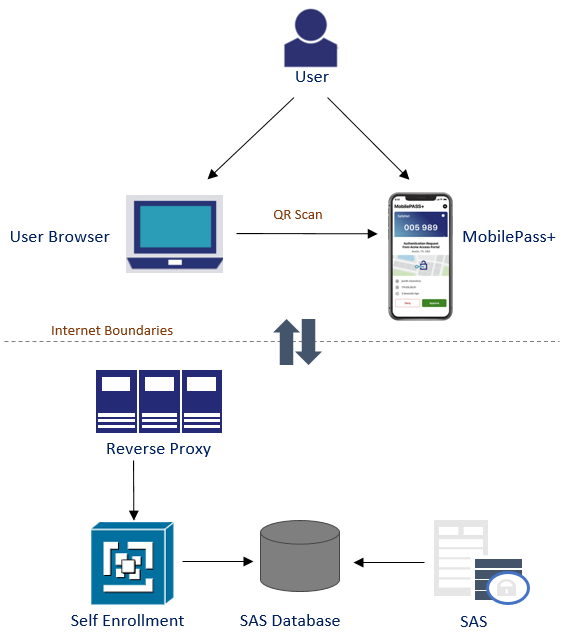
Option 2: MobilePass+ User self enrollment exposing only self-enrollment service
You can enable MobilePass+ users to communicate with SAS, where users can make a connection with Self Enrollment service using Reverse Proxy. SAS and its services remain in enterprise boundaries.
