
Synchronization groups
By default, no users are synchronized until at least one group is configured for synchronization.
For LDAP, SafeNet Synchronization Agent will synchronize users within nested groups, where users may be members of a group that is a member of another group. Group sync options allow retention of group membership attributes for users.
STA and SAS PCE synchronize users and groups that are visible in LDAP. STA and SAS PCE are not aware of trust relationships in AD.
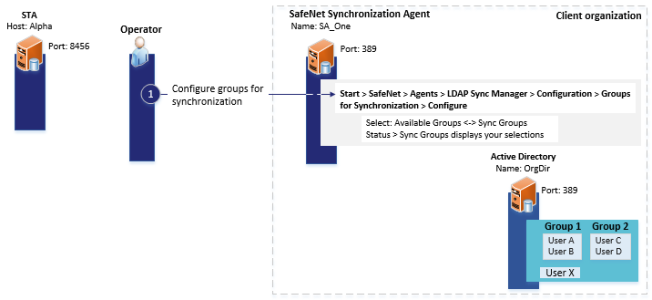
After you configure SafeNet Synchronization Agent for LDAP, configure groups for synchronization as follows:
-
From an administrator account on a Windows computer, launch SafeNet Synchronization Agent by clicking Start > SafeNet > SafeNet Synchronization Agent. If necessary, right-click SafeNet Synchronization Agent and select Run as administrator.
The SafeNet Synchronization Agent window displays.

-
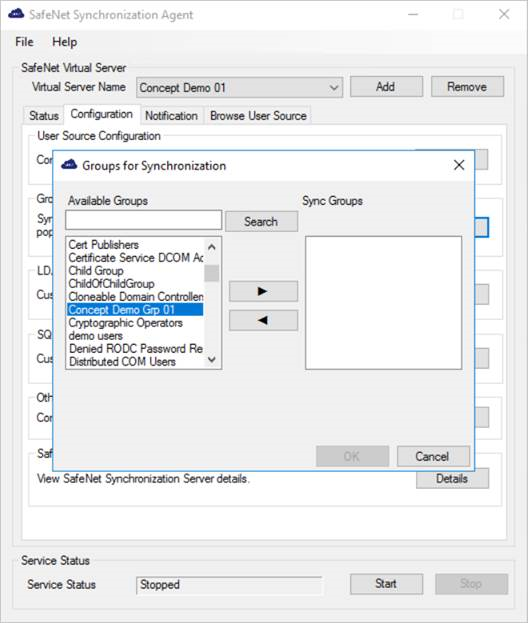
Click the Configuration tab and then click Configure in the Groups for Synchronization section.
The Groups for Synchronization window displays.
The Sync Groups field lists all LDAP or SQL user groups configured for synchronization with STA or SAS PCE.
-
Select the groups to be synchronized, as follows:
-
Enter the first letters of the group name in the Available Groups field.
-
Click Search. The results display below the Available Groups field.
-
Use the arrow buttons to move groups between the Available Groups and Sync Groups lists.
-
When finished, click OK.
Synchronization occurs only if the Sync Groups list contains at least one group. Groups are synchronized even if they contain no users. In the rare event that you want to remove all users from STA or SAS PCE, and start from scratch, change your SafeNet Synchronization Agent configuration to include one new empty group, remove the other groups, and then synchronize. STA or SAS PCE are updated with only the one empty group. You can then reconfigure SafeNet Synchronization Agent to include the groups you want and, on the next sync, STA or SAS PCE is updated with those groups.
-
-
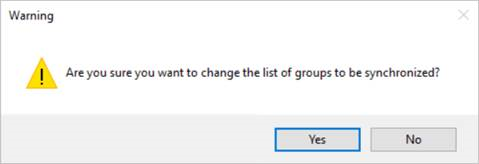
On the Warning message, click Yes to confirm your changes to the list of synchronized groups.
The groups selected for synchronization are displayed in the Status tab Sync Groups list.
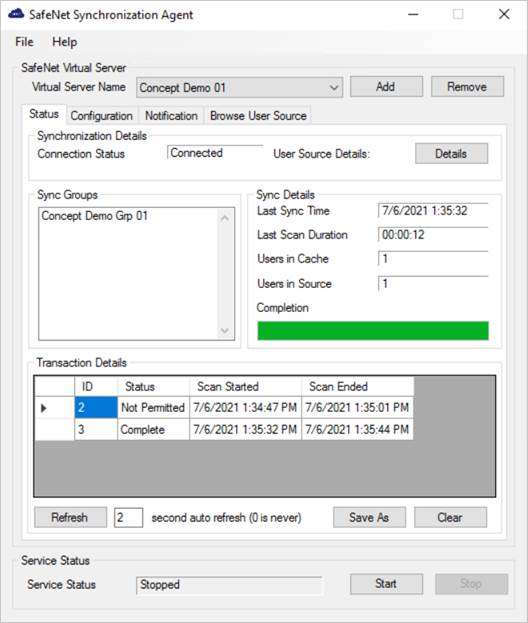
To view the users in the groups selected for synchronization and ensure that the groups were configured correctly, see Browse the user source.
If required, you can configure aliases 3 & 4.
After you are done, you can backup your configuration.