
Configure for SQL
To configure SafeNet Synchronization Agent for SQL environments, prepare the SQL schema before you configure the connection details:
For LDAP environments, see Configure SafeNet Synchronization Agent for LDAP.
Configure the SQL schema
-
From an administrator account on a Windows computer, click Start > SafeNet > SafeNet Synchronization Agent. If necessary, right-click SafeNet Synchronization Agent and select Run as administrator.
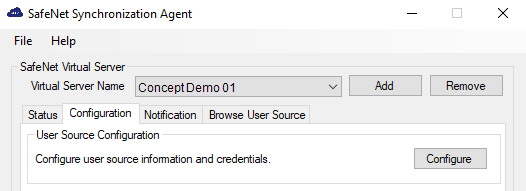
The SafeNet Synchronization Agent window displays.

-
In the SafeNet Virtual Server section, click Add.
-
Browse to the location of the SASSyncConfigFile.bmc key file that you saved in Configure record removal and generate an encryption key and select Open to load the file.
The Virtual Server Name field displays the name of your virtual server.
-
Click the Configuration tab.
-
In the SQL Schema Configuration section, click Configure.

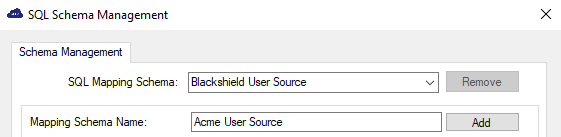
The SQL Schema Management window displays.
-
Enter a name in the Mapping Schema Name field and then click Add to add a schema.
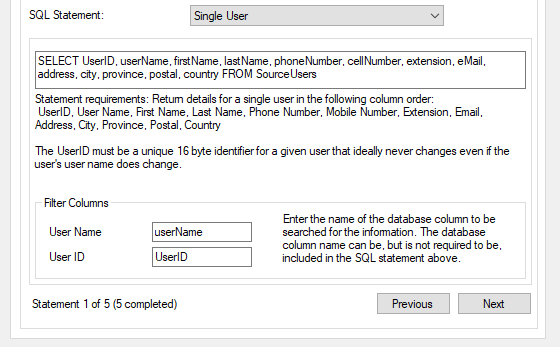
Five SQL statements are included in the sample user source schema:
-
Single User
-
User List
-
Groups
-
User's Groups
-
Group's Membership
The number of each statement is displayed at the bottom left of the window.
SafeNet Synchronization Agent uses null padding for binary values. On MySQL, use the BINARY data type instead of VARBINARY for your SQL queries.
For MS SQL, use the BINARY data type for the UserID field, or use a workaround to convert from VARBINARY.
-
-
In each SQL statement window:
-
After the word SELECT in the SQL Statement box, replace each default field name with the corresponding field name used in your SQL environment. Ensure that all of the fields in the edited statement are listed in the same order as in the default statement.
For PostgreSQL, you must declare mixed-case SQL attributes with double-quotes. For example:
SELECT "UserID", "userName", "firstName", "lastName", email, phonenumber, cellnumber, extension, address, city, province, postal, country FROM users -
Under Filter Columns, replace each default field name with the corresponding field name from your SQL environment.
For PostgreSQL, enclose mixed-case field names in double-quotes.
-
Click Apply to save your changes.
-
-
Click Next or Previous to move through the statements. When the field names in all five SQL statements comply with the field names used in your SQL environment, click OK.
MS SQL UserID field
For MS SQL, you must set the UserID field to the BINARY data type for your SQL queries.
As a workaround, you can use CAST(MOL_User_SAS.id AS varbinary(max)), which converts the UserID field from Int to VARBINARY.
The following examples show how to use this workaround:
Example
SELECT
CAST(MOL_User_SAS.id AS varbinary(max)) as UserID,
MOL_User_SAS.UserName as userName,
MOL_User_SAS.First_Name as firstName,
MOL_User_SAS.Fourth_Name as lastName,
'' as phoneNumber,
MOL_User_SAS.MobileNumber As cellNumber,
'' AS extension,
MOL_User_SAS.Email as eMail,
'' as address,
'' as city,
'' as province,
'' as postal,
'' as country FROM MOL_User_SAS
Example
SELECT CAST(MOL_User_SAS.id AS varbinary(max)) as UserID,
MOL_User_SAS.UserName as userName, MOL_User_SAS.First_Name as firstName,
MOL_User_SAS.Fourth_Name as lastName FROM MOL_User_SAS
Example
SELECT Enum_UserType.Name, Enum_UserType.Description FROM Enum_UserType
Example
SELECT CAST(MOL_User_SAS.id AS varbinary(max)) as UserID, Enum_UserType.Name as Name
FROM Enum_UserType
JOIN MOL_User_SAS ON Enum_UserType.Id=MOL_User_SAS.User_Type_Id
Example
SELECT P.name as parent, C.name as child FROM Enum_UserType M JOIN Enum_UserType C ON M.ID = C.ID JOIN Enum_UserType P ON M.ID = P.ID
Configure the connection details for SQL
-
In the SafeNet Virtual Server section, click the Configuration tab.
-
In the User Source Configuration section, click Configure.
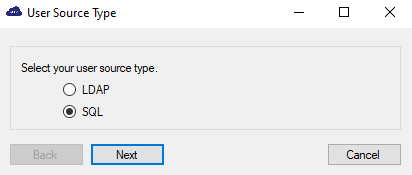
The User Source Type window displays.
-
Select SQL and then click Next.
The Database Provider window displays.
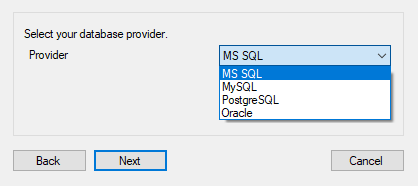
-
Select the appropriate database provider and then click Next.
-
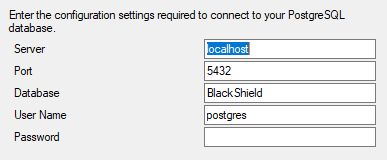
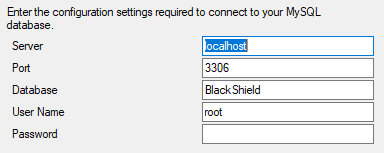
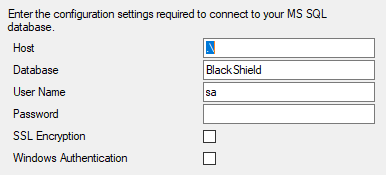
Enter the configuration settings for your SQL database:
-
For PostgreSQL: The database name must be in lowercase (and must already exist, but can be empty). If the database was created with uppercase in the name, it must be renamed.
-
For MySQL: If the .NET Connector is not present, the system prompts you to install it.
-
For MS SQL: Enter the user name and password created for the SafeNet Synchronization Agent connection to the LDAP directory server.
-
For Oracle:

-
-
Click Next after completing the configuration settings for your SQL database.
Depending on your SQL settings, you may be prompted to enter one or more failover hosts or servers for the agent to connect to in the event that the primary SQL server is inaccessible.

The Database Found window displays.
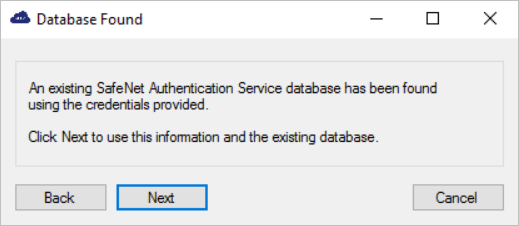
-
Click Next.
The Custom SQL Mapping window displays.
-
Select the SQL schema that you defined and then click Next.
The Configuration Complete window displays.
-
Click Finish to save your changes.
Verify the SQL connection
-
In the SafeNet Virtual Server section, click the Status tab.
-
In the Synchronization Details section, click Details to display the SQL connection information.
The User Source Connection Details window displays.
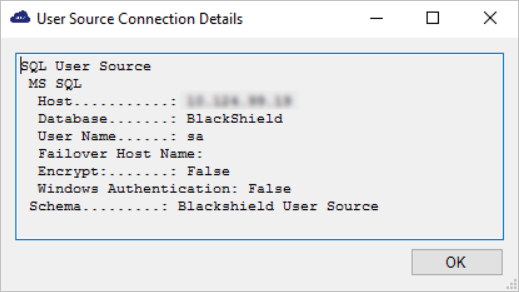
Password information is not displayed.
-
Click OK.
SafeNet Synchronization Agent is now configured for SQL.
Next, configure the SQL group memberships that will be used to determine which users are synchronized. See Configure groups for synchronization.