Windows Interactive Luna HSM Client Installation
NOTE The GUI interactive installer (see Windows Interactive Luna HSM Client Installation) is deprecated, and will be removed from a future release.
This section describes how to install the Luna HSM Client software on Windows, using the GUI interactive installer. It contains the following topics:
>Installing the Luna HSM Client Software
>Modifying the Installed Windows Luna HSM Client Software
>Java
>Modifying the Number of Luna Backup HSM Slots
>Uninstalling the Luna HSM Client Software
>Windows Luna HSM Client Installation
Applicability to specific versions of Windows is summarized in the Customer Release Notes for this release.
NOTE Before installing a Luna HSM system, confirm that the product you have received is in factory condition and has not been tampered with in transit. Refer to the Startup Guide included with your product shipment. If you have any questions about the condition of the product that you have received, contact Technical Support immediately.
Required Client Software
Each computer that connects to a Luna Network HSM 7 as a Client must have the cryptoki library, the vtl client shell and other utilities and supporting files installed.
Each computer that contains, or is connected to a Luna PCIe HSM 7 or a Luna USB HSM 7 must have the cryptoki library and other utilities and supporting files installed.
Prerequisites
The Luna HSM Client installer requires the Microsoft Universal C Runtime (Universal CRT) to run properly. Universal CRT requires your Windows machine to be up to date. Before running the installer, ensure that you have the Universal C Runtime in Windows (KB2999226) update and its prerequisites installed on your machine. The following updates must be installed in order:
1.March 2014 Windows servicing stack update (see https://support.microsoft.com/en-us/help/2919442)
2.April 2014 Windows update (see https://support.microsoft.com/en-us/help/2919355)
3.Visual C++ Redistributable for Visual Studio 2015 (see https://www.microsoft.com/en-in/download/details.aspx?id=481450)
NOTE CSP or KSP registration includes a step that verifies the DLLs are signed by our certificate that chains back to the DigiCert root of trust G4 (in compliance with industry security standards).
This step can fail if your Windows operating system does not have the required certificate. If you have been keeping your Windows OS updated, you should already have that certificate.
If your Luna HSM Client host is connected to the internet, use the following commands to update the certificate manually:
certutil -urlcache -f http://cacerts.digicert.com/DigiCertTrustedRootG4.crt
certutil -addstore -f root DigiCertTrustedRootG4.crt
To manually update a non-connected host
1. Download the DigiCert Trusted Root G4 (http://cacerts.digicert.com/DigiCertTrustedRootG4.crt) to a separate internet-connected computer.
2.Transport the certificate, using your approved means, to the Luna HSM Client host into a <downloaded cert path> location of your choice
3.Add the certificate to the certificate store using the command:
certutil -addstore -f root <downloaded cert path>
Installing the Luna HSM Client Software
Luna HSM Client can be installed on 64-bit Windows operating systems. Hardware drivers are 64-bit only. Older client versions include 32-bit libraries and binaries.
NOTE Luna HSM Client 10.1.0 and newer includes libraries for 64-bit operating systems only.
For compatibility of our HSMs with Windows CAPI we have Luna CSP, and for the newer Windows CNG we have Luna KSP. See Luna CSP and KSP for more information.
Interactive (prompted, this page) and non-interactive (no prompts Windows Luna HSM Client Installation) installation options are available.
NOTE Compatibility of Luna PCIe HSM 7 version, Client version, and Windows OS versions
Luna HSM Client 10.3.0 was the last client version to support Windows Server 2012 R2, which accepts the Luna PCIe HSM 7 6.x driver.
If you have Windows Server 2012 R2 computer with a Luna PCIe HSM 7 6.x onboard, do not install Luna HSM Client 10.4.0 or newer there; these client versions will not load the Luna PCIe HSM 7 6.x driver.
If you have Luna PCIe HSM 7 6.x and 7.x HSM card in the same system, failure of the 6.x driver would prevent loading of the 7.x driver as well. If your application works with Linux, the Luna PCIe HSM 7 6.x will continue to work there, and will not block Luna PCIe HSM 7 7.x.
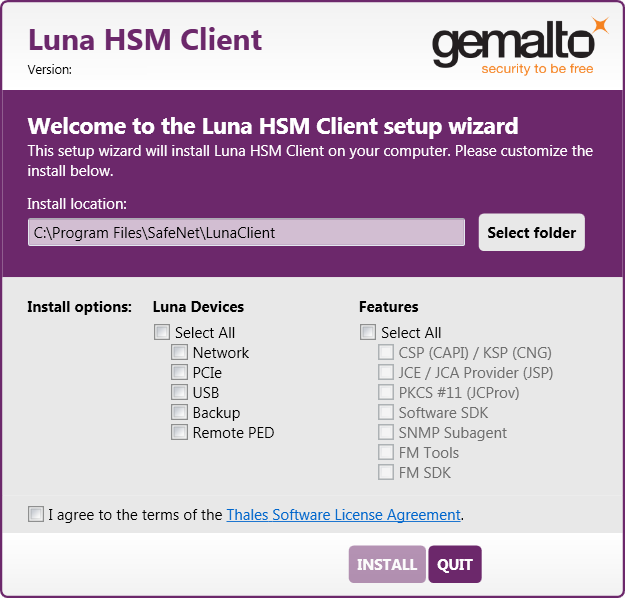
To install the Luna HSM Client software
1.Log into Windows as Administrator, or as a user with administrator privileges (see Troubleshooting).
2.Uninstall any previous versions of the Client software before you proceed (see Uninstalling the Luna HSM Client Software).
NOTE If you do not uninstall previous Luna HSM Client versions, you might face installation issues, such as failure to install the new client.
3.Download the Luna HSM Client from the Thales Support Portal at https://supportportal.thalesgroup.com.
TIP Thales recommends verifying the integrity of the Luna HSM Client packages, by calculating their SHA256 hash values and comparing with the hash values posted on the Support Portal, before installing them on your client machines.
You can use the sha256sum tool on Linux machines to calculate the SHA256 hash values.
4.Extract the .zip to an appropriate folder.
5.In the extracted directory, locate the folder for your Windows architecture and double click LunaHSMClient.exe.
6.The Custom Setup dialog allows you to choose which software components you wish to install. Click a product to select the components to install, or click Select All to install all available components.
The installer includes the Luna SNMP Subagent as an option with any of the Luna HSMs, except Luna Network HSM 7, which has agent and subagent built in. After installation of the Luna SNMP Subagent is complete, you will need to move the SafeNet MIB files to the appropriate directory for your SNMP application, and you will need to start the SafeNet subagent and configure for use with your agent
7.The Custom Setup dialog allows you to choose which software components you wish to install. Click a product to select the components to install, or click Select All to install all available components.
The installer includes the Luna SNMP Subagent as an option with any of the Luna HSMs, except Luna Network HSM, which has agent and subagent built in. After installation of the Luna SNMP Subagent is complete, you will need to move the SafeNet MIB files to the appropriate directory for your SNMP application, and you will need to start the SafeNet subagent and configure for use with your agent
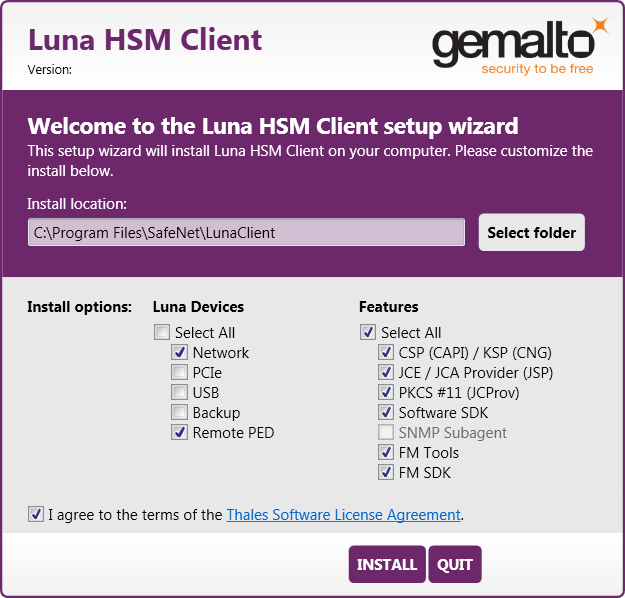
NOTE Dependencies and considerations when installing:
>The FM Tools and FM SDK are useful to you only if you will be using or creating Functionality Modules, to add custom abilities to your HSMs.
>The FM SDK requires that you install Luna PCIe HSM 7 software and drivers.
>Similarly, if you are using third-party software to make standard cryptographic calls to the HSM, and are not creating application programs, then you can forego loading the Software Development Kit.
>There is no harm in installing unneeded components; they do not conflict.
>The FM SDK option remains gray/unselectable until "Software SDK" is selected, because some of the FM SDK samples have dependencies on General Cryptoki Samples that are part of "Software SDK".
After you select the components you want to install, click Install.
a.Agree to the terms of the License Agreement to proceed with installation. To view the agreement text, click the link in the dialog. The installer loads a PDF version if a PDF reader is available; otherwise it launches a text editor and a plain-text version of the agreement.
b.If Windows presents a security notice asking if you wish to install the device driver from Thales, click "Always trust software from Thales DIS CPL USA, Inc." and click Install to accept.
c.If you choose not to install the driver(s), your Luna HSM Client cannot function with any locally-connected Luna hardware (which includes Luna PCIe HSM 7, Luna USB HSM 7, or Luna Backup HSMs).
8.When the installation completes, the button options are Uninstall, Modify, or Quit; click Quit to finish.
9.[Optional] For easy use of the Luna HSM Client command-line tools, add the directory to the system PATH variable.
"C:\Program Files\SafeNet\Lunaclient"
Modifying the Installed Windows Luna HSM Client Software
If you wish to modify the installation (perhaps to add a component or product that you did not previously install), you must re-run the current installer and ensure that the desired options are selected.
NOTE This feature requires minimum Luna HSM Client 7.2.0.
To modify the installed Luna HSM Client software
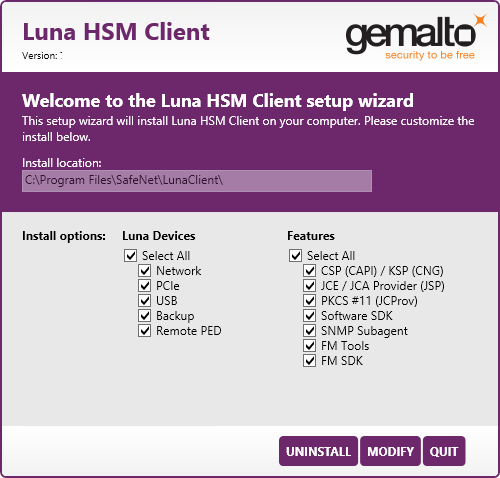
1.Run the LunaHSMClient.exe program again. Because the software is already installed on your computer, the following dialog is displayed (in this example, devices and features were previously installed, and the task is to uninstall a couple of items):
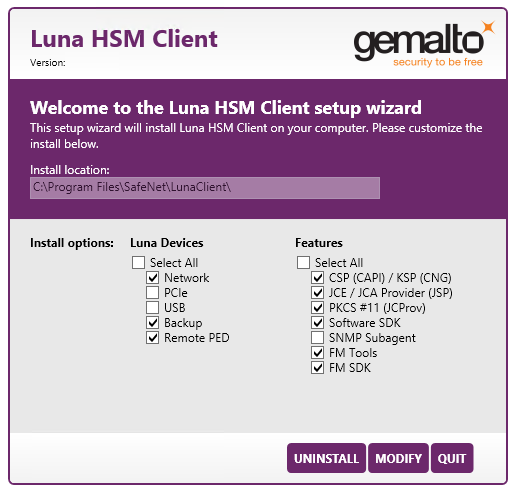
2.Select or deselect individual Devices or Features, as desired.
3.Click Modify. The client software is updated (items are added or removed).
If you are uninstalling some items, or if you are adding features, the dialog shows a progress bar briefly, and then shows the current status.
If you are adding a Luna Device, then you might be prompted with the operating system pop-up to accept/trust the driver.
4.Click Quit when the modification is complete.
NOTE You can also use Programs and Features in the Windows Control Panel to launch the Uninstall/Modify dialog for the client software.
Java
If you install the Luna Java Security Provider (JSP), refer to Luna JSP Overview and Installation for additional setup procedures for your operating system.
Luna CSP and KSP
Thales provides Luna CSP for applications running in older Windows crypto environments running Microsoft Certificate Services (CAPI), and Luna KSP for newer Windows clients running Cryptography Next Generation (CNP). Consult Microsoft documentation to determine which one is appropriate for your client operating system.
>Luna CSP Registration Utilities
>Luna KSP for CNG Registration Utilities
If the Luna CSP (CAPI) / Luna KSP(CNG) option is selected at installation time, the SafeNetKSP.dll file is installed in C:\Windows\System32 (used for 64-bit KSP). If you are installing a Luna HSM Client version older than 10.1, SafeNetKSP.dll is also installed in C:\Windows\SysWOW64 (used for 32-bit KSP).
NOTE The cryptoki.ini file, which specifies many configuration settings for your HSM and related software, includes a line that specifies the path to the appropriate libNT for use with your application(s). Verify that the path is correct.
USB-powered PED
The USB-powered Luna PIN Entry Device (PED) contains new hardware that enables the PED to be powered by the USB connection; there is no longer a requirement for an external power Adapter. It is functionally equivalent to your existing (previous-generation) Luna PEDs and is compatible with HSM versions, 5.x, 6.x, and 7.x.
The USB-powered Luna PED ships with Luna PED Firmware 2.8.0. Note that you cannot upgrade older, adapter-powered Luna PEDs to 2.8.0; existing PEDs continue to need a separate power adapter for remote PED and upgrade use. The model number on the manufacturer's label identifies the refreshed PED: PED-06-0001. An installed driver is required; see step 1, below.
To use the new USB-powered PED
1.Ensure the Luna HSM Client software is installed on the Windows computer that will act as the Remote PED server to your Luna HSM. Installing the Remote PED component of the Luna HSM Client installs the required driver.
NOTE A USB connection, without the driver software, only illuminates the Luna PED screen, with no menu. An installed and running PED driver, on the connected computer, is required for the PED to fully boot and to display its menu.
2.Connect the PED to the computer where you installed the Remote PED component of the Luna HSM Client, using the USB micro connector on the PED and a USB socket on your computer.
3.After you connect the PED to the host computer, it will take 30 to 60 seconds for initial boot-up, during which time a series of messages are displayed, as listed below:
BOOT V.1.1.0-1
CORE V.3.0.0-1
Loading PED...
Entering...
4.After the boot process is complete, the PED displays Local PED mode and the Awaiting command... prompt. Your new Luna PED is now ready for use.
5.To enter Remote PED mode, if needed, exit Local PED mode with the "< " key, and from the Select Mode menu, select option 7 Remote PED.
Modifying the Number of Luna Backup HSM Slots
By default, the Luna HSM Client allows for three slots reserved for each model of Luna Backup HSM. You can edit crystoki.ini to modify the number of reserved slots. See also Configuration File Summary.
To modify the number of reserved Backup HSM slots
1.Navigate to the crystoki.ini file and open in a text editor.
2.Add the following line(s) to the CardReader section of the file:
•For Luna Backup HSM G5:
LunaG5Slots = <value>;
•For Luna Backup HSM 7:
LunaG7Slots = <value>;
Uninstalling the Luna HSM Client Software
You need to uninstall Luna HSM Client before installing a new version. If you wish to modify the installation (perhaps to add a component or product that you did not previously install), you must uninstall the current installation and re-install with the desired options. If you have a Luna Backup HSM connected to the client workstation,
To uninstall the Luna HSM Client software
1.Run the LunaHSMClient.exe program again. Because the software is already installed on your computer, the following dialog is displayed, showing which components are currently installed (for this example, all Devices and all Features were previously installed):
2.Click Uninstall. The client software is uninstalled.
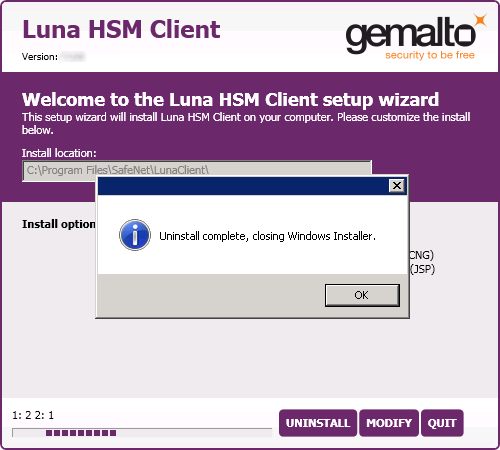
3.When the uninstallation is complete, click OK to dismiss the operating system's confirmation dialog.
NOTE You can also use Programs and Features in the Windows Control Panel to uninstall the client software.
Uninstall if not present
If the Luna HSM Client software has been uninstalled, and you launch the installer in uninstall mode, from the command line, the installer starts, looks for the installed software, fails to find it, and presents a Windows dialog to that effect.
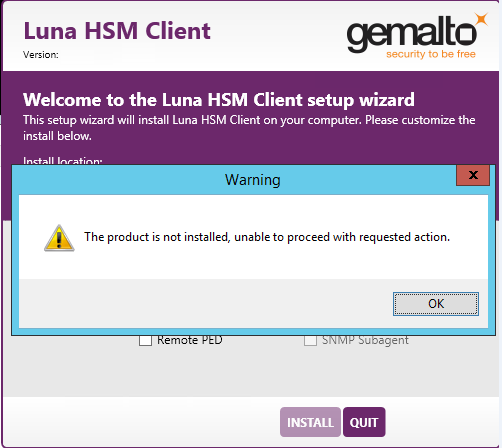
If the Luna HSM Client software has been uninstalled, nothing related to the client appears in Windows Control Panel, so nothing exists to launch from that avenue.
After Installation
Open a new command-line/console window to allow the library path to be found before you run LunaCM or other utilities that require the library.
Troubleshooting
If you are not the Administrator of the computer on which Luna HSM Client is being installed, or if the bundle of permissions in your user profile does not allow you to launch the installer with "Run as Administrator", then some services might not install properly. One option is to have the Administrator perform the installation for you.
Another approach might be possible. If you have sufficient elevated permissions, you might be able to right-click and open a Command Prompt window as Administrator.
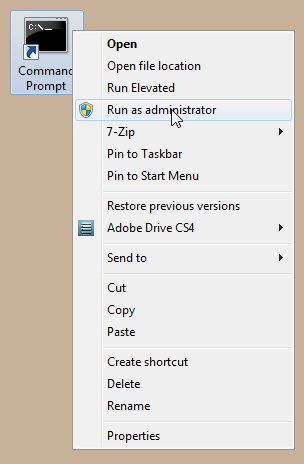
If that option is available, then you can use the command line to move to the location of the LunaHSMClient.exe file and launch it there, which permits the needed services to load for PEDclient. See Windows Luna HSM Client Installation for instructions on how to install the client software from the command line.
If, after you uninstall a previous version of Luna Client and install a newer one, the error code 2147023293 appears, reboot the client machine.