
Authentication with AD Federation Services
Last update: 2021-03-23
This sample scenario has been provided by individual contributors and is not updated frequently.
Active Directory Federation Services (AD FS) supports a federated identity management solution extending distributed identification, authentication, and authorization services to web-based applications across organization and platform boundaries. Thales provides a ready-made SafeNet Agent for AD FS to enable STA secondary authentication (domain username and password followed by STA credentials). However no ready-made or documented solution exists for STA/STA primary authentication (STA credentials only) with AD FS. This article provides an unofficial guide to achieve just that.
Prerequisites
The following are required before proceeding with this guide:
-
Windows 2016 Server is installed and configured in a domain
-
AD FS is installed and fully configured with certificates and can be reached outside of your network
-
A SafeNet Trusted Access virtual server with synchronized users from the test domain
Step 1: Generate STA metadata
-
Open a browser and login to STA as an operator.
-
Click the Applications vertical tab.
-
Click the + action button to add a new application.
-
Filter (search) for the Generic Template and click the + action button to add the application.
-
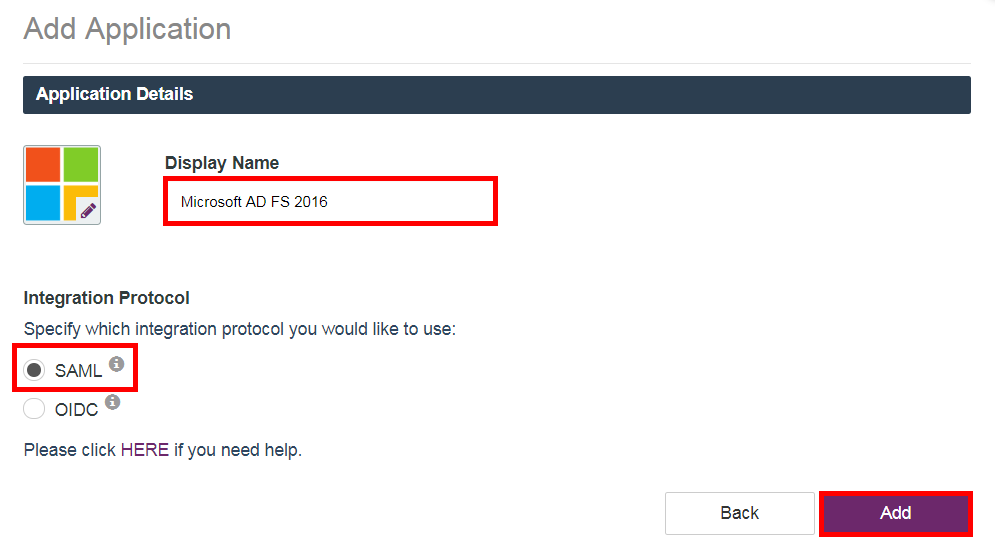
In the Display Name field, enter a name for the integration (e.g., “Microsoft AD FS 2016”).
-
Select the SAML radio button and then (optionally) click the pen action button to change the icon for the application.
-
Click Add to save the application/integration.
-
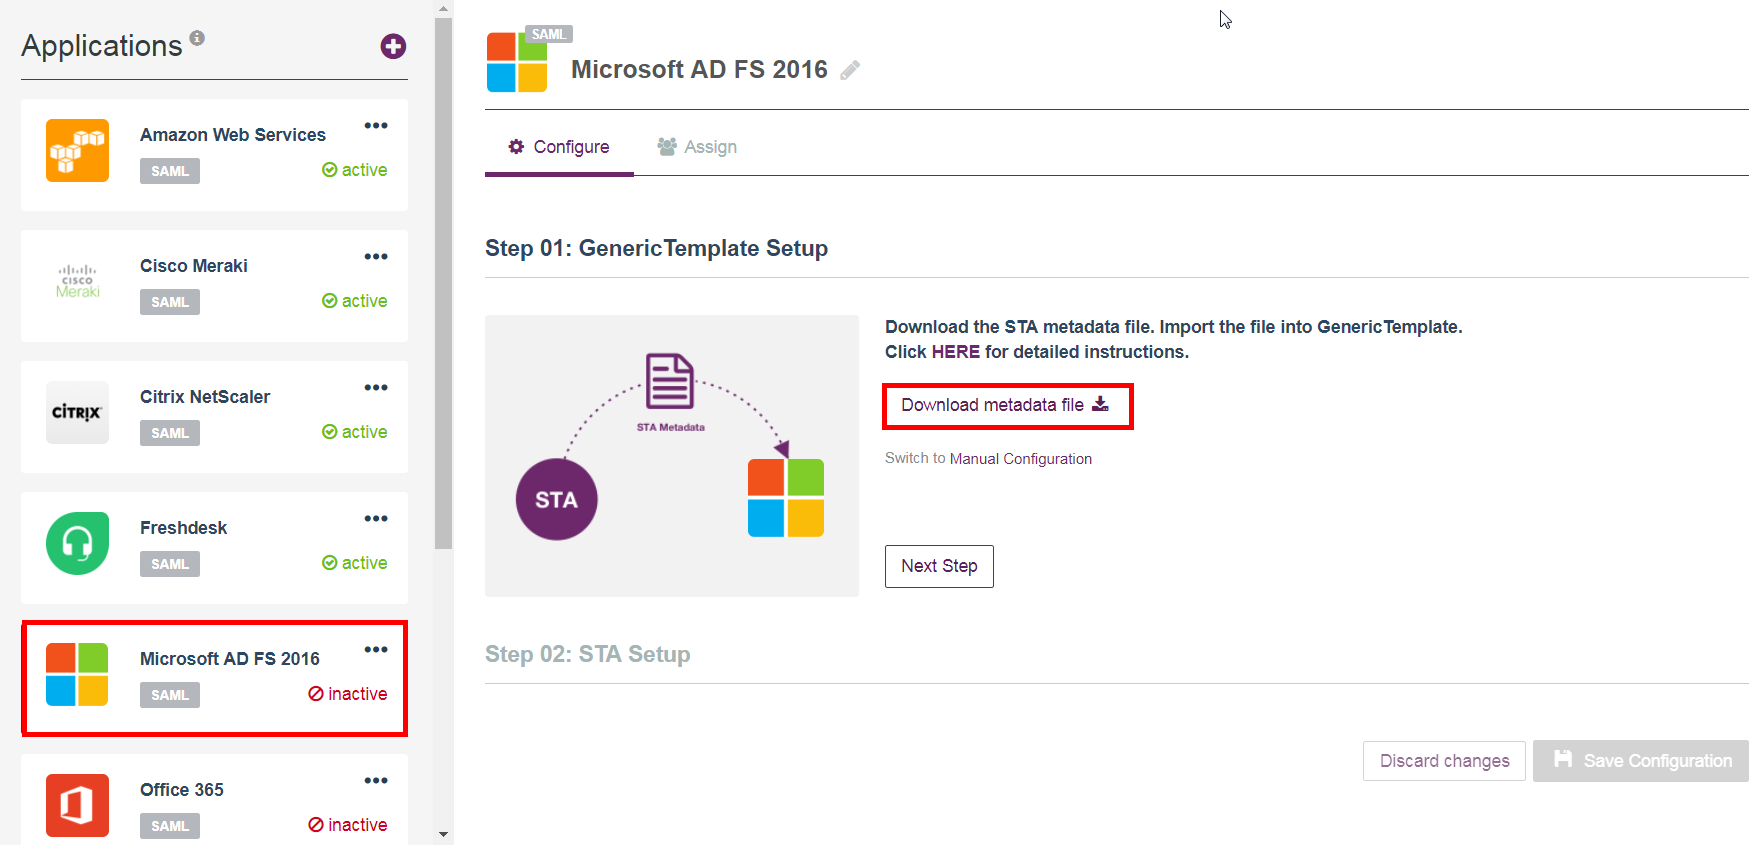
Select the application (AD FS) and then in the right-side pane, select Download metadata file.
-
Open a Chrome or Firefox browser window or a new tab and navigate to: https://fqdn/FederationMetadata/2007-06/FederationMetadata.xml.
The file should download to disk automatically. If it does not, save the properly formatted content of the page as “FederationMetadata.xml”.
-
Change tab/browser back to SafeNet Trusted Access and proceed to Step 2: Configure Claims Provider Trust.
-
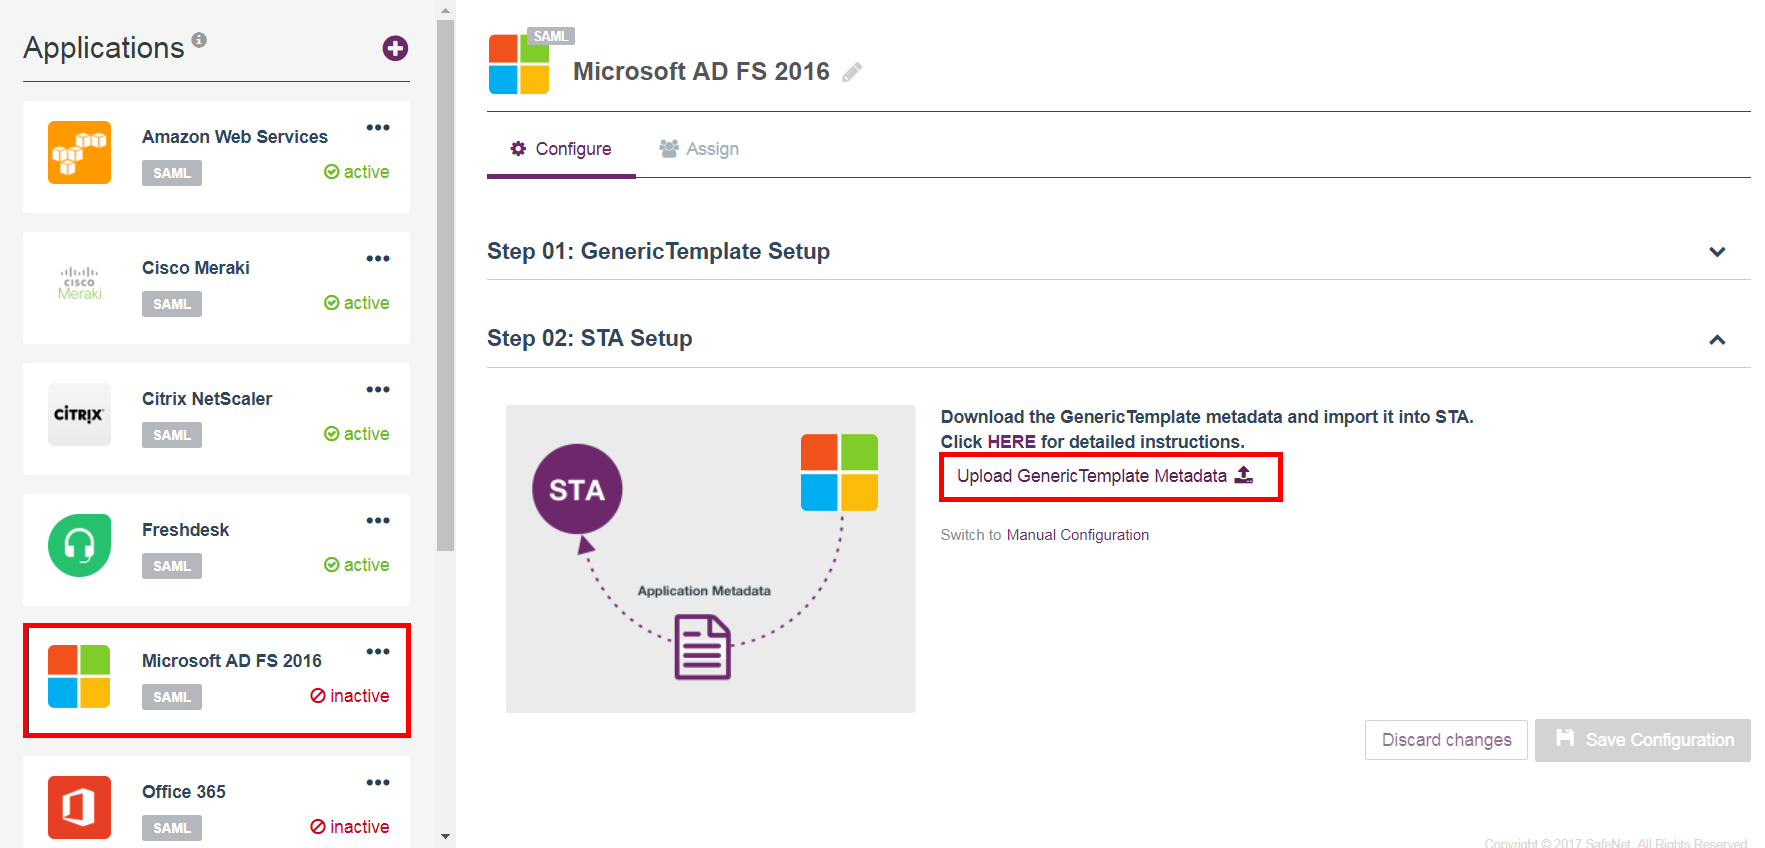
Click on Upload Generic Template Metadata and browse to the xml document downloaded in step 7.
-
Scroll down and click Save Configuration.
Step 2: Configure Claims Provider Trust
-
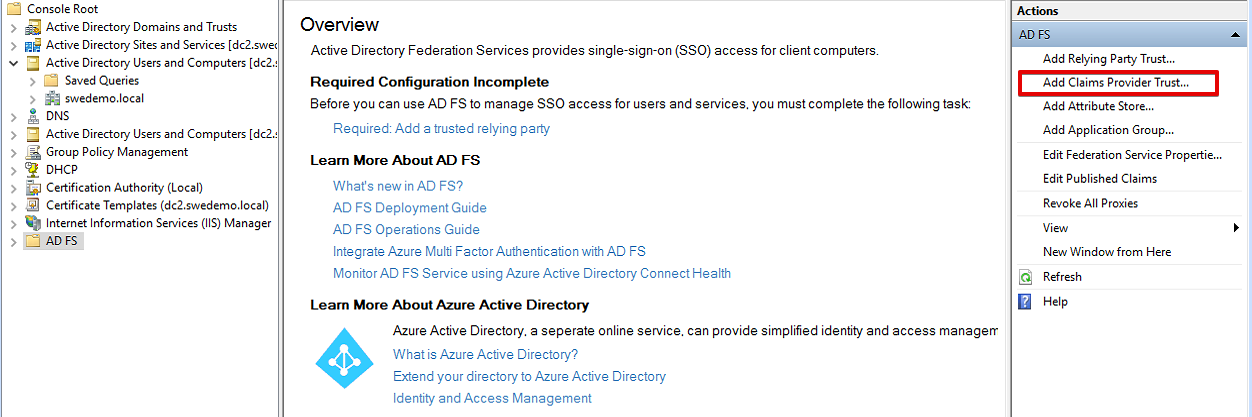
Open the AD FS Management Console (mmc).
-
On the right-side, click Add Claims Provider Trust.
-
In the “Add Claims Provider Trust” wizard, select Start.

-
Select Import data about the claims provider from a file and then click Browse.

-
Select the metadata file exported in step 1.5 and click Next.
-
Click OK if a popup box appears stating that some features are not supported by ADFS.
-
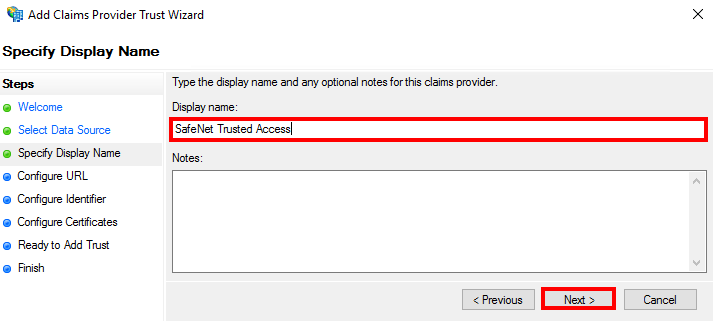
Give the claims provider a meaningful name (e.g., SafeNet Trusted Access) and click Next.
-
Click Next and then Close to return to the main ADFS configuration view.
-
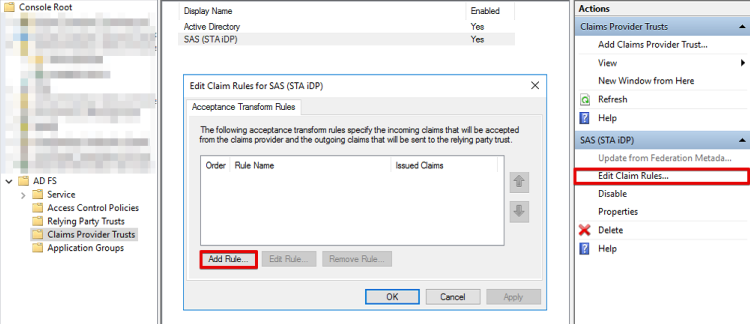
To configure claim rules, right-select Edit Claim Rules in the right-side pane.
-
Click Add Rule.
-
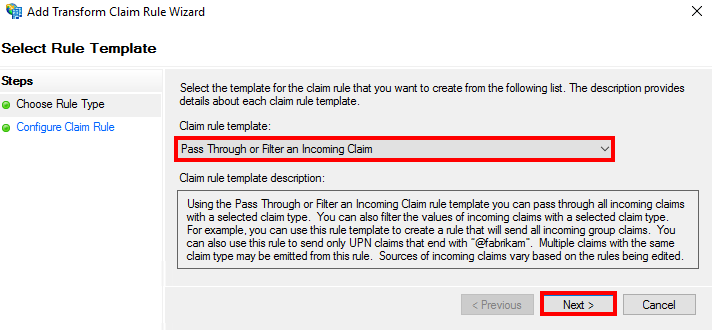
In the drop down list, select Pass Through or Filter and Incoming Claim, then click Next.
-
Provide a name for the rule (e.g., Transform Name ID to Windows Account Name) and set the Incoming claim type to Name ID and Incoming name ID format to Unspecified. Check the Pass through all claim values radio button and click OK.
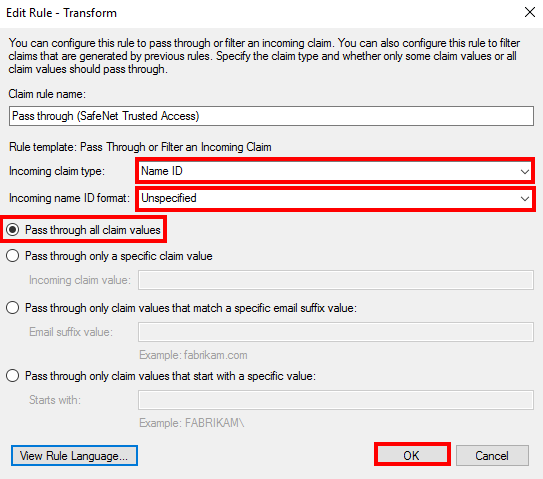
For reference, the above rule in Rule Language format (use with custom claims rule) is as follows:
c:[Type == "http://schemas.xmlsoap.org/ws/2005/05/identity/claims/nameidentifier", Properties["http://schemas.xmlsoap.org/ws/2005/05/identity/claimproperties/format"] == "urn:oasis:names:tc:SAML:1.1:nameid-format:unspecified"] => issue(claim = c); -
Click Finish (or OK) complete and close the configuration.
Step 3: Enable the IdpInitiatedSignon page
The /IdpInitiatedSignon.htm page can be used as a deployment validation tool when configuring AD FS. It is available in Windows 2012, but disabled by default on Windows 2016. This section explains how to enable the page for AD FS 2016.
-
Open PowerShell as Administrator.
-
Execute the following command.
Set-AdfsProperties -EnableIdpInitiatedSignonPage $true -
Exit PowerShell.
-
Open a browser and navigate to https://fqdn/adfs/ls/IdpInitiatedSignon.aspx.
A login page displays.
Use this page to test the integration with STA/STA.
Step 4: Testing the solution
The following steps test AD FS to STA integration using the AD FS test application.
The following test does not validate the use of a third party SAML/AD FS enabled app. Additional configuration is required in terms of Relying Party Trusts for third party apps.
-
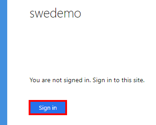
Open a browser and navigate to: https://fqdn/adfs/ls/IdpInitiatedSignon.aspx.
-
Click Sign in.
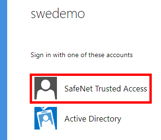
-
Select your STA claims provider from the list.
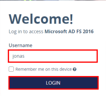
-
Provide your username and click LOGIN.
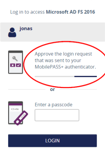
-
Approve the push request if using MobilePASS+ or enter a One Time Password and click LOGIN.
-
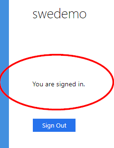
Assuming the configuration is correct, a message confirming successful login displays.
Step 5: Adding a Relying Party Trust
Configuration thus far has established and then verified AD FS Service Provider (SP) initiated flows with SafeNet Trusted Access (STA) using the native test app / page (IdpInitiatedSignon), but has excluded testing with an actual Relying Party. One way to approach this end-to-end testing without dependency on a third party is to use Claims X-Ray from Microsoft. This allows you to test and tweak the integration with a great degree of visibility.
Basic testing using Claims X-Ray
The following setup and test is based on what has been configured already.
-
Follow the steps outlined here to install Claims X-Ray: https://adfshelp.microsoft.com/ClaimsXray/.
-
Once configured on your federation service, return to the Claims X-Ray web page.
-
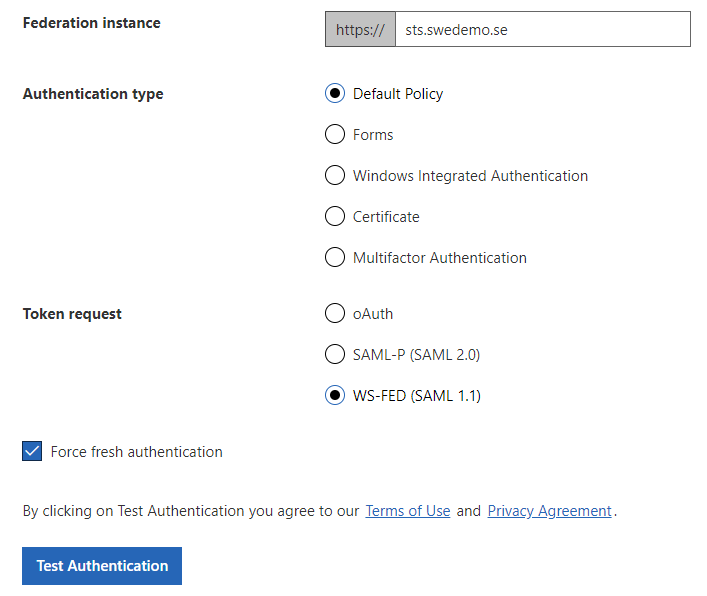
Configure the Federation instance field with the URL for your STS node and click Test Authentication.
-
When prompted, select the SafeNet Trusted Access claims provider and complete authentication.
-
Review the results.
RESULTS: A single claim containing NameIdentifier == Email (in my case: ‘jonas@swedemo.se’) should be shown. Note that this will satisfy the requirements of most cloud applications as email is often used to uniquely identify a user.
Advanced configuration and testing using Claims X-Ray
Now, let's do something slightly more advanced using the following scenario.
Say your third party app requires a set of claims based on attributes found in Active Directory. Let's say those claims are email, name, company and employee ID number. Some of these attributes might be on the SafeNet Trusted Access (STA) user if synchronized from Active Directory, but certainly not all.
Instead of solving this in STA we are going to do it with a custom claims rule at the Relying Party Trust.
Reviewing / defining Active Directory user attributes
For starters, to get the attributes from Active Directory (AD) we need to ensure they are populated. Here’s a look at my test user (jonas) in ADUC using the Advanced Features view to view and alter object attributes.
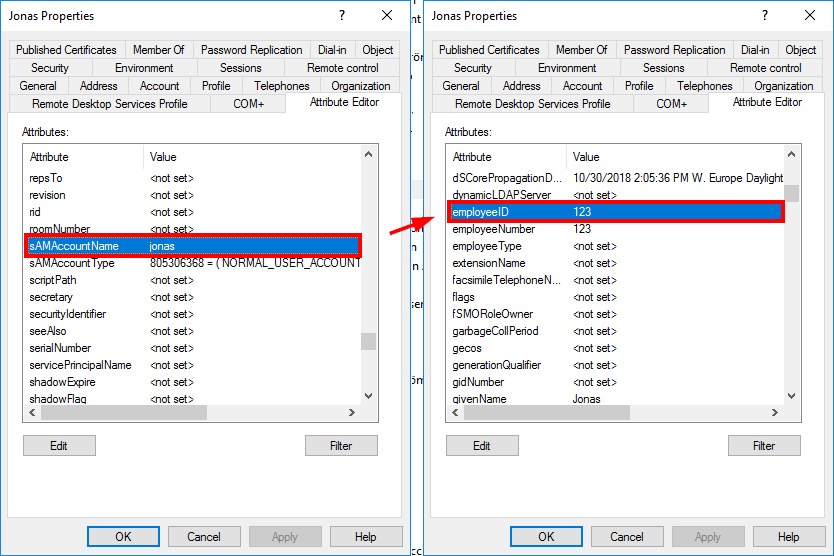
The AD attributes we are going to use as claims are:
-
mail
-
isplayName
-
company
-
employeeID
Make sure the above attributes are populated before proceeding.
SAS user ID instead of email address
Because we need to query the AD for attributes on a user object we will want to send in the user name in the query. To achieve this we must first change the SafeNet Trusted Access configuration for the AD FS app to return ‘SAS User ID’ instead of ‘Email address’. To do this:
-
Log in to SafeNet Trusted Access as an operator.
-
Go to the Applications tab.
-
Click to select your AD FS app.
-
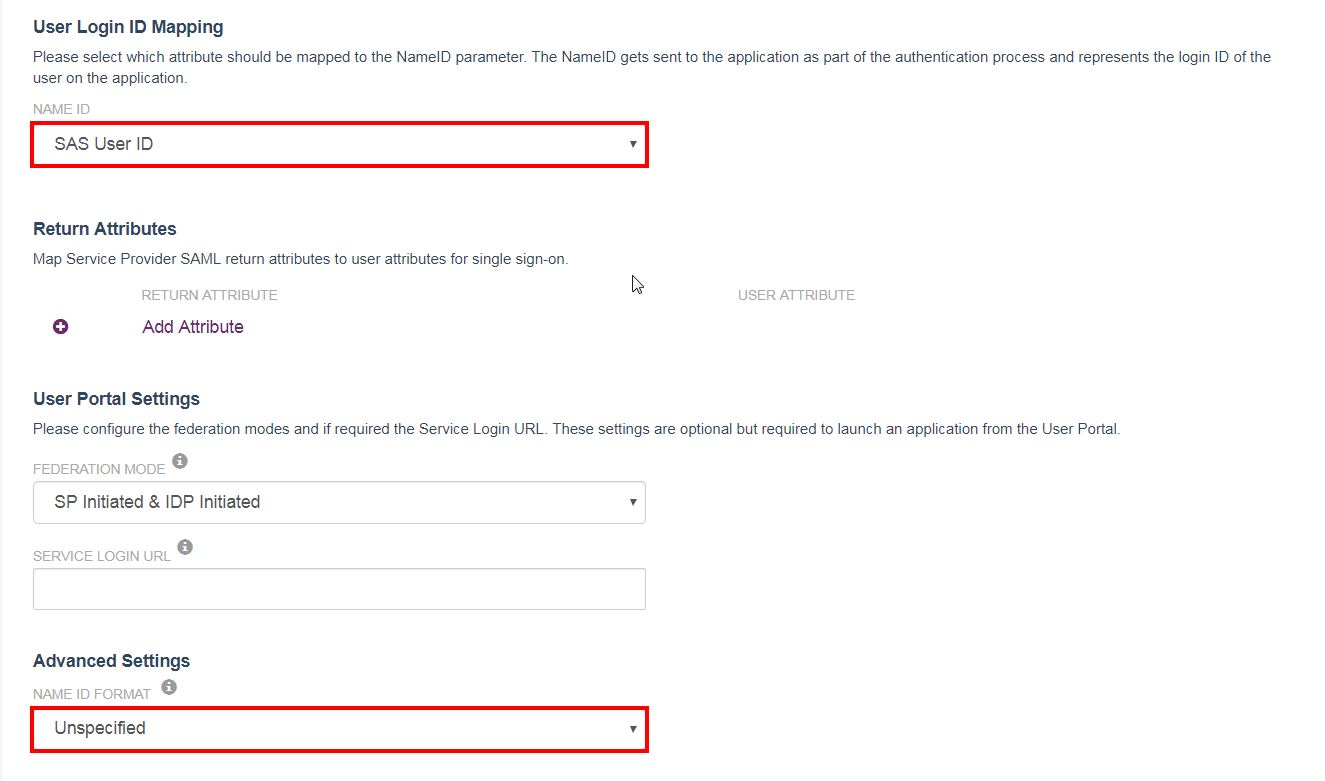
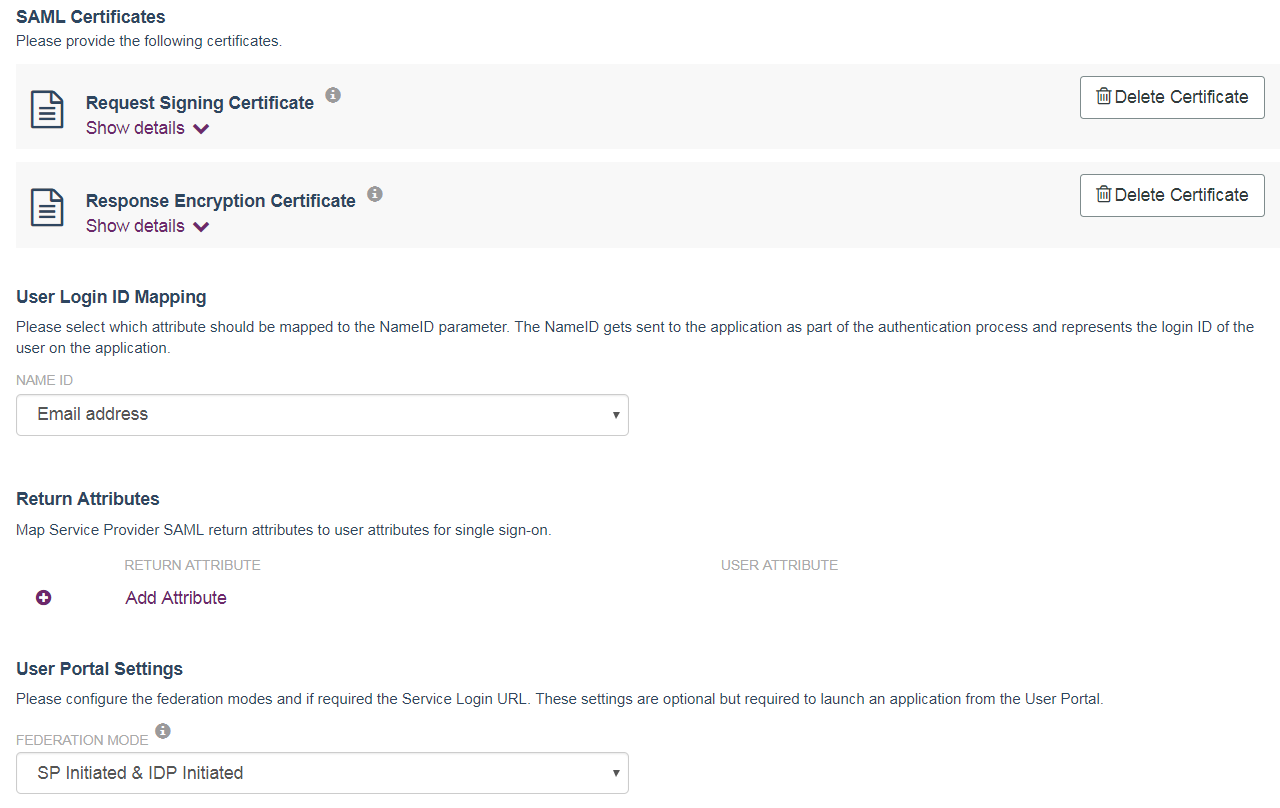
Scroll down to User Login ID Mapping and click the drop down menu to select ‘SAS User ID’ instead of ‘Email address’.
-
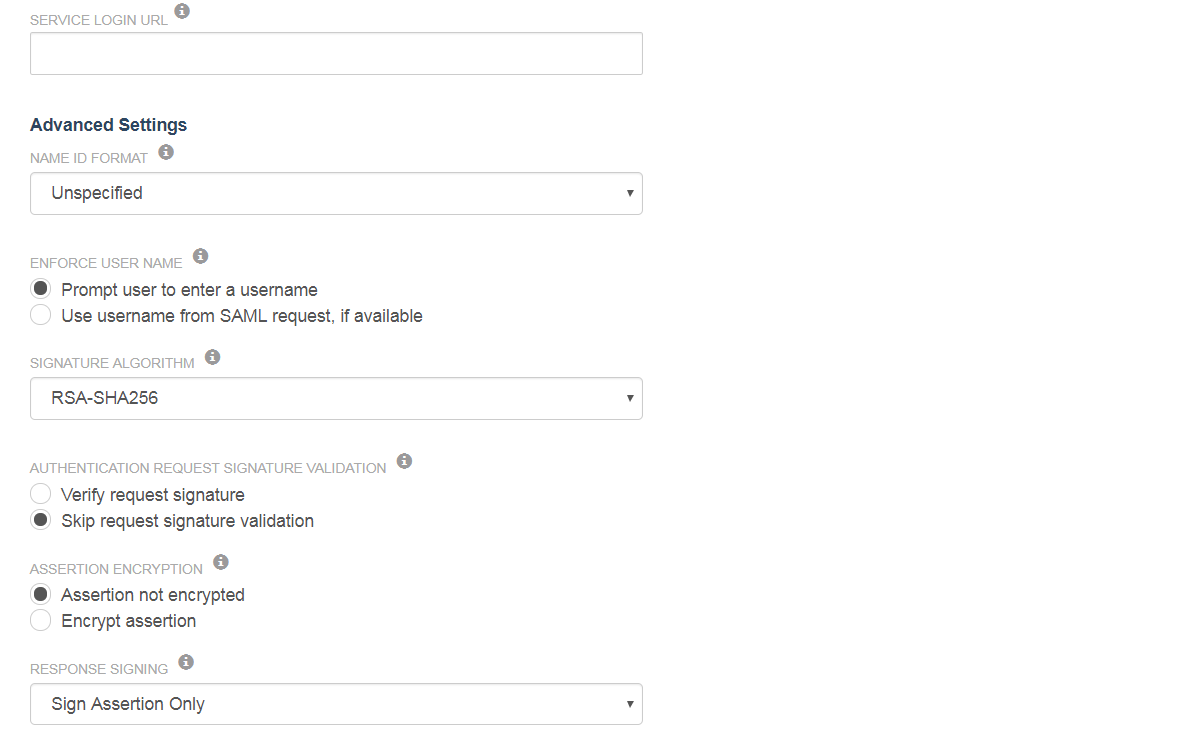
Confirm that NAME ID FORMAT is ‘Unspecified’ and then click Save Configuration.
-
Return to the Claims X-Ray web page (https://adfshelp.microsoft.com/ClaimsXray/).
-
Check the Force fresh authentication checkbox and then click Test Authentication.
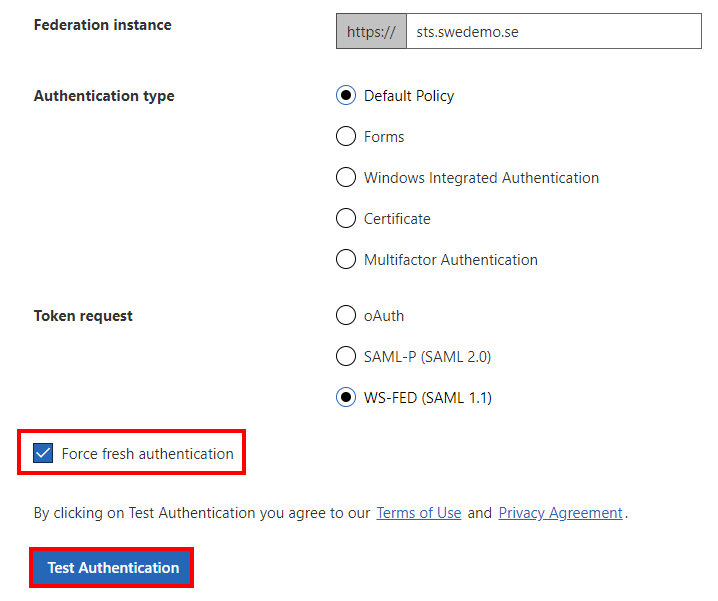
-
When/if prompted, select the SafeNet Trusted Access claims provider and complete authentication.
-
Review the results.
RESULTS: A single claim containing NameIdentifier == SAS User ID (in my case: ‘jonas’) should be shown. The claim value must match your sAMAccountName in AD.
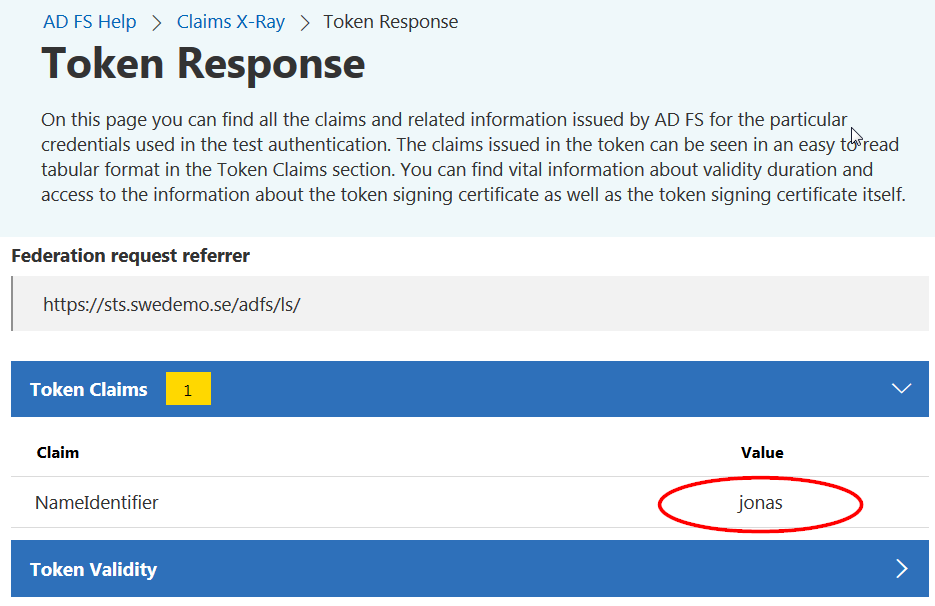
We now have Name ID (NameIdentifier) containing a STA User ID that matches our Active Directory user and we are able to publish it as a claim towards our Relying Party. The challenge now is to use this attribute as a key to resolve additional attributes (email, name, company, employee id). To do this we must correctly reference our Name ID using namespace etcetera, but we must also prepend a domain when executing the attribute lookup in Active Directory.
Defining name ID
Starting with Name ID: if you look at the rule language in the claim provider configuration you should be able to find the following attribute definition. If not, then you would find it if you create a pass-through rule in the Relying Party Trust and then review the rule language (note the bold parts in particular):
"http://schemas.xmlsoap.org/ws/2005/05/identity/claims/nameidentifier", Properties["http://schemas.xmlsoap.org/ws/2005/05/identity/claimproperties/format"] == "urn:oasis:names:tc:SAML:1.1:nameid-format:unspecified"]
Active Directory attributes
To understand how Active Directory (AD) attributes appear in a custom claims rule you can start with a rule of the type ‘LDAP Attributes as claims’ which allows you to pick AD attributes from a list. If you then review the rule language (button) you will see something like this:
=> issue(store = "Active Directory", types = ("http://schemas.xmlsoap.org/ws/2005/05/identity/claims/emailaddress", "http://schemas.xmlsoap.org/ws/2005/05/identity/claims/name",
The above example shows both the Active Directory store where the attributes reside as well as the attributes themselves as defined using URL/URI as namespaces (…) to uniquely and globally identify them.
Now to query these AD attributes we need to feed in the aforementioned NameIdentifier (Name ID) as a key. This key will look as follows (That is: during query execution ‘c’ will contain ‘jonas’ (c == “jonas”)):
c:[Type == "http://schemas.xmlsoap.org/ws/2005/05/identity/claims/nameidentifier", Properties["http://schemas.xmlsoap.org/ws/2005/05/identity/claimproperties/format"] == "urn:oasis:names:tc:SAML:1.1:nameid-format:unspecified"]
The problem with this is that we cannot query AD with just “jonas”. What we need is a domain prefix. There are probably better ways of resolving that challenge(?) and so here is one alternative: before performing the query we are going to prepend (add in front of) the domain in NETBIOS format, e.g. “swedemo\”. Thus we take whatever the value of “c” is and we add our domain as a string of text in front of it:
param = "swedemo\" + c.Value);
Now that we understand the logic let’s configure a custom rule to achieve our goal.
Creating a custom claims rule
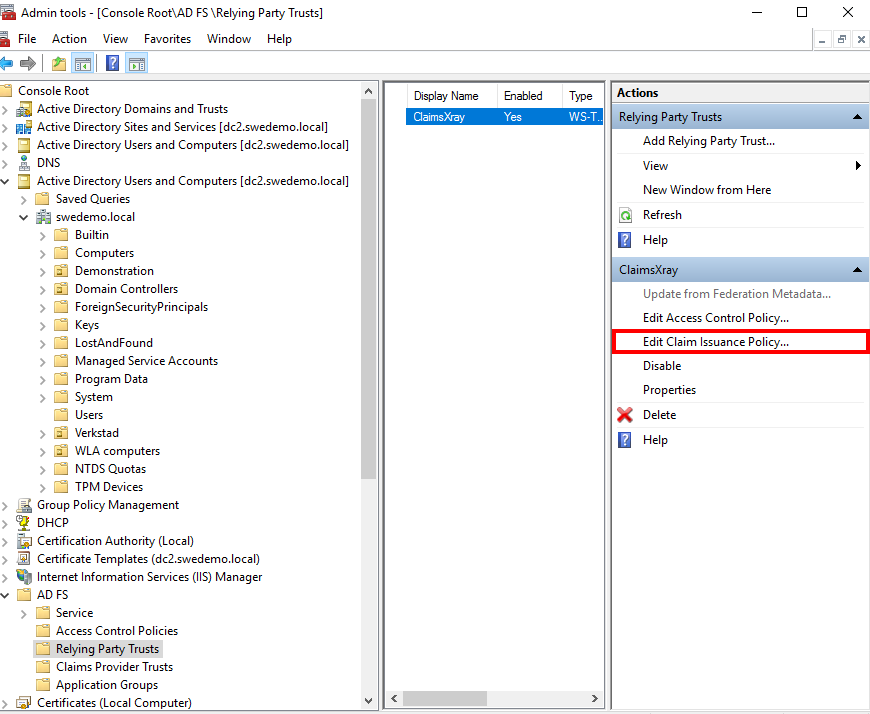
-
In AD FS mmc, highlight the ClaimsXray app within Relying Party Trusts and then click on Edit Claim Issuance Policy on the right-side of the console.
-
Select Custom claims rule from the available options and click to proceed.
-
Click Add rule, give the rule a suitable name (e.g. “Issue claims XYZ”) and then type/paste the rule shown below into the ‘Custom rule’ canvas and click OK.
c:[Type == "http://schemas.xmlsoap.org/ws/2005/05/identity/claims/nameidentifier", Properties["http://schemas.xmlsoap.org/ws/2005/05/identity/claimproperties/format"] == "urn:oasis:names:tc:SAML:1.1:nameid-format:unspecified"] => issue(store = "Active Directory", types = ("http://schemas.xmlsoap.org/ws/2005/05/identity/claims/emailaddress", "http://schemas.xmlsoap.org/ws/2005/05/identity/claims/name", "http://schemas.swedemo.se/ws/2005/05/identity/claims/Organization", "http://schemas.swedemo.se/ws/2005/05/identity/claims/EmployeeID"), query = ";mail,displayName,company,employeeID;{0}", param = "swedemo\" + c.Value);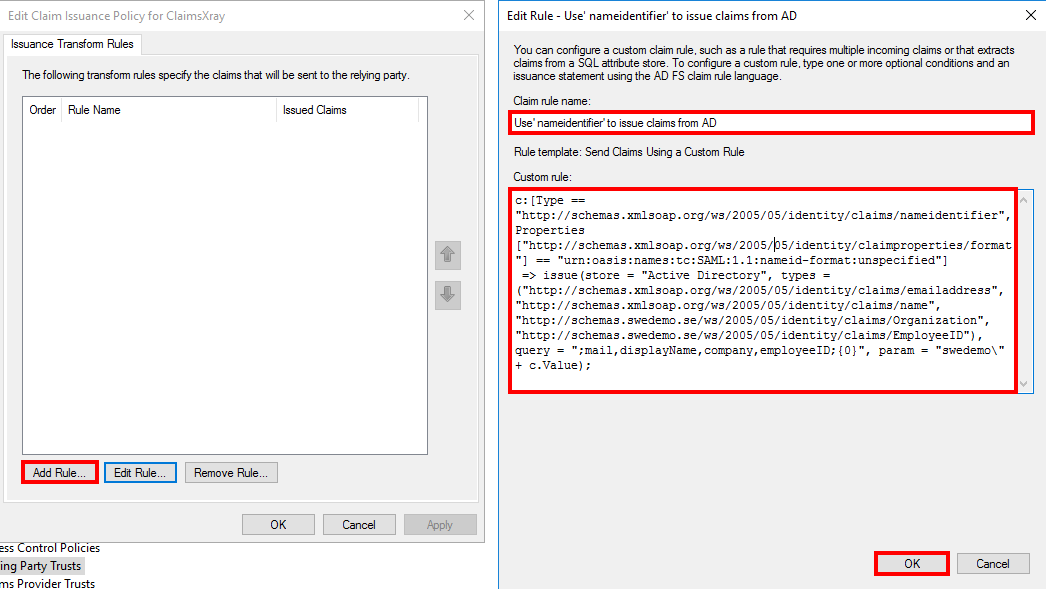
For some attributes you may need to name them and create a namespace for them. In my case I used my lab domain and was able to do this in the rule editor.
-
Return to the Claims X-Ray web page (https://adfshelp.microsoft.com/ClaimsXray/).
-
Check the Force fresh authentication checkbox and then click Test Authentication.
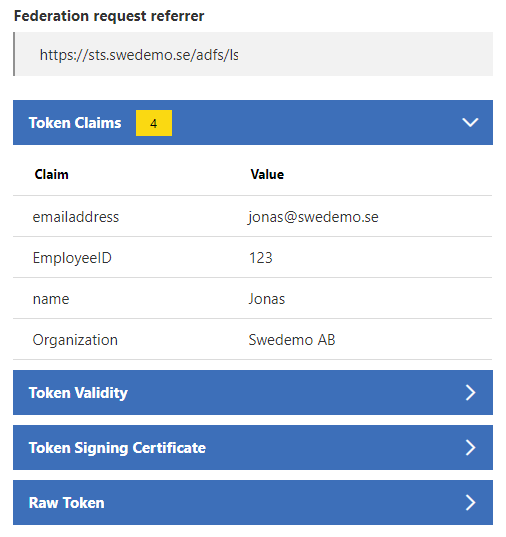
RESULTS: Four (4) claims are issued from Active Directory.
Appendix
Manual input of AD FS metadata in SAS PCE/STA
If metadata import into STA/STA fails or is not possible for other reasons, consider manual input using the metadata file to grab only the relevant information. You can do this simply using the output XML document or you can use Federation Metadata Explorer from Microsoft to simplify things:
Federation Metadata Explorer
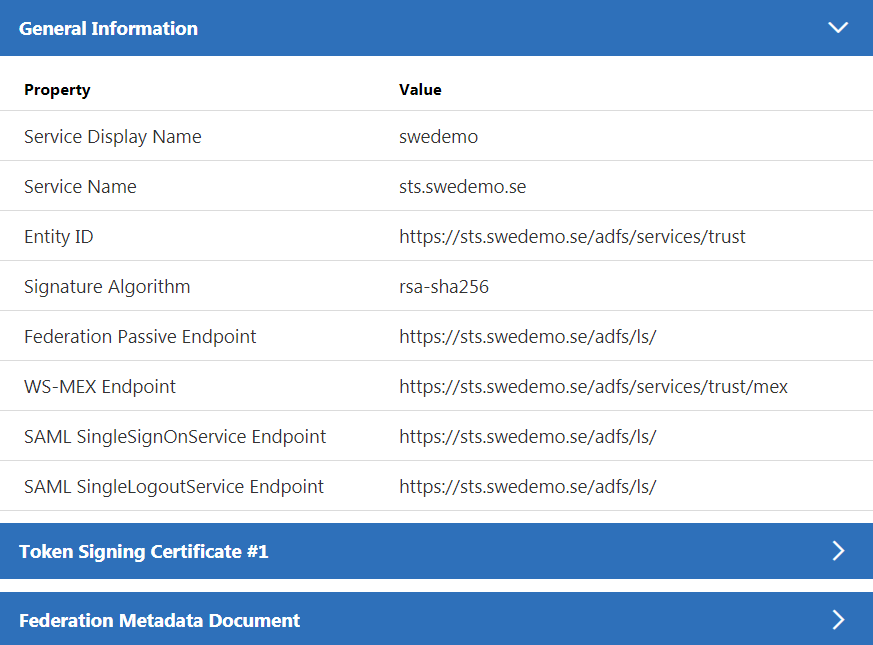
The Federation Metadata Explorer is an online tool that will retrieve the federation metadata document from your AD FS service and display the contents in a readable format. Using the tool also helps verify connectivity in that the STS service is resolvable over the internet.
Use federation metadata explorer.
https://adfshelp.microsoft.com/MetadataExplorer/GetFederationMetadata
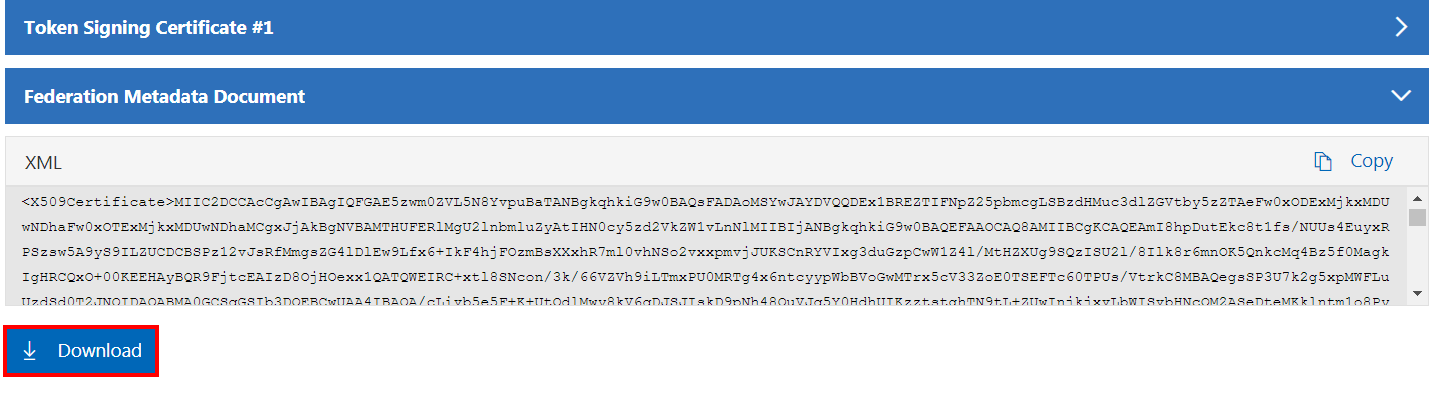
Federation Data Explorer also provides the option of downloading the metadata. It can be worthwhile to test both the Copy feature (paste into a XML document) and the Download feature to retry the STA metadata upload.
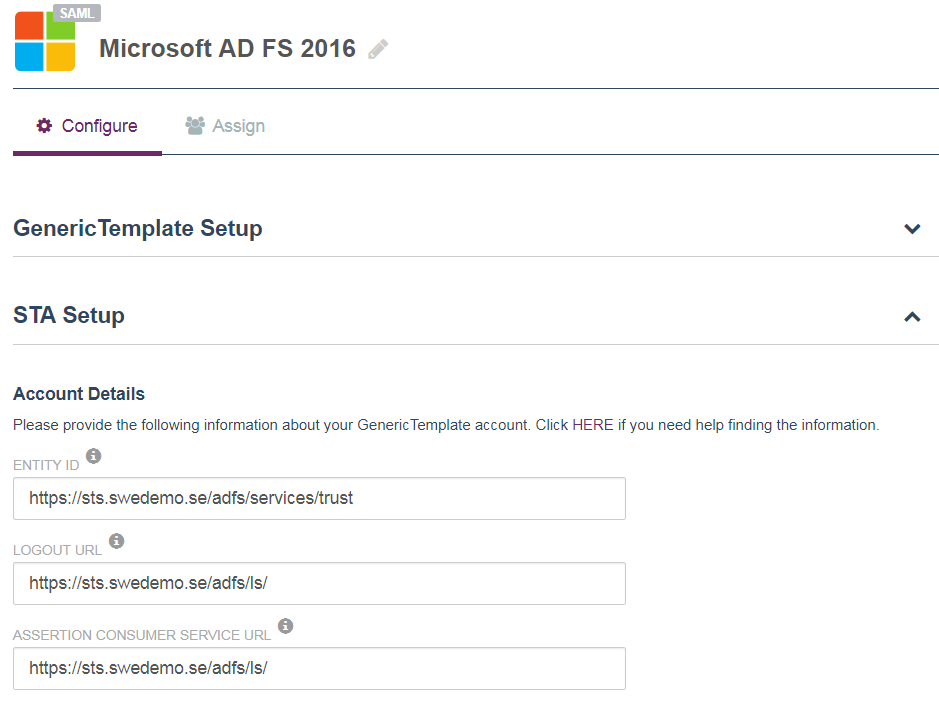
STA manual configuration reference
The following screens show a working example based on the successful upload of AD FS metadata.

Customizing look and feel
The following section describes changing the appearance (icon) of the SafeNet claims provider trust and is valid only if you have one external IDP. For all other cases refer to the Resources section.
Changing the IdP icon
-
Open PowerShell as Administrator.
-
Export the default AD FS theme to a folder titled ‘theme’.
export-AdfsWebTheme –Name "Default" –DirectoryPath c:\theme -
Browse the extracted folder content and replace ‘idp.png’ with a suitable 80 by 80 pixel SafeNet icon using your image editor of choice.
-
Execute the following command to create a new theme template based on the default and at the same time replace the third party IdP icon for the new template:
New-AdfsWebTheme -Name "STA" -AdditionalFileResource @{Uri="/adfs/portal/images/idp/idp.png";Path="C:\theme\images\idp\idp.png"} -SourceName "Default" -
Now execute the following command to set the new template as active (to revert execute the same command referring to "Default"):
Set-AdfsWebConfig -ActiveThemeName STA -
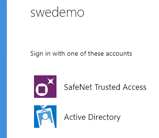
Return to the IdpInitiatedSignon Page and refresh. Example results follow:
Bypassing Home Realm Discovery
Bypassing Home Realm Discovery (HRD) streamlines the authentication experience presenting less views for the user to click through. If for example we know that Microsoft 365 users federated to an on-premise AD FS are going to have to authenticate with SafeNet Trusted Access, then why present both an Active Directory and a STA IdP tile!?
Present user with STA login directly, bypassing IdP listing in HRD
Using an Microsoft 365 organization federated to AD FS as an example, the following command in PowerShell will bring the user directly into the STA authentication flow (no tile to click on!).
Set-AdfsRelyingPartyTrust -TargetName "Microsoft Office 365 Identity Platform" -ClaimsProviderName @(“${SafeNet Trusted Access}”)
The above example assumes the Claims Provider is named “SafeNet Trusted Access”.
AD FS terminology
| Term | Explanation |
|---|---|
| Claim Provider | In our case it is SafeNet Trusted Access (STA), e.g., a third party Identity Provider (IdP). It could also be Active Directory (default). |
| Relying Party | A consuming application for which the Claim Provider (STA) will handle authentication and issue user claims. |
| Claim | An attribute (a key-value pair) that supports identification and maybe authorization. For example, user email can be a claim issued to the consuming app in order to provide the user with access to that app. |
Example rules
Publish User Principal Name (UPN) as a claim
c:[Type == "http://schemas.xmlsoap.org/ws/2005/05/identity/claims/nameidentifier", Properties["http://schemas.xmlsoap.org/ws/2005/05/identity/claimproperties/format"] == "urn:oasis:names:tc:SAML:1.1:nameid-format:unspecified"]
=> issue(store = "Active Directory", types = ("http://schemas.xmlsoap.org/ws/2005/05/identity/claims/upn"), query = ";userPrincipalName;{0}", param = "swedemo\" + c.Value);
Rewrite STA name ID as UPN and publish as a claim
c:[Type == "http://schemas.xmlsoap.org/ws/2005/05/identity/claims/nameidentifier"]
=> issue(Type = "http://schemas.xmlsoap.org/ws/2005/05/identity/claims/upn", Issuer = c.Issuer, OriginalIssuer = c.OriginalIssuer, Value = c.Value, ValueType = c.ValueType, Properties["http://schemas.xmlsoap.org/ws/2005/05/identity/claimproperties/format"] = "urn:oasis:names:tc:SAML:1.1:nameid-format:unspecified");
Resources
When working with AD FS be sure to check out the following resources:
-
Federation Metadata Explorer: https://adfshelp.microsoft.com/MetadataExplorer/
-
Microsoft Claims X-Ray app for testing: https://adfshelp.microsoft.com/ClaimsXray/
-
Microsoft article on customization: Customizing the AD FS Sign-in Pages