Rack-Mounting the Luna Network HSM 7
The Luna Network HSM 7 appliance comes with front ear brackets, side rails, rear slider brackets, and the necessary screws packed separately in the carton. You may also have ordered the optional sliding rail mounting system. See Luna Network HSM 7 Required Items for details. Instructions for installing both systems are provided below:
>If you intend to use the supplied mounting brackets, see Using the Supplied Mounting Brackets.
>If your order included the optional sliding rail mounting system, see Using the Optional Sliding Rail System. The sliding rails are recommended for ease of installation and maintenance.
CAUTION! Do not attempt to mount the appliance using only the front brackets – damage can occur.
Using the Supplied Mounting Brackets
Install and adjust the rails and brackets to suit your equipment rack. The standard mounting bracket set is designed for use in standard 483mm (19")-wide racks with depth of 620-902mm (24.5”-35.5”).
CAUTION! The included mounting hardware is meant for static positioning of the appliance. The long tab that slides into the bracket, applied to each side of the appliance, is adjustable for fitting the appliance into racks of varying depth - it must not be used to extend the appliance out of the rack.
Optional gliding rails with rolling bearings are available for situations where rolling excursion of the appliance, while attached to the rack, is required for maintenance. See Using the Optional Sliding Rail System (below).
Ensure you have all the necessary components before proceeding. In addition to the supplied components, you will need:
>#2 Philips screwdriver
>hydraulic equipment lift
CAUTION! If you are installing the appliance in a rack without a mounting tray or shelf, ensure that the appliance is supported at all times or damage may occur. Use of a hydraulic equipment lift is strongly recommended. If you do not have access to a lift, you will need at least one assistant to mount the appliance.
To mount the Luna Network HSM 7 hardware
1. Install the two front ear mounting brackets on the HSM chassis using the included screws and a #2 Phillips screwdriver.
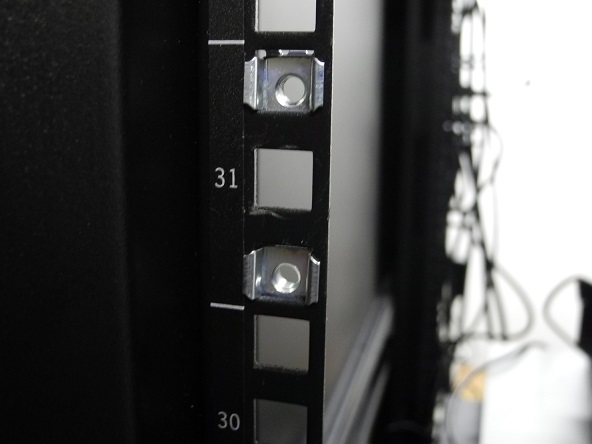
2.Fit eight cage nuts into the rack space where you want to install the appliance. Ensure that they are spaced correctly.
3.Install the two side rails on either side of the HSM chassis, using the included screws and a Phillips screwdriver. Note how the sliding rear brackets fit into the side rails.
4.Install the two sliding rear brackets in your equipment rack using four rack mounting screws.
NOTE While any standard equipment rack screws should fit the brackets, certain large-headed screws may interfere with the operation of the secure locking bezel.
5.Using a hydraulic lift, raise the HSM to the level of the brackets and extend the lift into the rack.
CAUTION! Perform the next step from the rear of the server rack. Do not push the HSM off the lift without supporting its rear end.
6.From the rear of the server rack, pull the appliance back towards you until the sliding rear brackets fit into the side rails. Pull the appliance back onto the rear brackets until the front ear brackets meet the equipment rack.
CAUTION! Support the weight of the appliance with the hydraulic lift until all four brackets are secured.
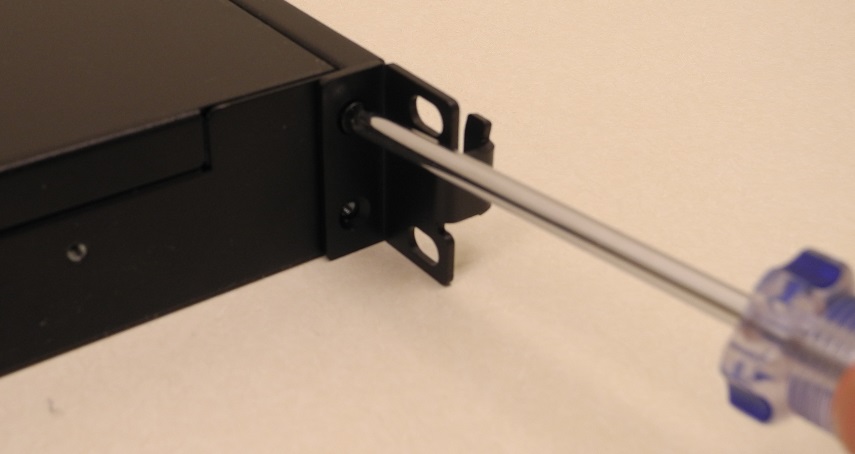
7.Secure the front ear brackets using rack mounting screws.
See Luna Network HSM 7 Hardware Installation to continue the installation process.
Using the Optional Sliding Rail System
The optional sliding rail system allows for the appliance to be extended out in front of the equipment rack, possibly easing access to other racked appliances. This is rarely necessary. After configuration, the Luna Network HSM 7 should remain secured in the rack with the locking bezel installed. Some security standards require the use of this bezel. Leaving the HSM uncovered for ease of access might compromise physical security.
The sliding rail system is designed for use in standard 483mm (19")-wide racks with depth of 620-902mm (24.5”-35.5”).
Ensure you have all the necessary components before proceeding. In addition to the supplied components, you will need a #2 Philips screwdriver.
To mount the Luna Network HSM 7 hardware
1. Install the two front ear mounting brackets on the HSM chassis using the included screws and a #2 Phillips screwdriver.
2.Fit the front end of each mount into either side of the rack and pull the spring-loaded latch at the rear to snap it in place.
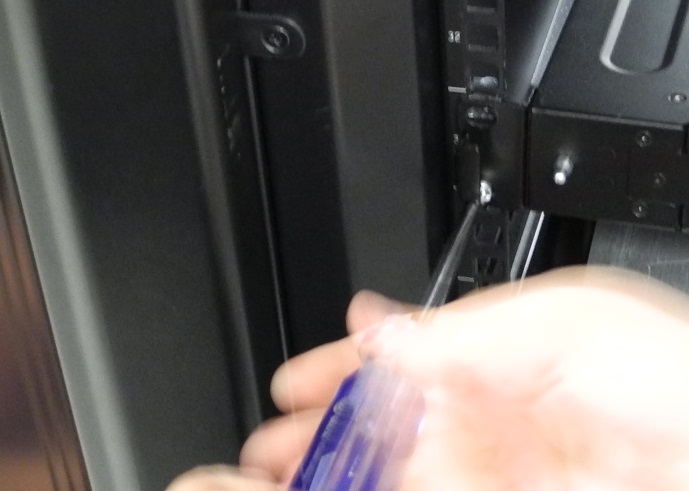
3.Secure the rear end of each mount to the rack with two wide flat-headed screws.
4.Fasten the transformer bracket to each sliding mount with two wide flat-headed screws.
![]()
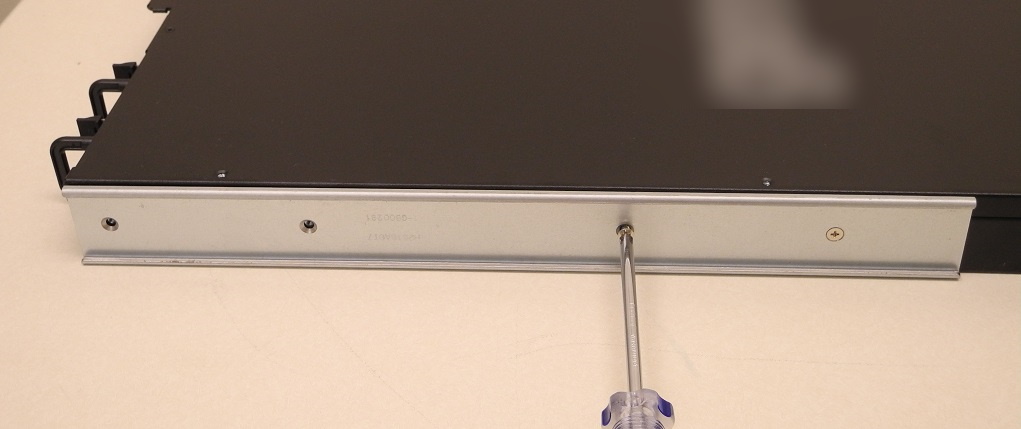
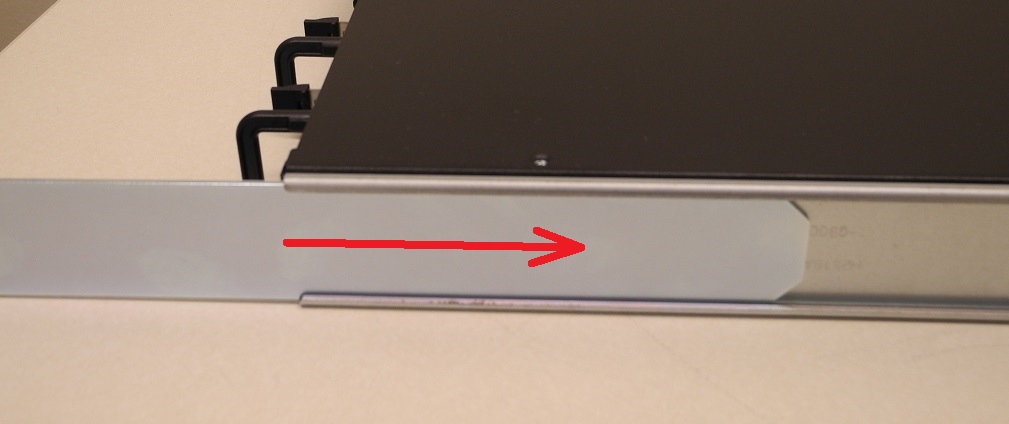
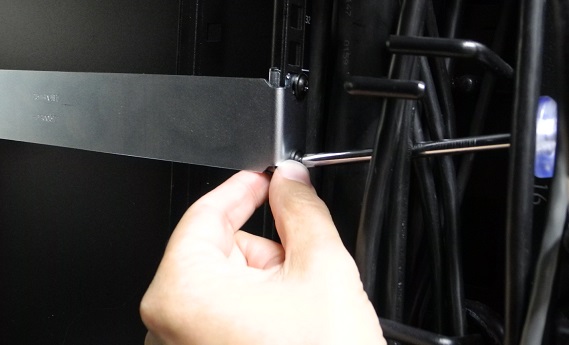
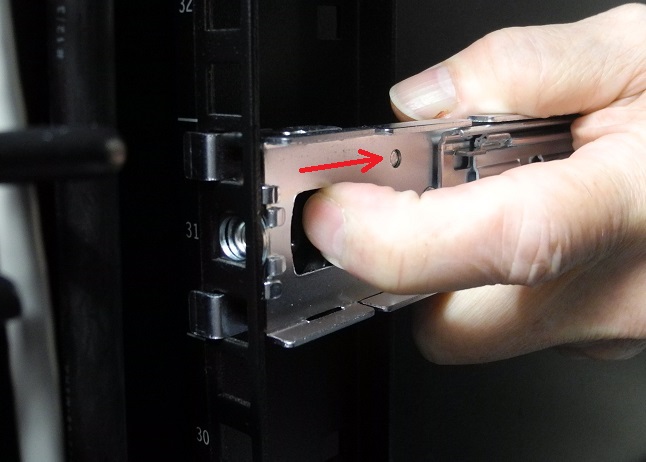
5.Loosely thread two small flat-headed screws into each side of the Luna Network HSM 7. Fit each sliding rail over the screw heads and slide it forward into place before tightening the screws. Fasten each sliding rail with a third screw where it lines up with the hole in the HSM chassis.

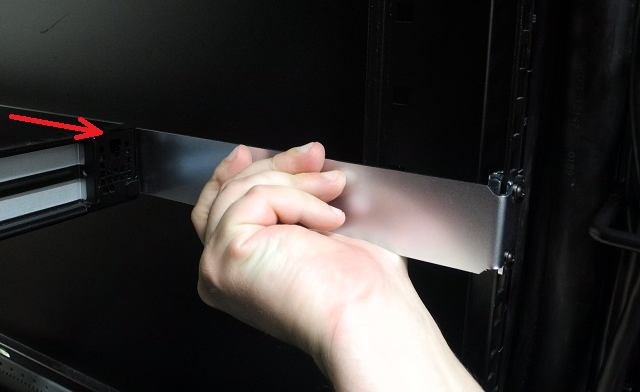
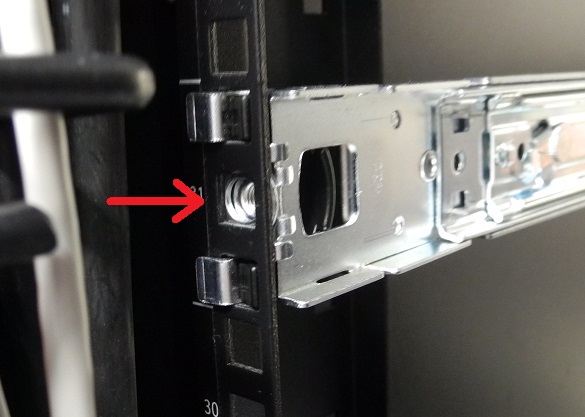
6.Fit the sliding rails onto the rack mounts until they lock into place.
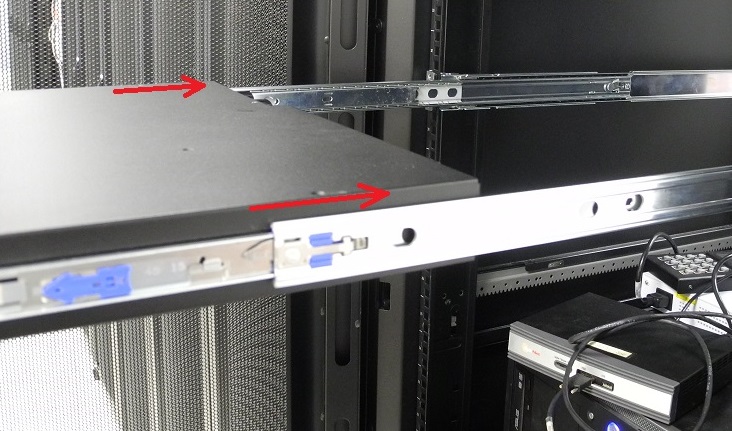
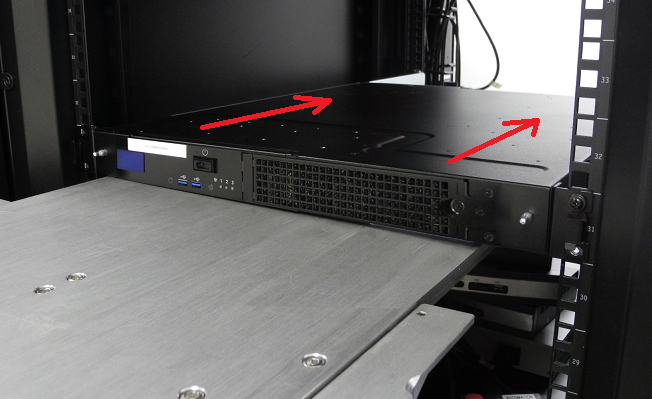
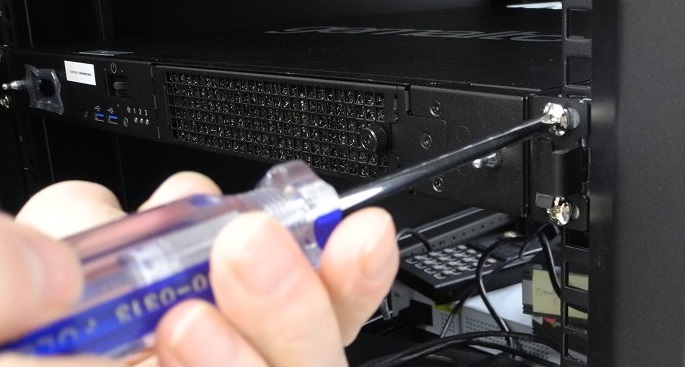
7.The HSM now moves smoothly and securely on the rails. Push the HSM all the way back and secure it to the transformer bracket with four rack screws.
NOTE Screws with heads that are too large can prevent the locking bezel from fitting to the faceplate. Use the screws included with the Luna Network HSM 7, or other screws with suitable heads.
See Installing the Luna Network HSM 7 Hardware to continue the installation process.