
NPS settings
To launch SafeNet Agent Management Console:
select Start > All Programs > SafeNet > NPS Agent Manager.
Note
Execute NPS Configuration Management as an administrator when configuring the SafeNet Agent for NPS.
NPS Settings

To configure NPS settings, perform the following steps:
-
Select NPS Settings tab.
-
To activate the agent, select Enable for Turn the plugin on or off option.
-
To activate the feature to detect and send the remote client IP address to SAS PCE/STA:
-
Select Send client IP address to SAS PCE/STA.
-
Modify the following registry keys at the location,
HKEY_LOCAL_MACHINE\\SOFTWARE\\CRYPTOCard\\AuthRadius:
Name Type Data RequiredAttribute Reg_SZ 265 SendClientIP Reg_SZ 1 – will use the Required Attribute data settings 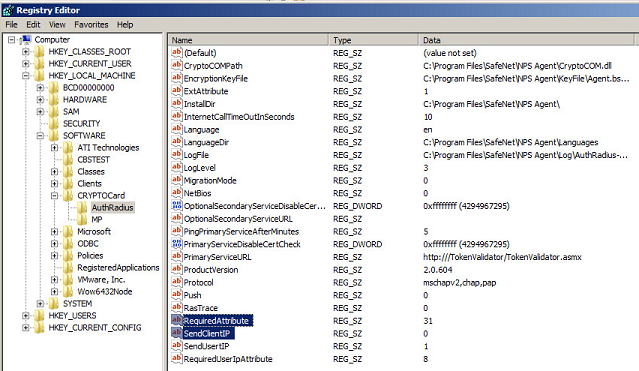
-
-
Select at least one of the authentication protocols.
-
PAP
-
CHAP
-
MS-CHAP v2
Note
It is recommended to use MS-CHAP v2, which is the most secure option.
-
-
To enable OTP Push, select Push OTP Enabled.
-
To enable SafeNet Server RADIUS return attributes, select SafeNet Server RADIUS Return Attributes Enabled (selected by default).
-
To allow users to proxy the authentication request to the next server listed in the Remote RADIUS Server Groups within NPS, select Enable Migration Mode.
-
To enable detailed logging, select Enable verbose logging to the %SystemRoot%\ tracing directory.
-
Click Apply.
-
Restart NPS.