
Integration of SANtricity
This section lists the steps to integrate SANtricity with CipherTrust Manager.
Prerequisites
This section provides the prerequisites for integration of SANtricity with CipherTrust Manager.
Ensure that the CipherTrust Manager is installed and configured. For more details, refer to the CipherTrust Manager Documentation.
SANtricity communicates with the CipherTrust Manager using the KMIP interface. Ensure that the KMIP interface is configured on the CipherTrust Manager. Refer to CipherTrust Manager Administration Guide for details.
IP address of the CipherTrust Manager and port of the KMIP interface must be accessible from the SANtricity system.
CipherTrust Manager recognizes only registered KMIP clients. Ensure that each node of the SANtricity cluster is registered as a KMIP client on the CipherTrust Manager. Refer to KMIP Client Registration for more details.
Ensure that SANtricity has proper license for data at Rest Encryption. To check the license information in SANtricity, navigate to Settings > Software and Licenses > License Information.
Ensure that the required licenses are activated on CipherTrust Manager. For more details, refer to the CipherTrust Manager documentation.
Configuration on CipherTrust Manager
To configure the CipherTrust Manager, you need to perform the following steps:
Creating a User
To create a user, perform the following steps:
Log on to the CipherTrust Manager GUI.
Open the Access Management application.
On the left navigation pane, click Users. The Users page is displayed.
On the Users page, click Add User.
On the Add User page, provide the following details:
Select the required Connection Type
Select the checkbox against the required Allowed Client Type.
Enter Full Name
Enter Username
Enter the desired Password. Re-enter the password in the Password Match field.
Click Add User. The newly created user will now appear on the Users page.
Assigning User to a Group
Perform the following steps to add user to a group:
Navigate to the Users page.
Click the ellipsis button (...) corresponding to the user that you created in the previous step.
Click Edit/View.
Click Group Memberships > Add Group.
In the search bar, enter the desired Group name and select the check box corresponding to it. For example, Key Admins or Key Users.
Click Add Group.
Creating or Adding a CA (Optional)
Note
Creating a CA is an optional step in this integration. However, it is recommended to select the CA carefully, as it will be used throughout the process.
Select the Local CA tab if you want to create a Local CA OR select the External CA tab if you wish to add the External CA.
To create/add a Self-signed local CA, perform the following steps:
Navigate to CA > Local. Select Add Local CA, the Add Local CA page appears.
Provide the required information and click Add Local CA. The created Local CA will appear under Pending CAs section.
Click the ellipsis against the Local CA that you created and select the option Self-sign.
Select a valid duration for the Local CA. Click Save.
To add an external CA, perform the following steps:
Navigate to CA > External. The External Certificate Authorities page appears. Select Add External CA, the Add External Certificate page appears.
Provide the required information.
If you want to upload the external CA, select the File Upload option and click Upload Certificate. Browse and select the required External CA.
OR
Select Text and paste the contents of External Certificate.
Click Add External CA.
Registering a KMIP Client
You can register a KMIP client on the CipherTrust Manager through:
Auto Registration
Manual Registration
Log on to the CipherTrust Manager.
Go to Products > KMIP.
Create Client Profile using the following steps:
Navigate to Client Profile and click Add Profile.
Add a Profile Name.
Click Save. The new profile is created.
Create Registration Token using the following steps:
Go to Registration Token and click New Registration Token > Begin.
Add a Name Prefix.
Specify a Token Lifetime value along with the Client Capacity for the token.
Click Select CA.
Select the CA type as Local/External depending on CA that you created above.
Select the appropriate CA from the dropdown menu and click Select Profile.
Select the Client Profile from the dropdown which you have created in the above step.
Click Create Token.
Copy the value of the Token created and click Done.
Note
If you are using External CA then you can select the external CA that you created above and uploaded on the CipherTrust Manager.
Turn ON Auto Registration using the following steps:
Go to Admin Settings > Interfaces.
Click the ellipsis button (...) corresponding to the kmip interface.
Click View/Edit.
On the Interface Detail window, perform the following:
Select the Interface Mode as TLS, verify client cert, user name taken from client cert, auth request is optional.
Select Auto Registration checkbox.
Paste the
Registration Token.Add the CA (Local or External) to the list of Trusted CAs. The CA will reflect under the dropdown menu of Local/External Trusted CAs depending upon CA that you created above.
Click Update.
Log on to the CipherTrust Manager into your domain.
Go to Products > KMIP.
Create Client Profile using the following steps:
Go to Client Profile and click Add Profile.
Add a Profile Name.
Select CN in Username Location in Certificate.
Expand the Certificate Details section.
You can either paste the content of a generated
client.csror you can create one, by filling in the required details.For domain, the format to enter the Common Name field of the cert is always:
domainName||domainUserClick Save.
Create a Registration Token using the following steps:
Go to Registration Token and click New Registration Token > Begin.
Add a Name Prefix.
Specify a Token Lifetime value along with the Client Capacity for the token.
Click Select CA.
Select the CA type as Local/External depending on CA that you created above.
Select the appropriate CA from the dropdown menu and click Select Profile.
Select the Client Profile from the dropdown which you have created in the above step.
Click Create Token.
Copy the value of the Token created and click Done.
If you are using External CA then you can select the external CA which you created earlier. Refer to External CA under Creating or Adding a CA.
Go to Registered Clients and click Add Client.
Specify client name and paste the Registration Token generated in the above step.
Note
If you are using external CA then you need to paste the signed client certificate in the Client Certificate field.
Click Save to save the client certificate.
Configuring the KMIP Interface
The KMIP interface can be configured through:
Go to Admin Settings > Interfaces.
On the KMIP Interface, click the ellipsis button (...) and then click View/Edit.
Select the Auto Registration checkbox if you auto-registered your KMIP client and paste the value of the registration token that you created.
Note
By default, the Auto Registration is disabled.
Select the mode as TLS, verify client cert, user name taken from client cert, auth request is optional.
Specify selections for Local CA for Automatic Server Certificate Generation as desired.
Note
In case of External CA, Local CA for Automatic Server Certificate Generation should be set to Turn off auto generation from Local CA.
Depending upon the CA that you created above, select an option from the following::
If you are using Local CA then select the CA under Local Trusted CAs
If you are using External CA then select the CA under External Trusted CAs provided you have the external CA that you created and uploaded on the CipherTrust Manager. For more information on creating or uploading CA, refer to Creating or Adding a CA.
Configuration on SANtricity
Create CSR on SANtricity
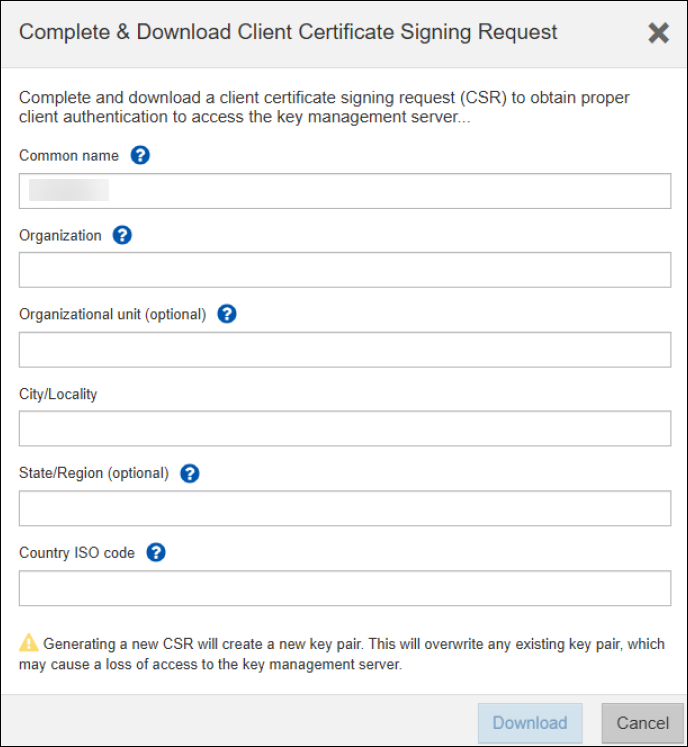
On SANtricity System Manager, navigate to Settings > Certificates > Key Management. Click Complete CSR. Complete & Download Client Certificate Signing Request window appears.

Enter the required details and click Download. A CSR will be downloaded to your local system.
Upload the Signed Certificate to SANtricity
Before uploading the This certificate needs to be signed by the CA and the recieved signed certificate can be uploaded through the following steps:
Navigate to Key Management and click Create External Key.
On the Create External Security Key window, enter the CipherTrust Manager IP address and Port.
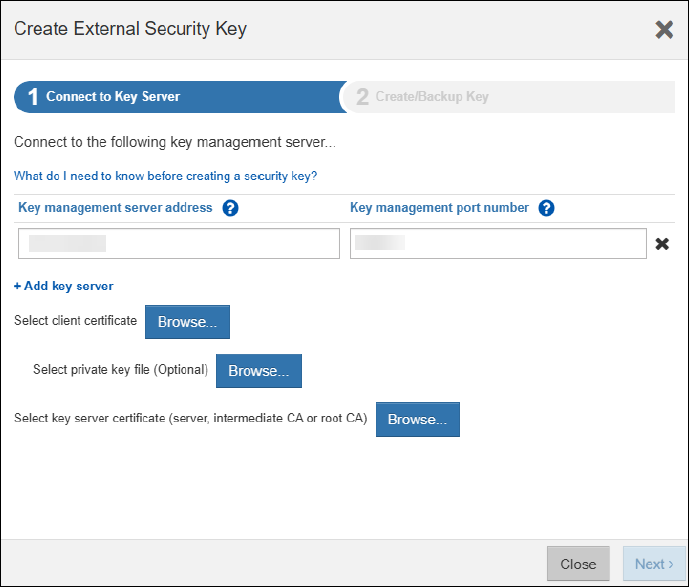
Select the SANtricity Certificate and CipherTrust CA certificate. Click Next.
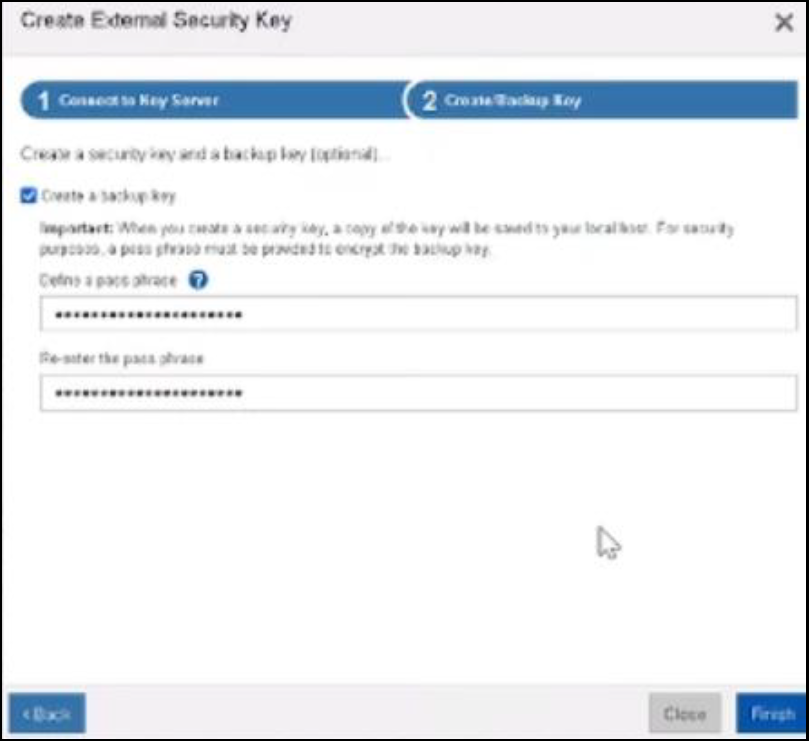
Enter the Passphrase, Re-enter passphrase and click Finish.
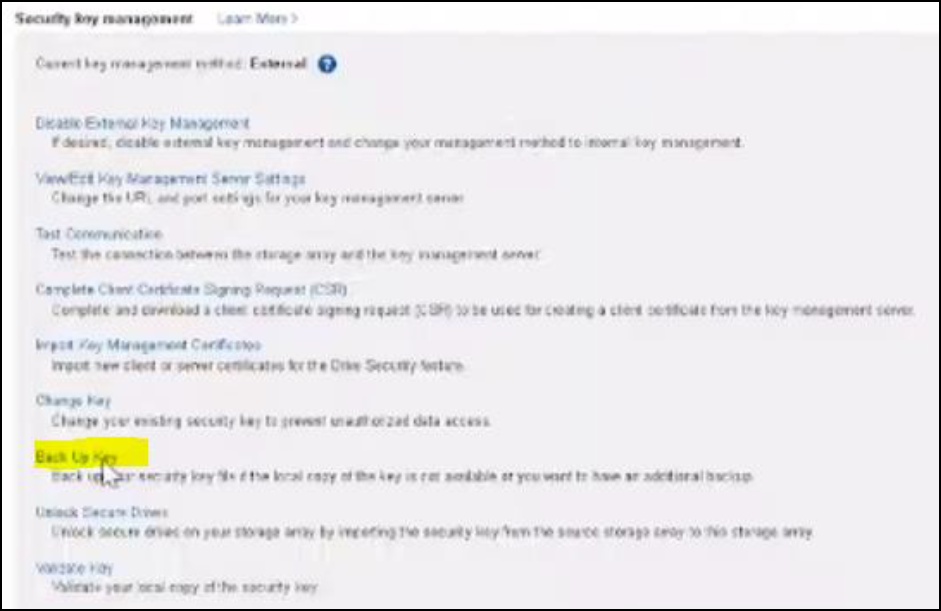
Click Back Up Key. Back Up Security Key window appears.
Enter the passphrase that you created above and click Backup. A backup file will downloaded to your local system.
Click Validate the backup key. A pop-up window will appear.
Select the Download backup key, enter the passphrase, and click Validate.
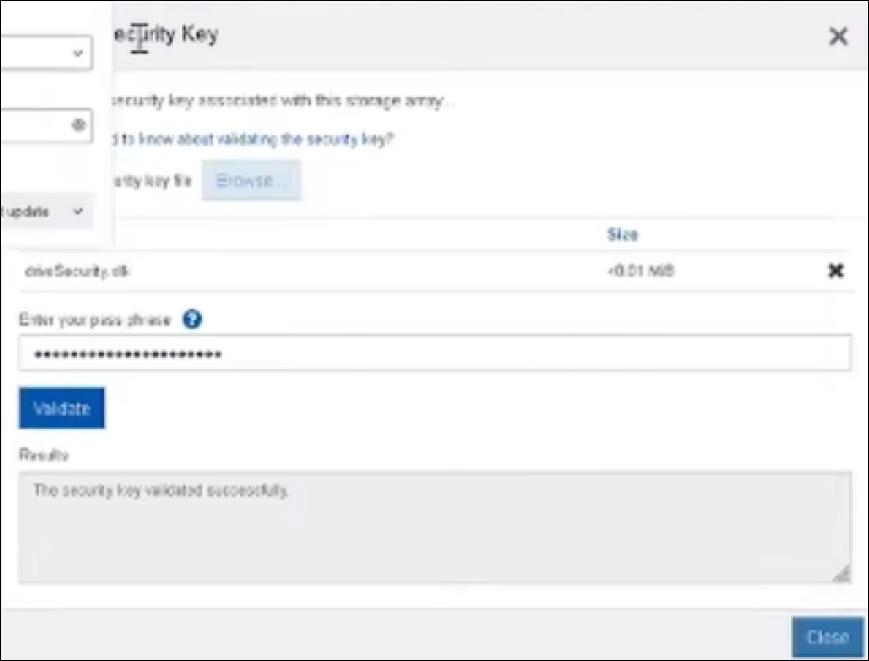
A security key validated successfully will appear.
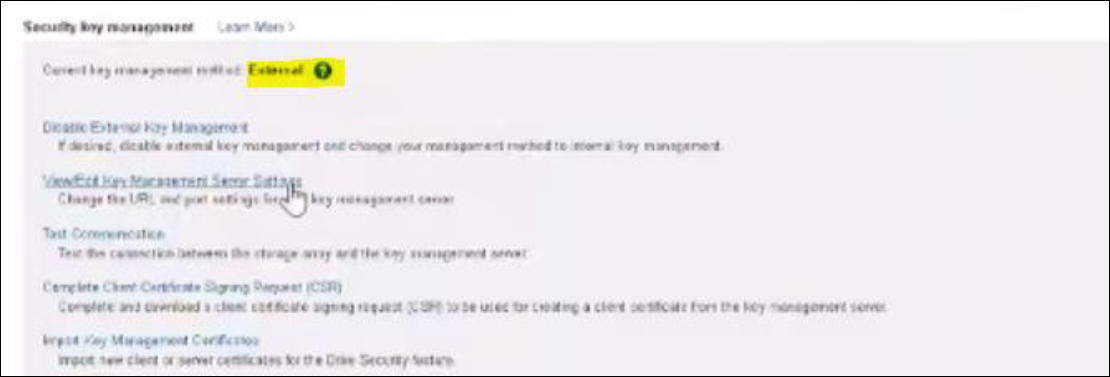
Under Security Key management, now External should be reflected near certificate key management.
Navigate to CipherTrust Manager > Keys and verify the keys created on CipherTrust Manager.